Difference between revisions of "Callback setup example"
| Line 25: | Line 25: | ||
[[Image:Callbackdevice.png]] | [[Image:Callbackdevice.png]] | ||
<br> | |||
The Device's settings are not at all important – leave everything empty. They will not be used, anyway.<br> | The Device's settings are not at all important – leave everything empty. They will not be used, anyway.<br> | ||
You can even create a Virtual device for this service. | You can even create a Virtual device for this service. | ||
<br> | <br><br> | ||
'''4.''' [[Dial_Plans | Calling Card or Authorization by PIN]] dial plan should be created depending on your needs:<br> | '''4.''' [[Dial_Plans | Calling Card or Authorization by PIN]] dial plan should be created depending on your needs:<br> | ||
Revision as of 14:44, 9 January 2012
This example will demonstrate the basic steps needed to make a calling card callback setup:
Before proceeding, make sure you understand the concepts of dial plans in MOR!
In order to accomplish this you will need:
a) Two DID numbers (one can be fake)
b) One tariff for callback
c) One user + device for callback
d) Two dial plans (or more), one for callback and one for Calling card/authorization by PIN/ANI.
1. Let's create a Callback User:
2. When you create a callback user make sure to assign a correct Tariff for the callback.
Our suggestion is to include only those destinations in the tariff from which clients will be calling to the callback.

3. Now, let's add a Callback Device:
The Device's settings are not at all important – leave everything empty. They will not be used, anyway.
You can even create a Virtual device for this service.
4. Calling Card or Authorization by PIN dial plan should be created depending on your needs:
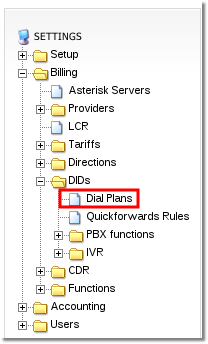
Open dial plans menu:

We will create a calling card dial plan:

Assign the dial plan to the DID, through which it will be reached, in the DIDs menu (the DID can be fake).
Important! This Dial Plan are active by themselves. That is, dialing the associated DID, you will get the service described by this Dial Plan. Callback is not configured yet.
5. Now we will create a Callback Dial Plan:
   1. Enter your callback dial plan name.
   2. Assign a DID which will be used after callback is made (to which the call will be connected).
   3. Set the correct callback hangup cause - this allows to work with various DID providers.
   4. Wait - set how many seconds to wait before starting the callback (defined in seconds).
   5. Select your created autodialer device here.
   6. Ask for card - if enabled system will was to enter PIN after callback is made
6. Save the dial plan and edit the settings, you will be forwarded to this page:

Important steps here - Assign the correct DID through which the client will reach callback service
Set the callerID which is needed. In many case enter the Asterisk sign * - for Pinless services for example.
7. And in the Dial Plans section, the same information is given in another perspective:
See also:


