Difference between revisions of "Call Flow"
| Line 1: | Line 1: | ||
<div align="center"><BIG><BIG><BIG><BIG>[[Image:warning.png|30px]]'''IMPORTANT - this feature is a part of the [[PBX_Functions_Addon | PBX Functions Addon]]'''</BIG></BIG></BIG></BIG></div> | |||
<br><br> | |||
= Description = | = Description = | ||
Revision as of 07:41, 1 March 2021
Description
Call Flow is set of rules on how a call should behave when it is trying to reach a device. From MOR X4 PBX addon is required for Call Flow functionality.
A call has several States as:
- Before Call – call has not reached device.
- Call – call to device is in progress.
- Answered – call was answered.
- No Answer – call was not answered and ended after timeout.
- Busy – callee was busy.
- Failed – call to device failed.
The possible actions are:
- Empty
- Forward
- Voicemail
- Fax detect (only for the Before Call state)
Usage
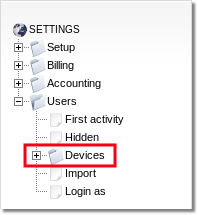
Go to SETTINGS –> Users –> Devices
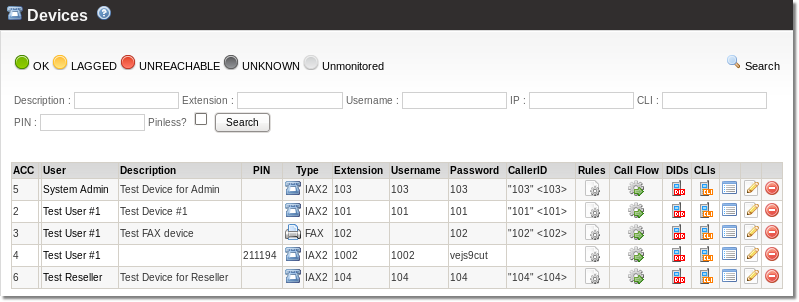
Call Flow can be reached by clicking ![]() Call Flow link in Devices list or Details:
Call Flow link in Devices list or Details:
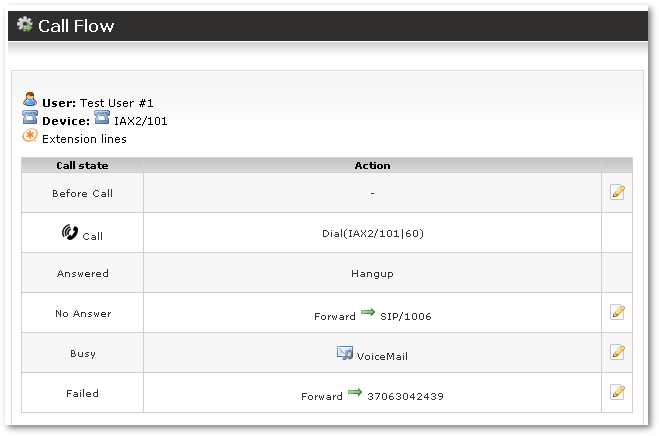
When you reach Call Flow window, you are able to manage actions for states: Before Call, No Answer, Busy and Failed.
Actions
Empty
Empty – means no action should be taken. It is the default in most cases.
Forward
Forward to
Call can be forwarded to Local device or External number:
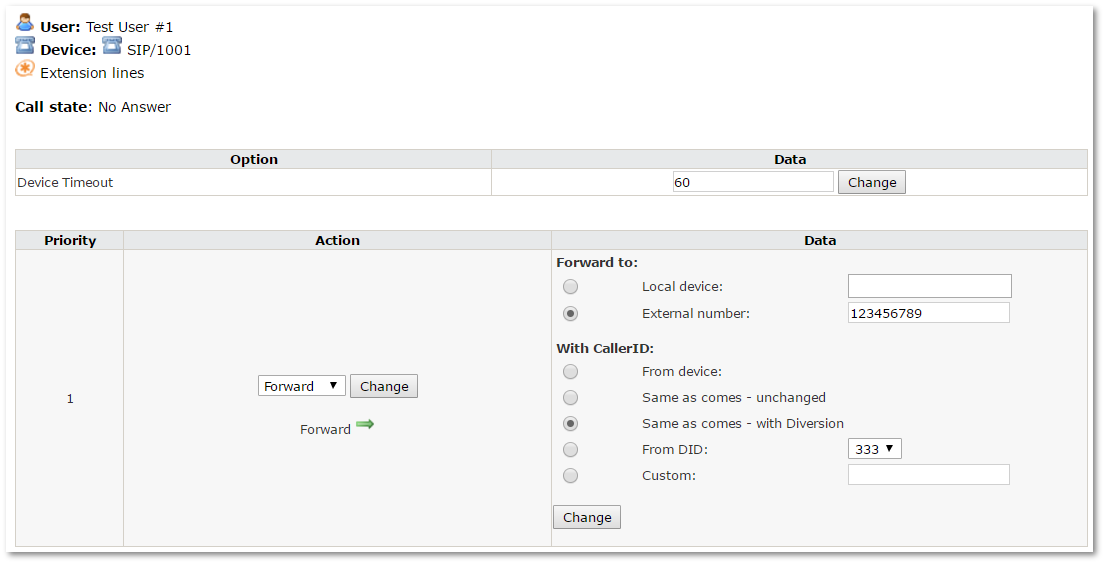
Device Timeout is only available in the No Answer state. It decides for how long a device should ring before the system decides that it is unreachable (when to activate the No Answer state).
The system owner (admin) can select any device he likes. If a user edits his devices' Call Flow, he can only select his own devices.
Using the "forward" action it is easy to implement:
- Unconditional forward – when forward is used in the Before Call state.
- Forward on no answer/busy/failed – when forward is used in No Answer, Busy or Failed states.
CallerID options
The following options are available to manage CallerID for a forwarded call:
- From device - puts CallerID from the Device that is forwarding the call.
- Same as comes - unchanged - leaves the CallerID as it comes from the original caller.
- Same as comes - with Diversion - leaves the CallerID as it comes from the original caller and additionally adds SIP header Diversion from the initial URI (SIP To).
- From DID - selects a CallerID from available DIDs.
- Custom - enters any CallerID.
Forwarding example
Let's make a chain of forwards: when someone calls to a device (extension) and until the device timeout there is no answer the call is forwarded to another device, if there is still no answer then forwared to the next extension.
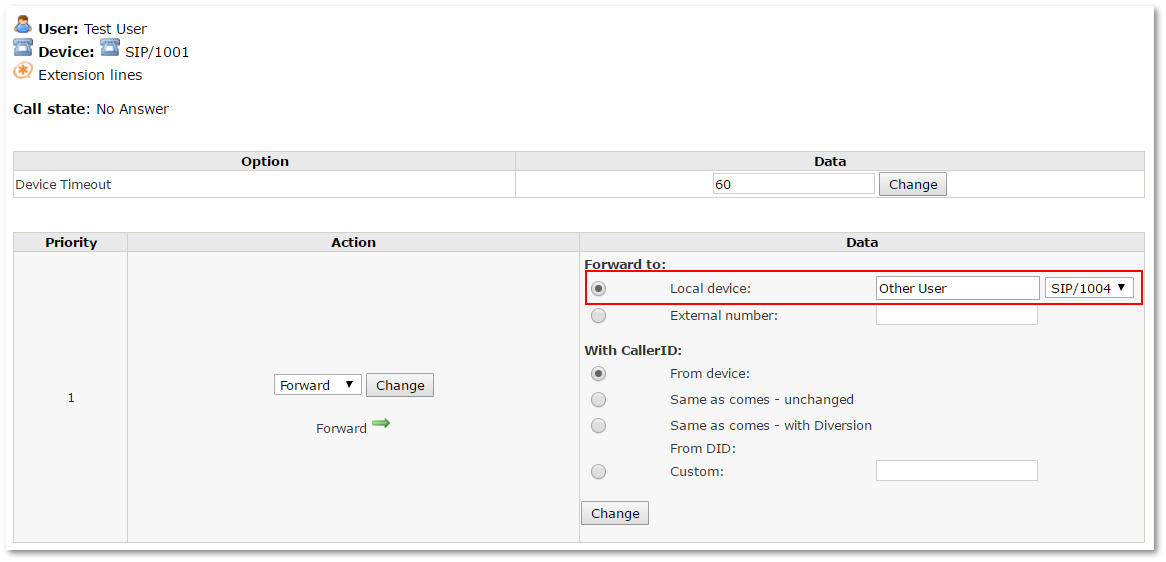
In Forward to select the second extension. Then go to Devices main page and make the same call flow to that second extension just in Forward to select the third extension:
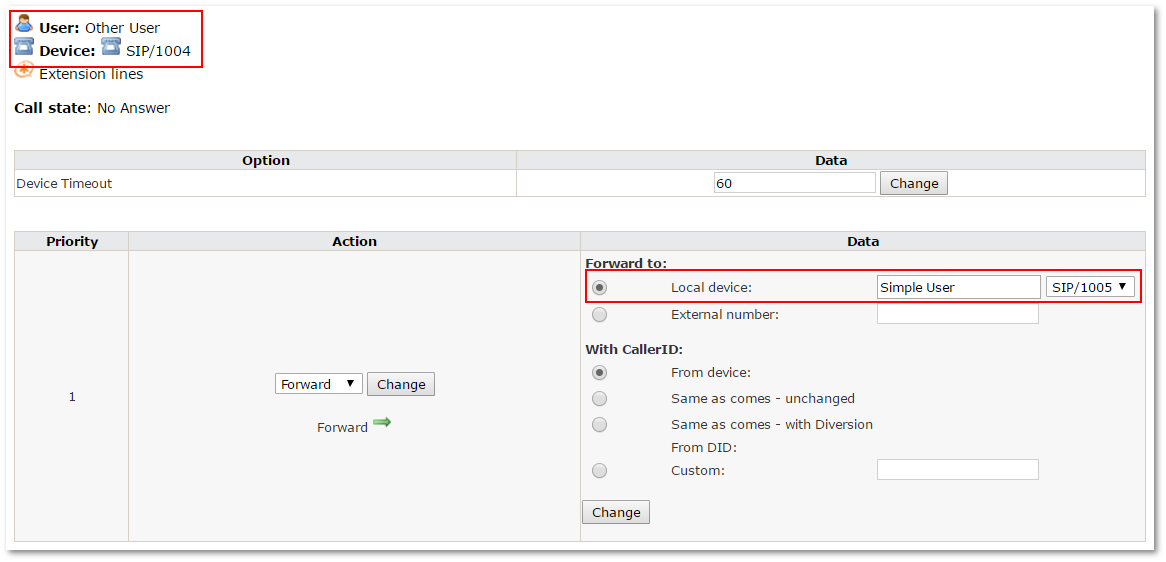
the parameters of ringing before forwarding can be changed in /etc/asterisk/indications.conf in this line of an appropriate nation's block:
ringing tone 440+480Hz 1 sec. on ,2 sec. off
on - length of tone
off - length of pause between two tones.
Voicemail
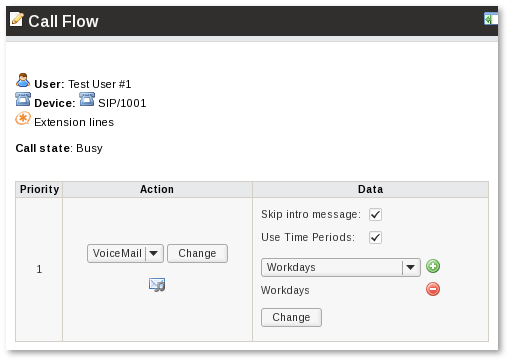
The Voicemail Action sends the Call directly to the Voicemail. The Action can be set on Before Call, No Answer, Busy and/or Failed states of Callflow.
Voicemail Action options:
- Skip intro message - when checked, skips the intro message "Please leave your message after the tone". This is useful when Users have their own custom Voicemail intro messages set up (unavailable in a Before Call state).
- Use Time Periods - when checked several Time Periods can be applied to the Voicemail action. For example, if there is a Time Period Workdays (Monday to Friday from 08:00 till 17:00) the Call will be sent to Voicemail only when current time is within this time interval.
Notes:
- Time Period's time zone depends on the Device Owner.
- The first suitable Time Period is chosen in the order the Time Periods are selected.
- When none of the selected Time Periods is suitable, the Call is not sent to Voicemail.
Fax detect
This action can be set ONLY in the Before Call state and only if a Fax device is enabled in Settings:
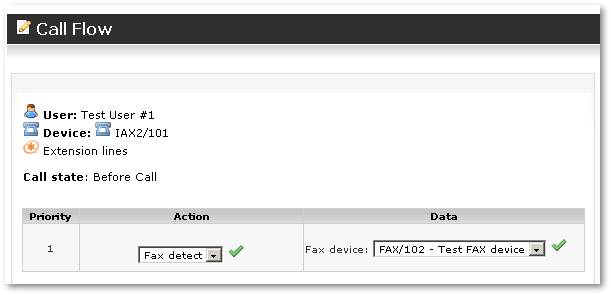
You can select only a FAX device to route the call if a Fax is detected. MOR will use fax detection when this action is set.
If a fax is detected, it routes calls to the set fax device. Otherwise, they go to the basic device.
NOTE: Fax over VoIP is not reliable and this setting should be used only for testing.
NOTE: Do not add Devices with Fax Detect to Ring group. Ring group will not work correctly in this case.
Change Forward action by Call (Feature Codes)
Starting from MOR X6 it is possible to change Forward action by calling to special extensions. You just have to dial extension as it is listed (ie.: *72) and then if additional number is needed to complete the action, it will be asked by IVR:
- *72 Call Forward All Activate - User will be prompted to enter a number where Calls should be forwarded unconditionally. Call state Before will be set with External number.
- *73 Call Forward All Deactivate - Disables unconditional forward.
- *52 Call Forward No Answer/Unavailable Activate - User will be prompted to enter a number where Calls should be forwarded when Device or Callee is unreachable. Call state No Answer will be set with External number.
- *53 Call Forward No Answer/Unavailable Deactivate - Disables No Answer forward.
- *90 Call Forward Busy Activate - User will be prompted to enter a number where Calls should be forwarded when Device is busy. Call state Busy will be set with External number.
- *91 Call Forward Busy Deactivate - Disables Busy forward.
CallerID can be managed by Call Forwarding CallerID setting
Note that in all cases External number is set. If you want to forward to Device then enter DID when you are prompted to enter forwarding number and assigned that DID to Device. All changes made by calling to these extensions are visible in Device Call Flow page and can be changed manually when needed.
Add custom extensions
It is possible to access forwarding functions by custom extensions. To do so, modify /etc/asterisk/extensions_mor_custom.conf file in each Asterisk server and add such lines for extensions which you want to change:
[mor_local]
exten => XX,1,AGI(mor_feature_codes,${CDR(ACCOUNTCODE)},52) ; Call Forward No Answer/Unavailable Activate
exten => XX,1,AGI(mor_feature_codes,${CDR(ACCOUNTCODE)},53) ; Call Forward No Answer/Unavailable Deactivate
exten => XX,1,AGI(mor_feature_codes,${CDR(ACCOUNTCODE)},72) ; Call Forward All Activate
exten => XX,1,AGI(mor_feature_codes,${CDR(ACCOUNTCODE)},73) ; Call Forward All Dectivate
exten => XX,1,AGI(mor_feature_codes,${CDR(ACCOUNTCODE)},90) ; Call Forward Busy Activate
exten => XX,1,AGI(mor_feature_codes,${CDR(ACCOUNTCODE)},91) ; Call Forward Busy Deactivate
Here XX needs to be replaced by own extensions, for example if you want to assign 'Call Forward All Activate' to extension *11, then it should look like this:
exten => *11,1,AGI(mor_feature_codes,${CDR(ACCOUNTCODE)},72) ; Call Forward All Activate
Asterisk dialplan reload each time file is modified:
asterisk -rx 'dialplan reload'
