M4 DID Management
Supported Functionality
- DID inventory search/filtering
- Bulk upload tool
- DID Status and Assignment visibility
- Buying/Selling charges support
- Flexible Inbound routing
- Route to client PBXs by IP addresses – Trunking
- Follow me ( Call Forwarding ) style services where the inbound calls can be routed back out to the alternate destination
Inventory
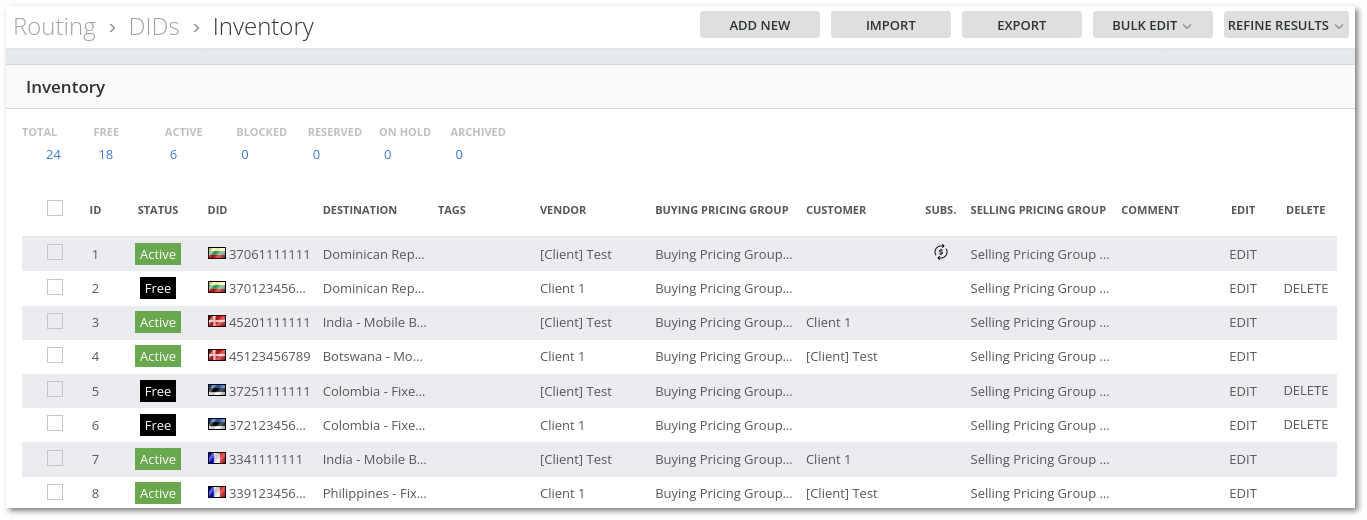
On this page you can:
- Add new DID(s).
- Import DID(s).
- Export DID(s).
- Bulk edit DID(s).
- Search DID(s) using various parameters.
- Edit DID(s) subscription.
Buying Pricing Groups
Buying Pricing Groups unifies DIDs bought as a group for the same price from one DID Provider. It allows quickly setting buying prices for the DID or group of DIDs.
In Buying Pricing Groups all charges would be paid by Admin to Provider
DID Buying Pricing Groups can be accessed at Routing -> DIDs - Buying Pricing Groups
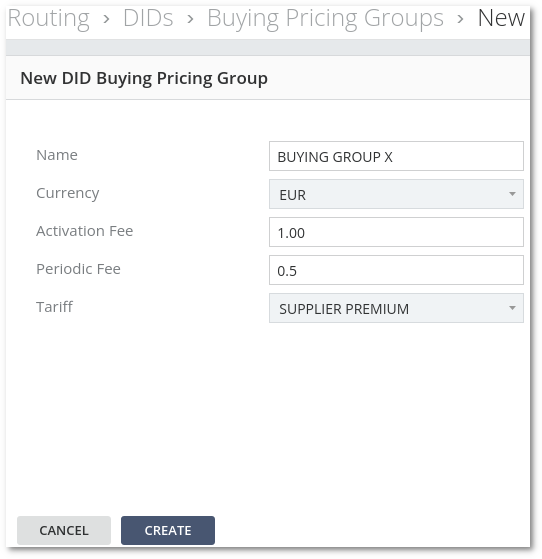
To Add a new DID Buying Pricing Group, press NEW and fill in needed data:
- Name
- Currency
- Activation Fee - One-time fee that will be charged when activating DID.
- Periodic Fee - Fee that will be charged every period set in Charge Plan.
- Tariff - Tariff which will be used for the call. The call will be charged by CallerID prefix by a tariff rate.
When data is filled, press CREATE
It is possible to edit or delete a group by pressing the EDIT or DELETE button.
Selling Pricing Groups
Selling Pricing Groups unifies DIDs sold as a group for the same price. It allows quickly setting selling prices for the DID or group of DIDs.
In Selling Pricing Groups all charges would be paid by User to Admin
DID Selling Pricing Groups can be accessed at Routing -> DIDs - Selling Pricing Groups
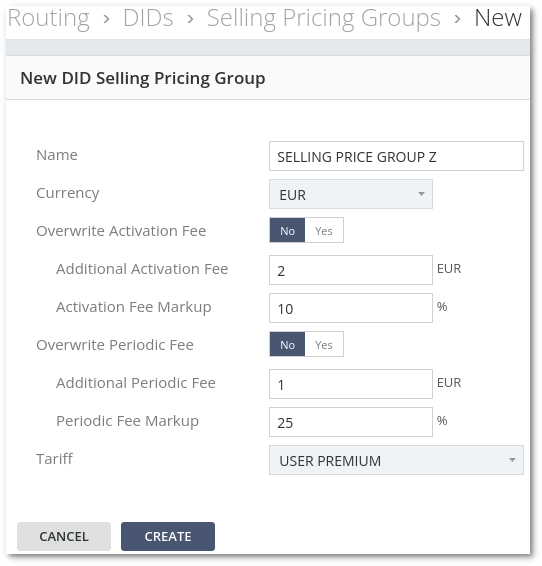
To Add a new DID Selling Pricing Group, press NEW and fill in needed data:
- Name
- Currency
- Overwrite Activation Fee - NO / YES . If Yes is chosen, options Additional activation fee and Activation fee markup would be changed to Activation fee.
- Additional Activation Fee - Additional one-time fee that will be charged when activating DID. The value is added to Buying Activation fee.
- Activation Fee Markup - Activation Fee Markup is calculated as % from Buying Activation fee.
- Overwrite Periodic Fee - NO / YES . If Yes is chosen, options Additional Periodic fee and Periodic fee markup would be changed to Periodic fee.
- Additional Periodic Fee - Additional fee that will be charged every period set in Charge Plan. The value is added to Buying Periodic fee.
- Periodic Fee Markup - Periodic Fee Markup is calculated as % from Buying Periodic fee.
- Tariff - Tariff which will be used for the call. The call will be charged by CallerID prefix by a tariff rate.
When data is filled, press CREATE
It is possible to edit or delete a group by pressing the EDIT or DELETE button.
Charge Plans
Charge Plan is a template for the Subscription - defines what type of Subscription can be used for a service.
More information can be found here.
Tags
Tags are labels attached to DIDs for the purpose of identification or to give other useful information. Tags help manage groups of DIDs.
DID Tags can be accessed at Routing -> DIDs - Tags
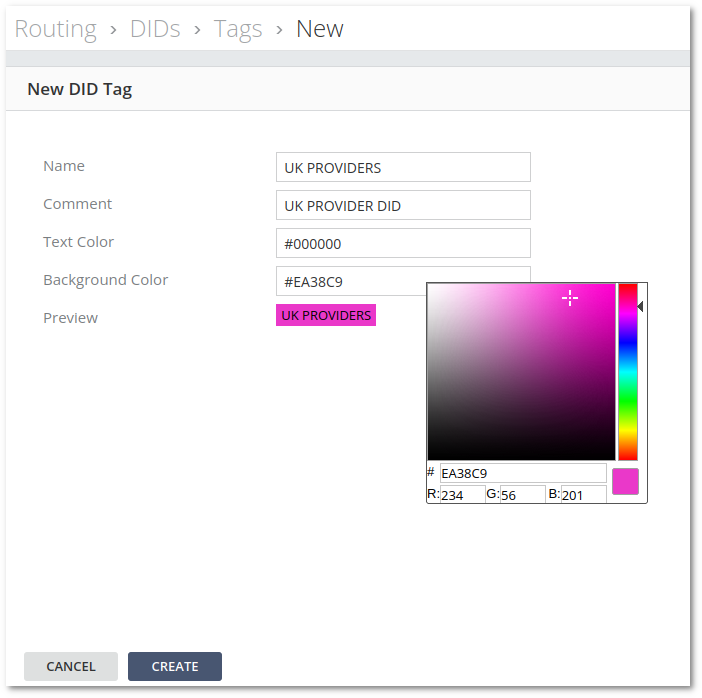
To Add a new DID Tag, press NEW and fill in its Name and Comment if needed.
Color gamma can be accessed when pressing on the Color field.
When data is filled, press CREATE
It is possible to edit or delete Tag by pressing the EDIT or DELETE button.
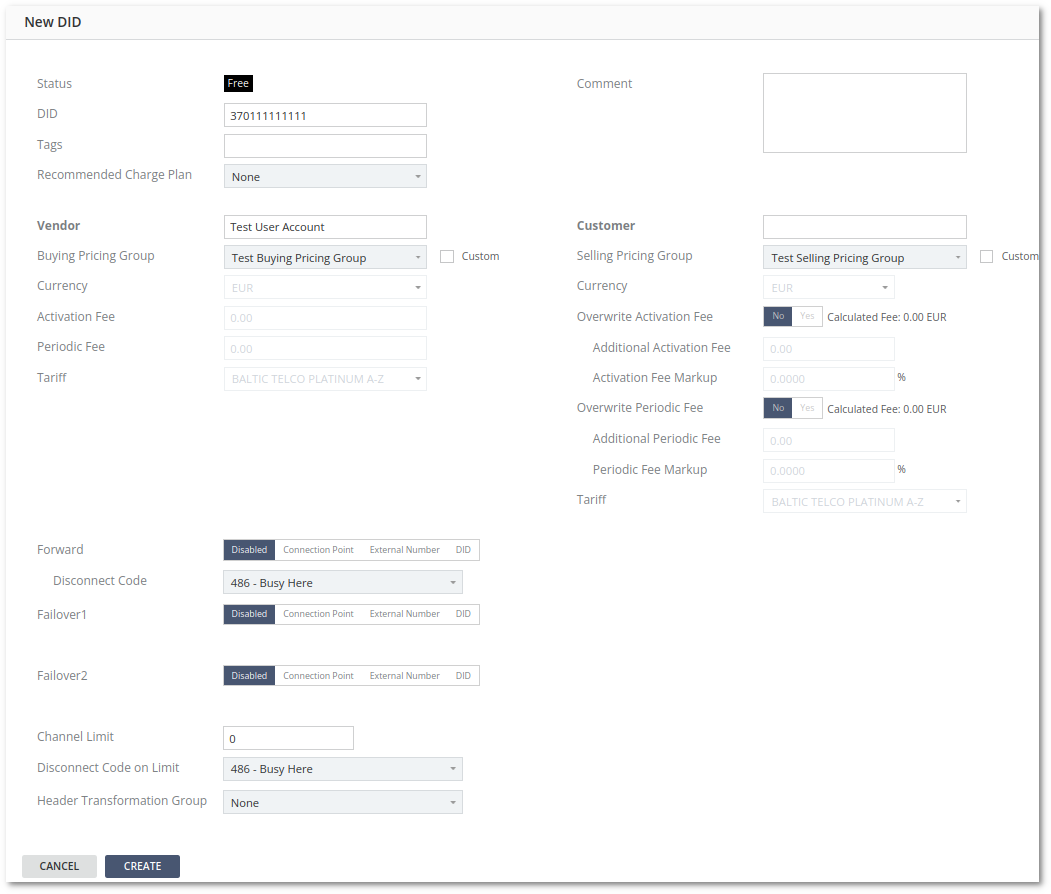
Add new DID(s)
- DID - enter DID number.
- Tags - select tag.
- Vendor - select a supplier.
- Buying Pricing Group - select Buying Pricing Group or create a Custom one.
- Comment - for notices.
- Customer - select a user.
- Selling Pricing Group - select Selling Pricing Group or create a Custom one.
- Header Transformation Group - which Header Transformation Rules Group to use.
NOTE. By pressing CREATE AND ACTIVATE FOR USER the DID should start working immediately and receive calls.
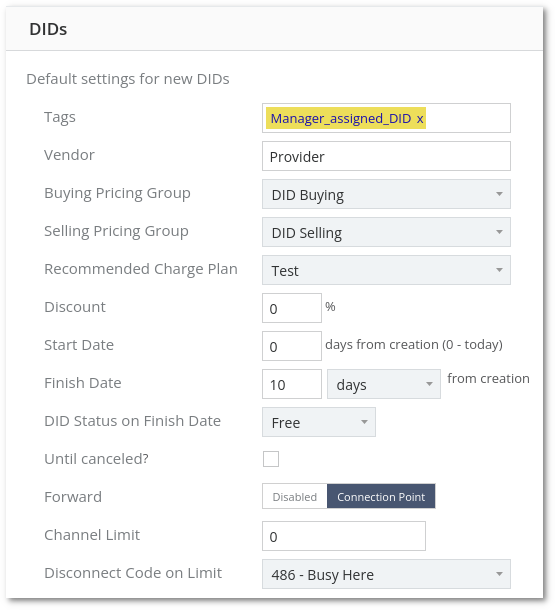
NOTE. It is possible to fill Default DIDs settings for new DIDs at Maintenance - Settings - DIDs.
Add new DID(s) as Manager
Managers needs DIDs permission to manage DIDs.
To simplify the manager's work, the admin can fill DIDs section in settings.
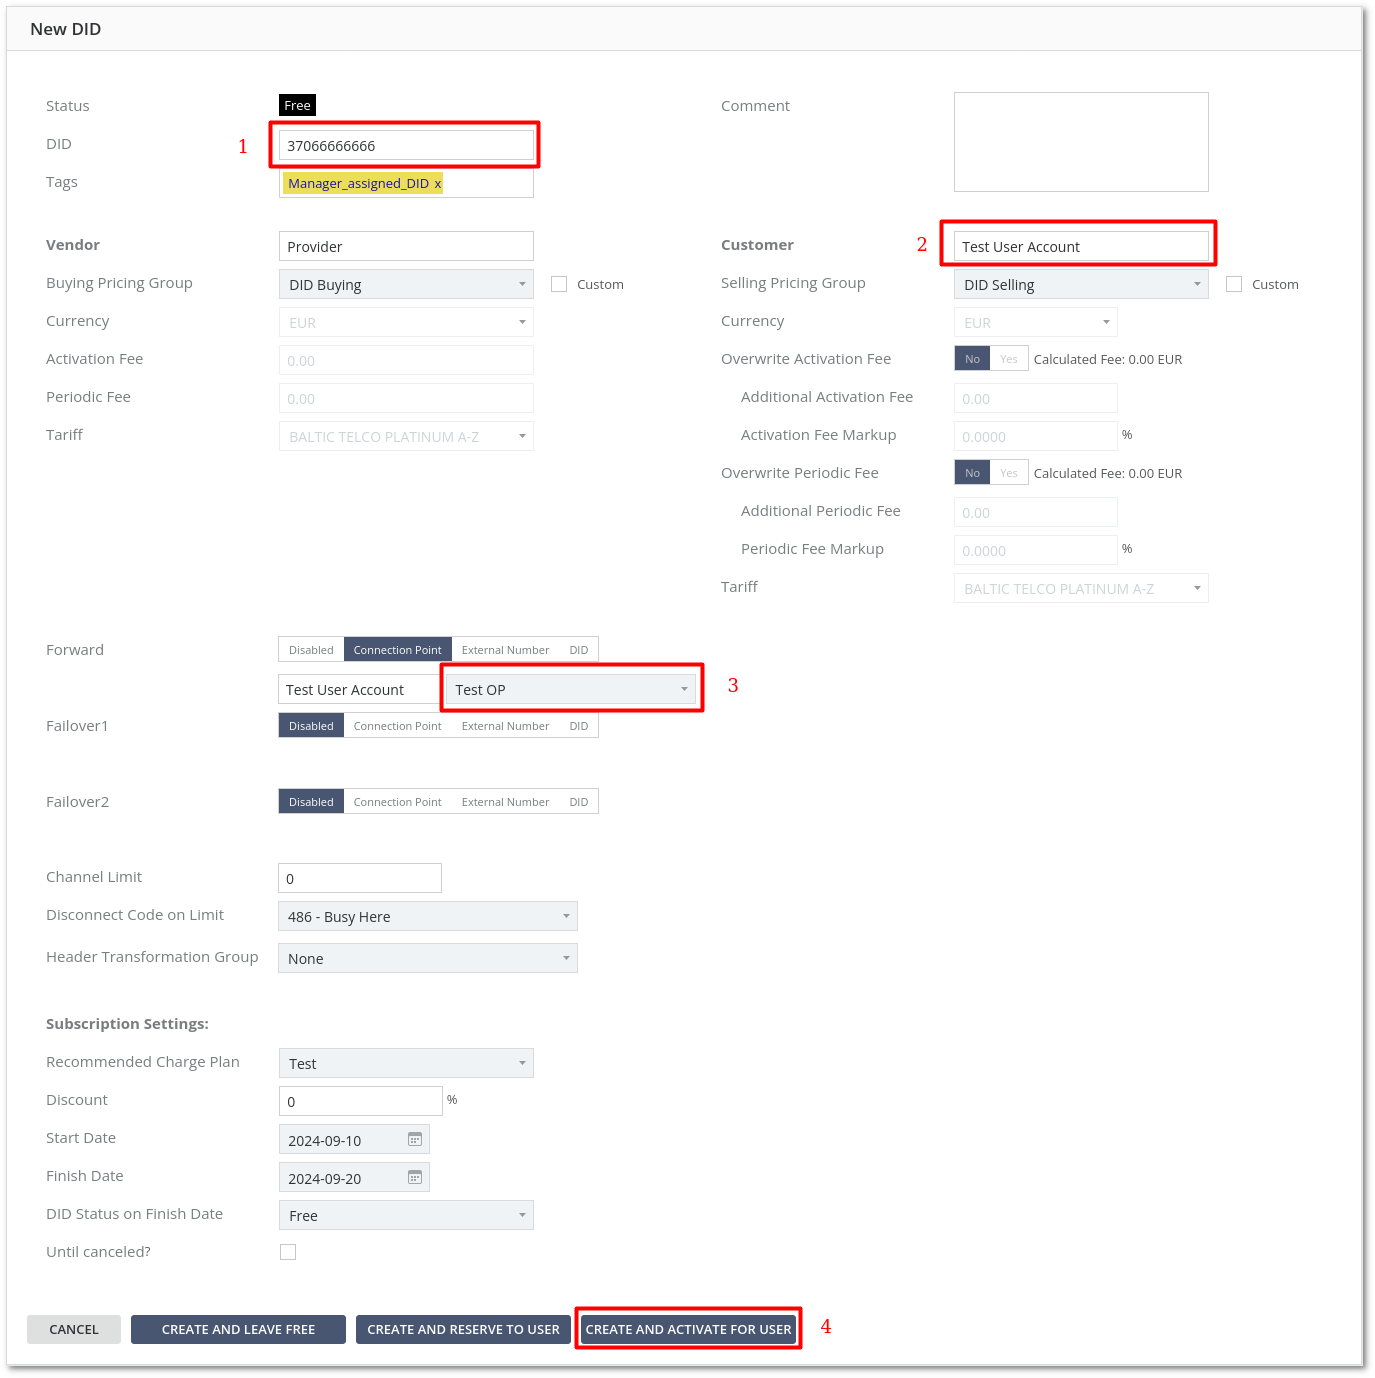
When the manager creates a new DID, all settings will already be filled in.
The manager will only need to enter the DID number and select the user. The system will select the first user's device (number 3 in the screenshot). The Manager can change the device if needed.
If the settings are correct, then the Manager needs to press CREATE AND ACTIVATE FOR USER to create and activate the DID.
Import
M4 DIDs can be imported from the CSV file. Import procedure described here.
Export
DIDs are exported to CSV. The system exports only visible DIDs in the Inventory that are filtered by search parameters.
DID Search (Refine)
Filter DIDs by various options:
When a filter is active, then Inventory stats will show green values for the filtered DIDs (example):
DID bulk management
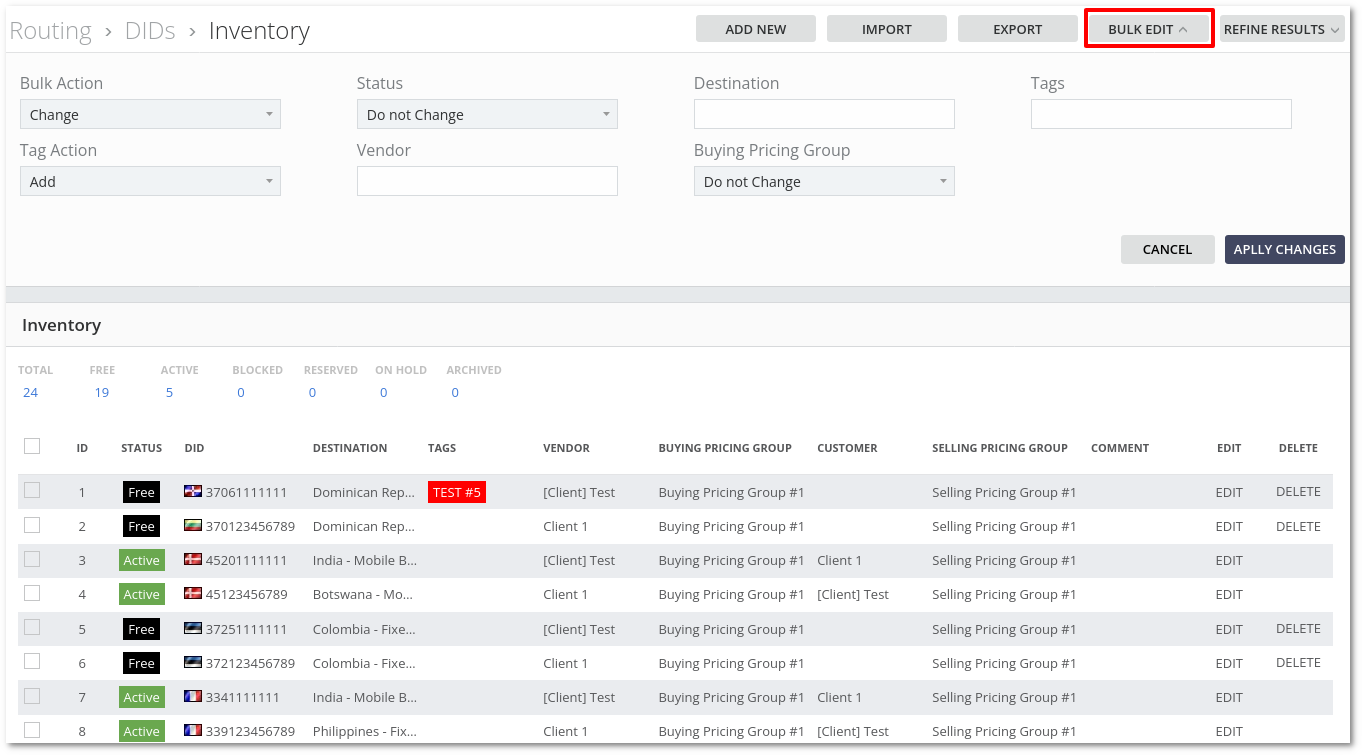
In the main DIDs window, click on BULK EDIT and you will be able to perform various actions.
Bulk management works together with REFINE (Search). First, you find the DIDs you need, then you apply Bulk Action on them.
Find necessary DIDS with REFINE section. Then mark (by pressing the rectangle at the left of the DID) all DIDs or just some of them to apply Bulk Action to them.
Example how to do that here
Bulk Action - Change, Delete or Close Subscription.
Tag Action - Add or Delete.
Status - Do not Change, Free, Reserved, Archived.
Vendor - Change Vendor.
Destination - Change Destination.
Buying Pricing Group - select and change Buying Pricing Group from the list.
Tags - Change Tags.
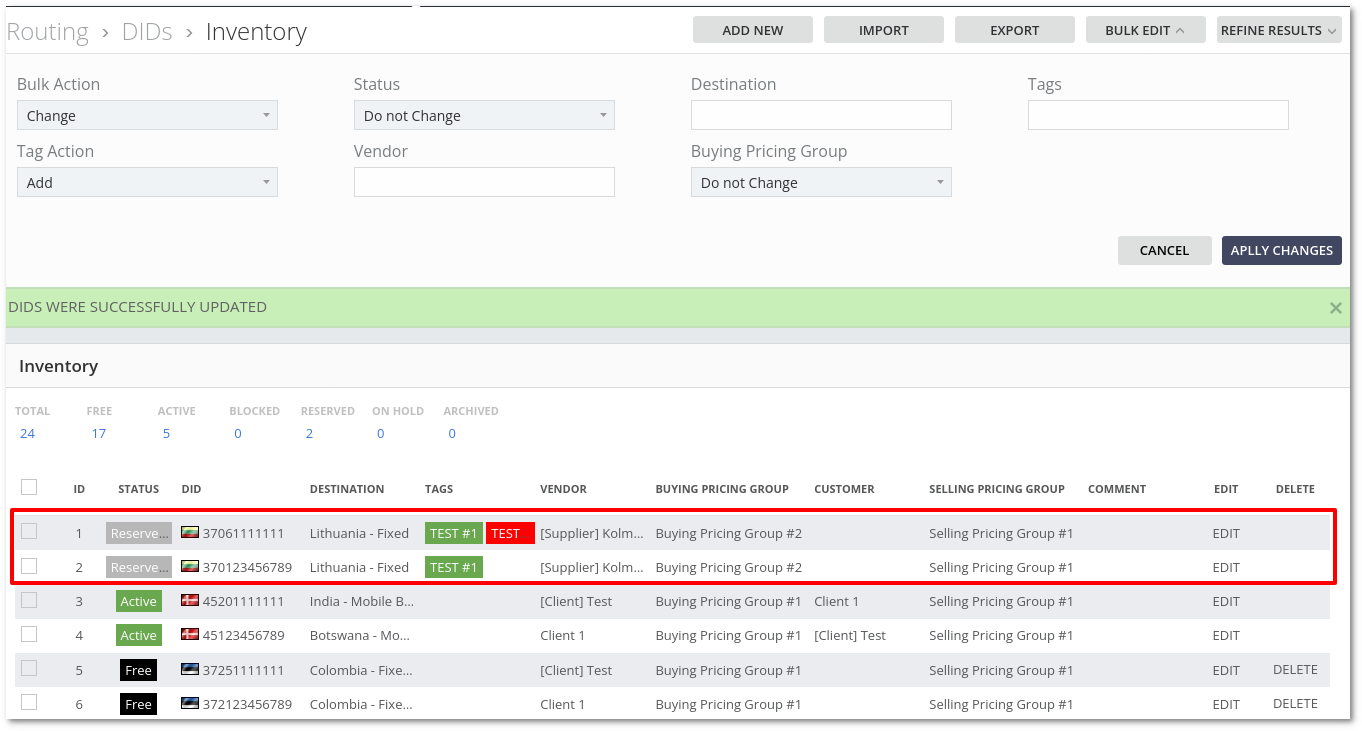
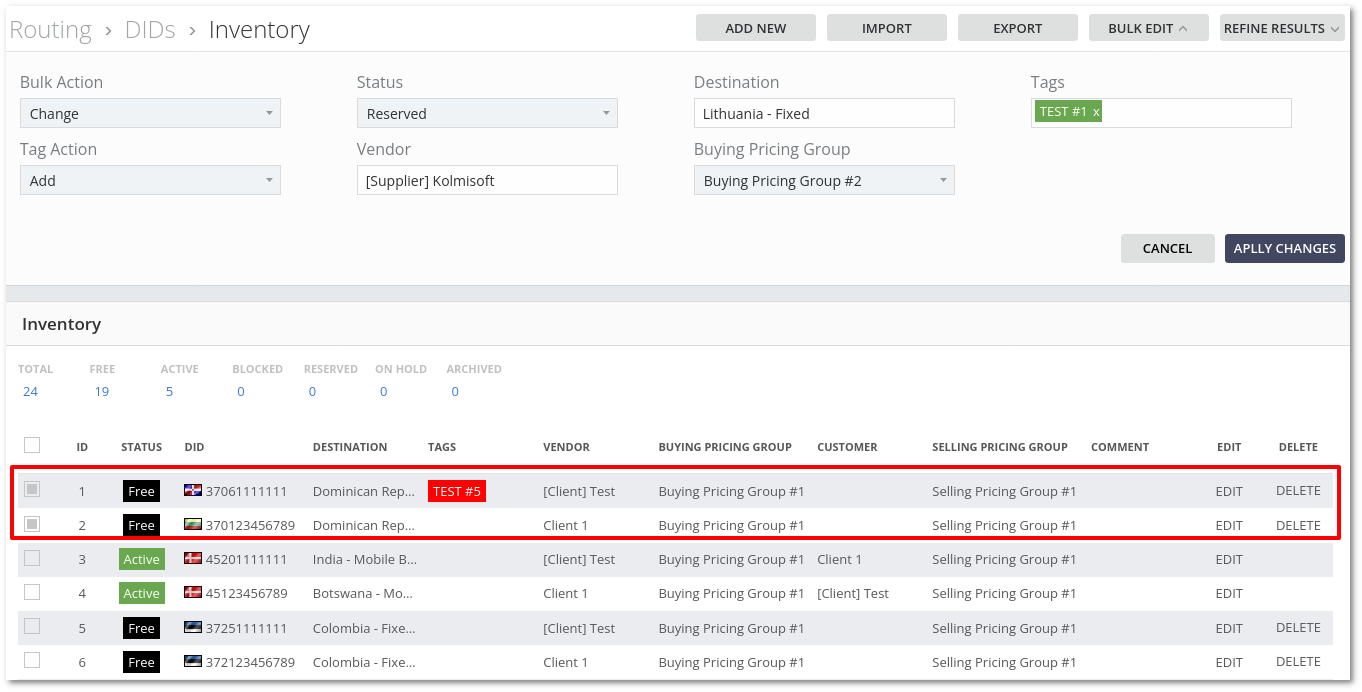
Select DIDs to modify and apply the actions. Example before changes:
DIDs Bulk Update from CSV
M4 DIDs can be updated from the CSV file. Update procedure described here.
Making DID Active
Important. In order to make DID active and call it, it must have an assigned subscription.
