Difference between revisions of "IVR setup example"
| (One intermediate revision by the same user not shown) | |||
| Line 39: | Line 39: | ||
Assign a DID to this dial plan and thats is all. | Assign a DID to this dial plan and thats is all. | ||
<br><br> | |||
= See also = | |||
* [[IVR system]] | |||
* [[IVR for Calling Cards]] | |||
* [[IVR Greeting for DID]] | |||
Latest revision as of 19:56, 21 March 2019
First you need to have 4 devices under one or more users.

SIP phones can be registered to these devices directly, or devices can be forwarded to external number if you need to reach it. Device can be forwarded to external number by using its Call Flow.
Then when you have end Devices prepared, you need to upload audio file which will be played when someone will dial your IVR:
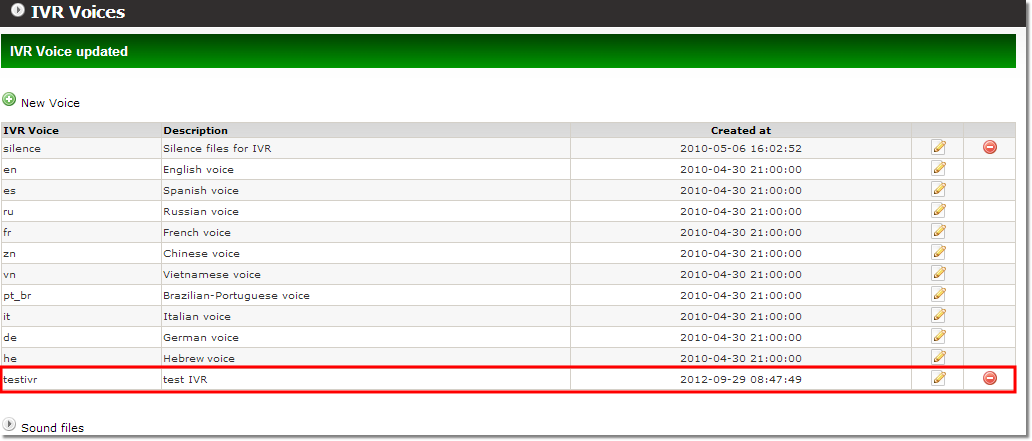
When you have your sound file uploaded, go to ADDONS -> PBX functions -> IVR and click ![]() New IVR. Enter the name and the name of the first block (for example "main"):
New IVR. Enter the name and the name of the first block (for example "main"):
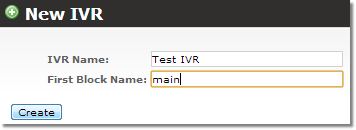
Click Create.
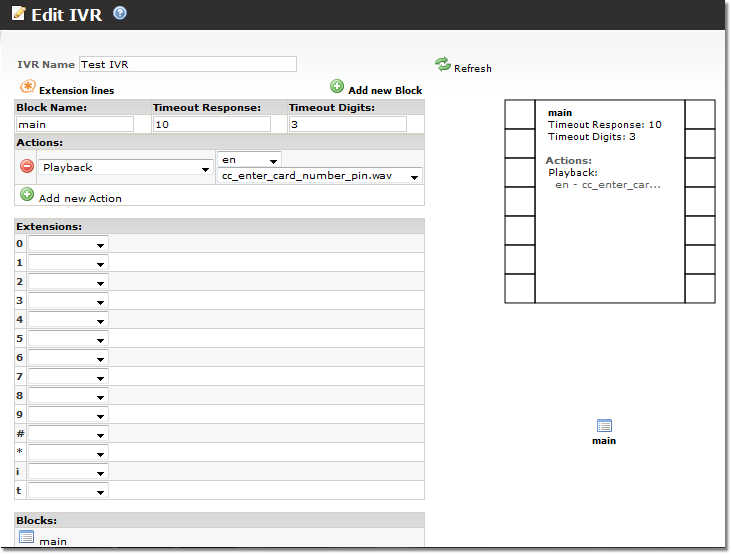
Click ![]() Edit. Please note, IVR editing is only available using Firefox browser! Click Add new Action and choose Playback. Specify you audio file:
Edit. Please note, IVR editing is only available using Firefox browser! Click Add new Action and choose Playback. Specify you audio file:
Click Add new block. Change block name to something like "support" or "sales". Click Add new Action and choose Transfer To, Device and specify one of Devices which were created at the beginning:
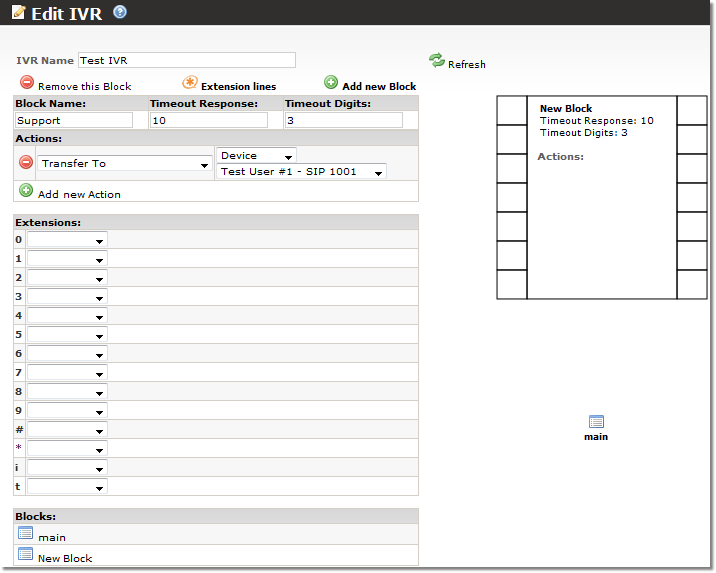
Repeat this step with other three devices.
When all 4 blocks are ready go back to "main" block (you can navigate between blocks by clicking on them in Blocks section). Click on a certain extension (Extensions section) and choose to which block IVR should go when this extension is chosen:
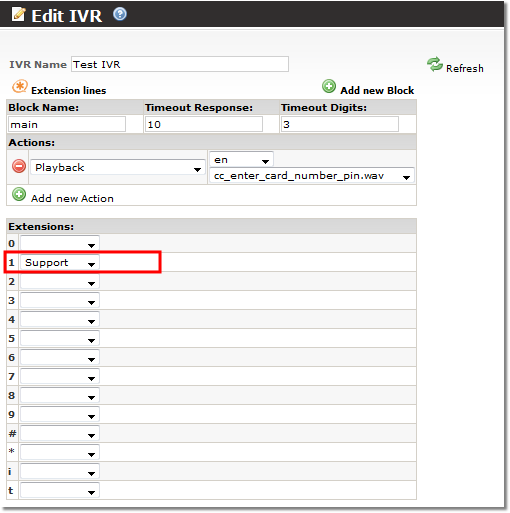
Do the same with other blocks.
IVR system is ready to use.
To start using the system go to SETTINGS -> Billing -> DIDs -> Dial plans and make an IVR Dial Plan. Put the name, in IVR: Default column specify name of you IVR system and click ![]() icon to add this dial plan:
icon to add this dial plan:

Assign a DID to this dial plan and thats is all.
