ATI - Tata example
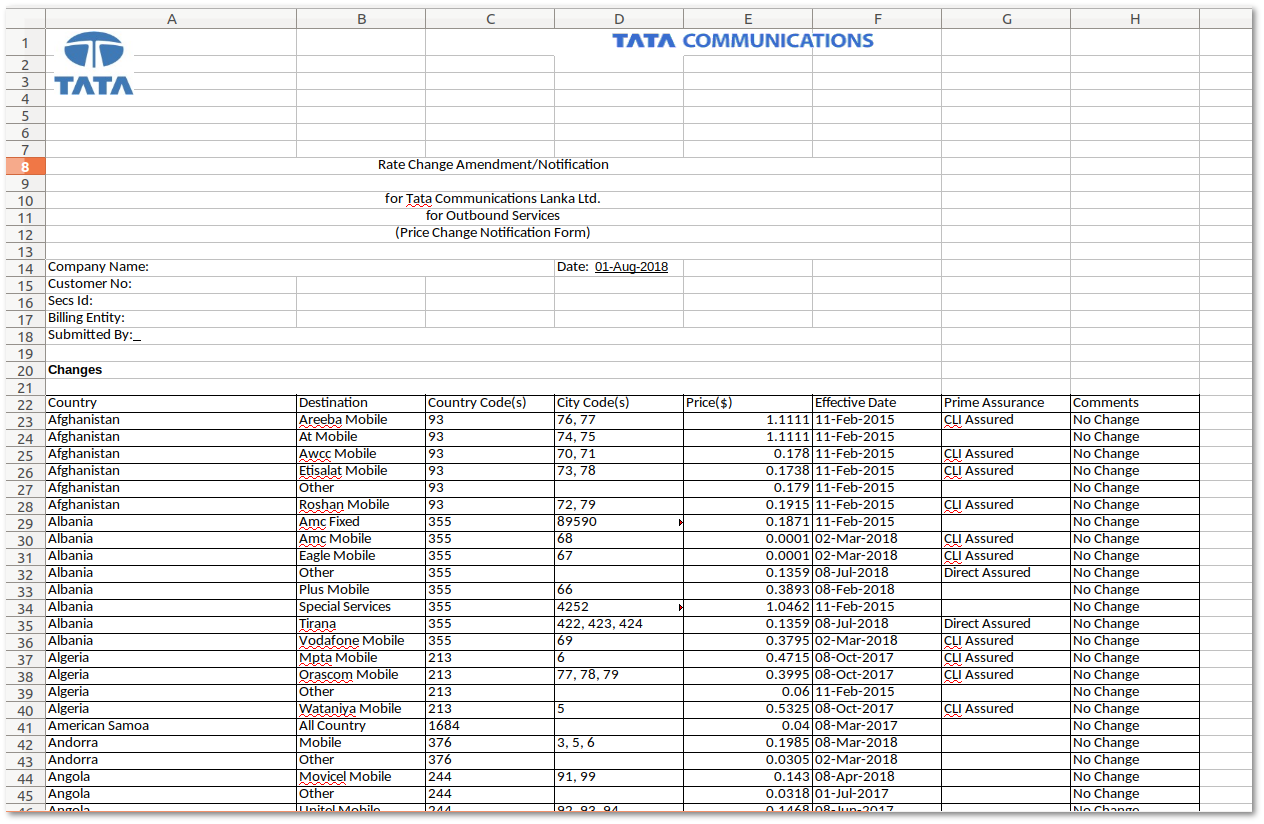
Rate upload from TATA
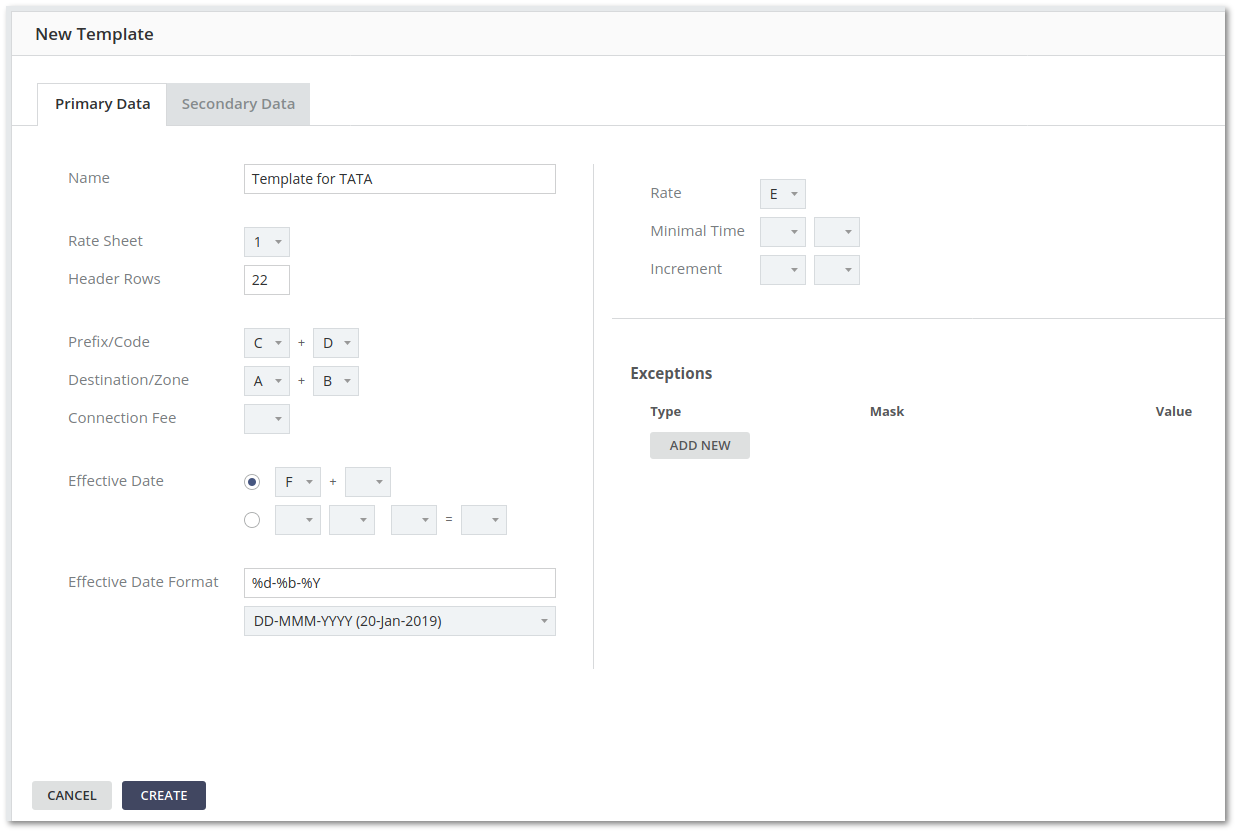
2. Create a template for a tariff in BILLING → Tariff import → Import Rules → Templates

3. Select appropriate fields according to the tariff cells:
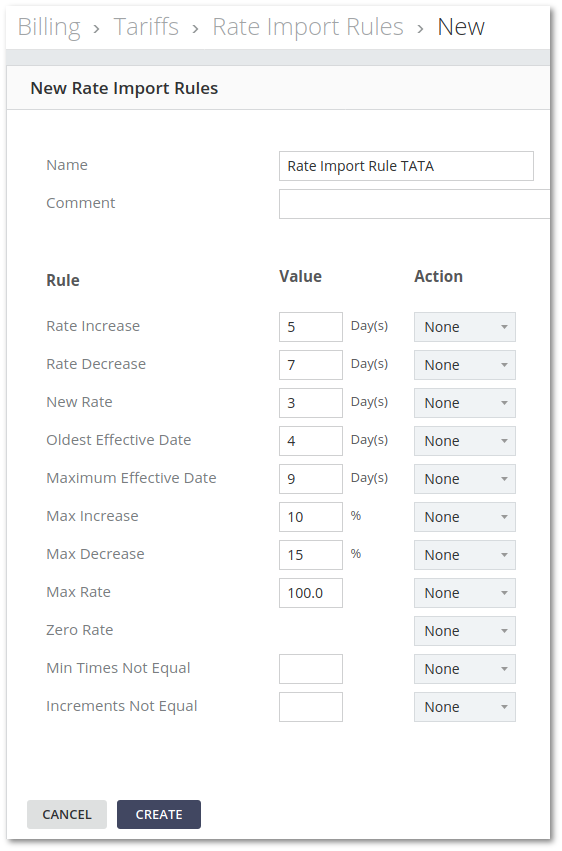
4. Create Rate Import Rules in BILLING → Tariff import → Import Rules → Rate Import Rules

5. Fill cells according to your needs:
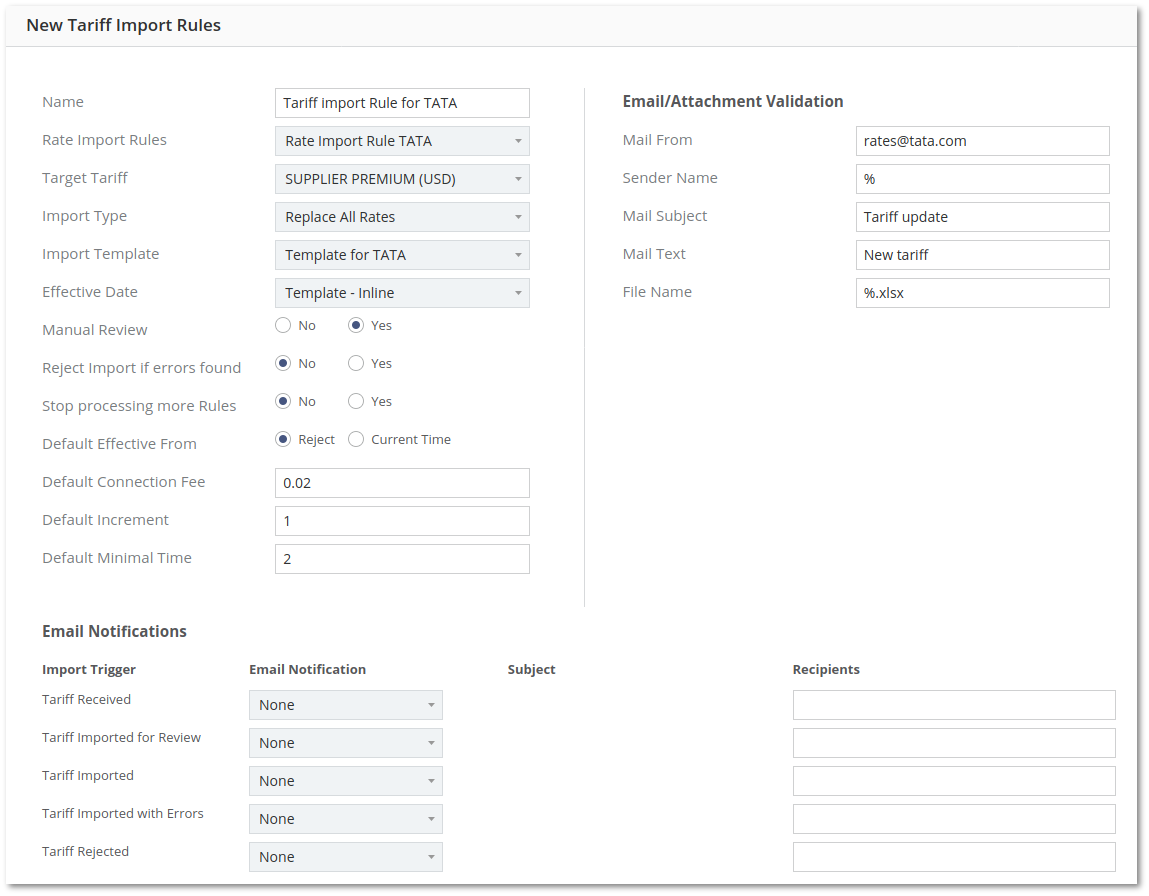
6. Create Tariff Import Rules in BILLING → Tariff import → Import Rules

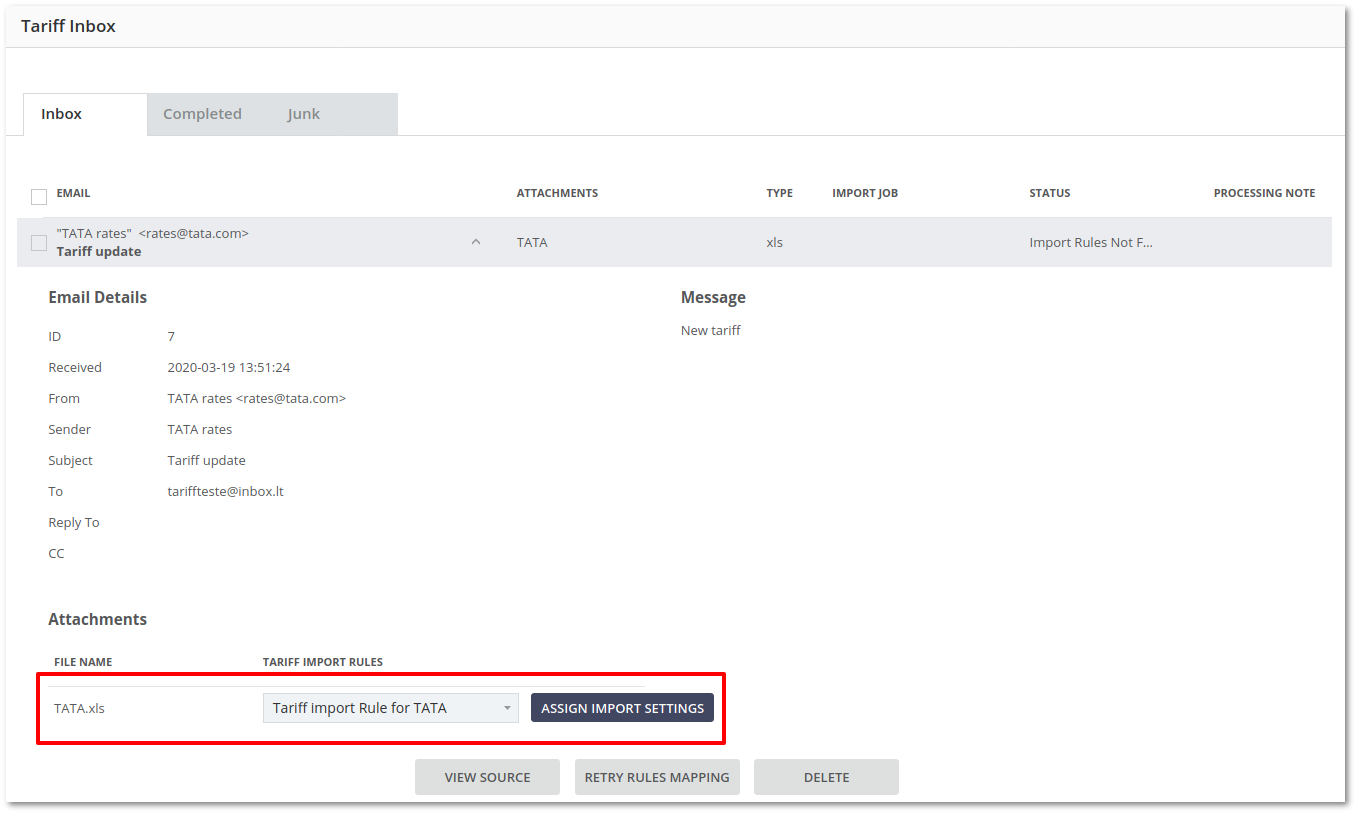
8. Check the Inbox for a new email at Billing → Tariff Import → Inbox
9. Enter the mail, select Tariff Import Rules, and press Assign Import Settings to continue the import:
10. Tariff job is created now, you can see it in BILLING → Tariff Import → Jobs

11. Job is now waiting for confirmation. You can view the analysis before confirming:

12. Point to the line you want to analyze to see more information:
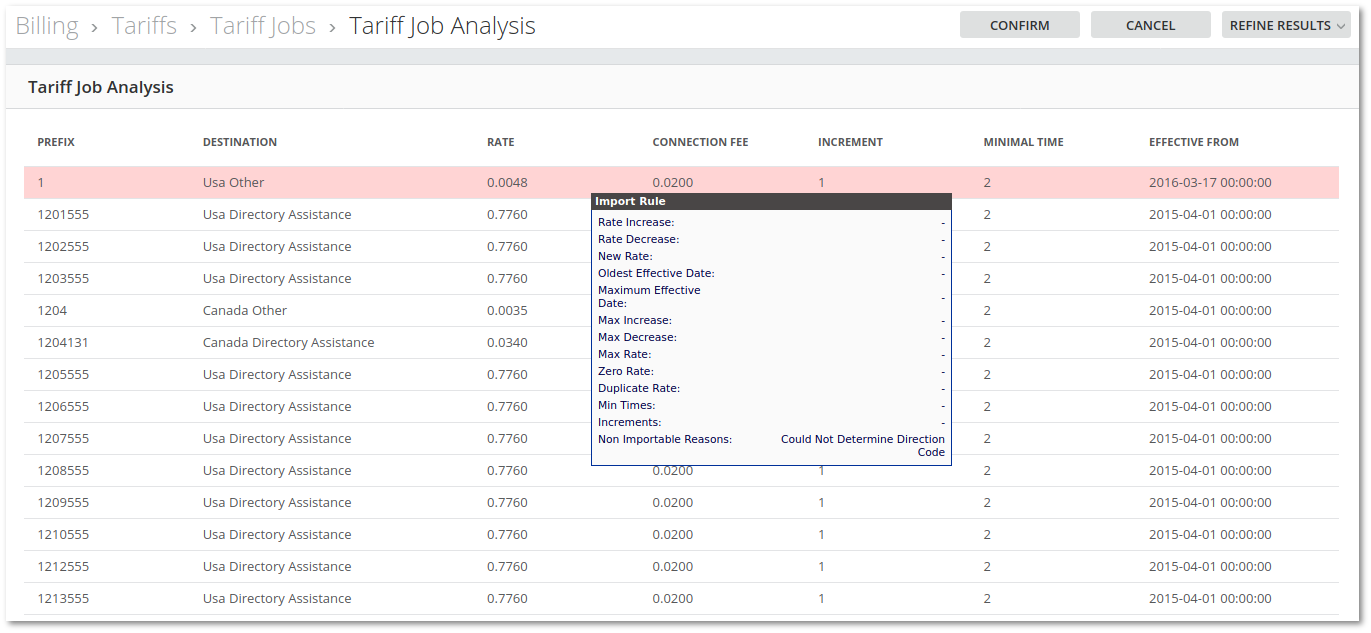
13. If you are satisfied, press confirm to finish the import procedure, otherwise, cancel it.

14. If you pressed confirm, you will see that job was successfully confirmed:

15. Go back to the Jobs page in BILLING → Tariff Import → Jobs to see the status of the Job:

16. Tariff import is finished. As a targeted tariff in this example was “SUPPLIER PREMIUM”, you can verify rates by checking page BILLING → Tariffs.

