Monitorings Addon
This addon is available starting from MOR 9
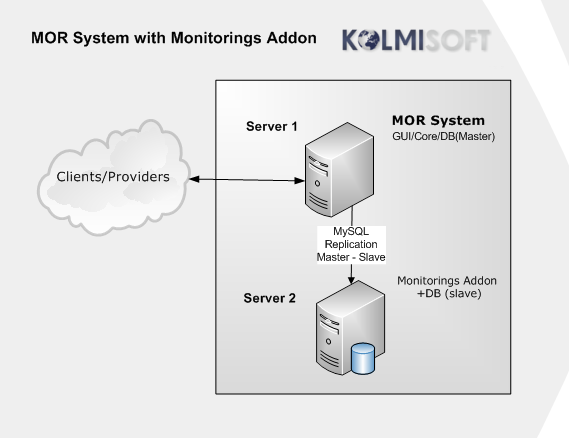
IMPORTANT! To use Monitorings addon you need additional server to MOR like shown in topology on the right
What is Monitorings Addon?
Monitorings Addon is an optional MOR feature that:
- protects you from high money losses.
- allows admin and resellers to spy their user calls on real-time
How Monitorings Addon work?
Monitoring Addon crawls the MOR database and counts user's call price sum over specified period. If user's call price sum over specified period will be higher than the amount specified in monitoring - an action will be taken. Possible action are:
- Only notify admin (no action is taken against user)
- Block user (user is automatically blocked, no notification is sent to admin)
- Block user and send notification for admin
You can create differently configured monitorings for:
- All users
- Postpaid users
- Prepaid users
- 1 user (separate monitorings for each user, also called personal monitorings)
Also it is possible to create 2 or more monitorings for each group, for example:
- First monitoring only reports admin about quickly increasing sum, let's say 50 Euro
- If an administrator takes no action and someone tries to abuse the system when call sum for that user reaches for example 100 Euro the second monitoring can block that user
Where to find Monitorings?
Remember: you will find Monitorings only if you have purchased Monitorings Addon.
Monitorings can be found in ADDONS section -> Monitorings.
How to create a Monitoring?
Global Monitoring
Global Monitoring will be applied to all users which meet the requirements (this will be explained later)
1. Go to ADDONS section -> Monitorings.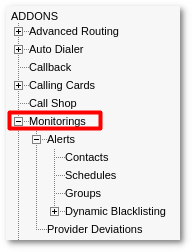
2. Select the desired options for new global Monitoring: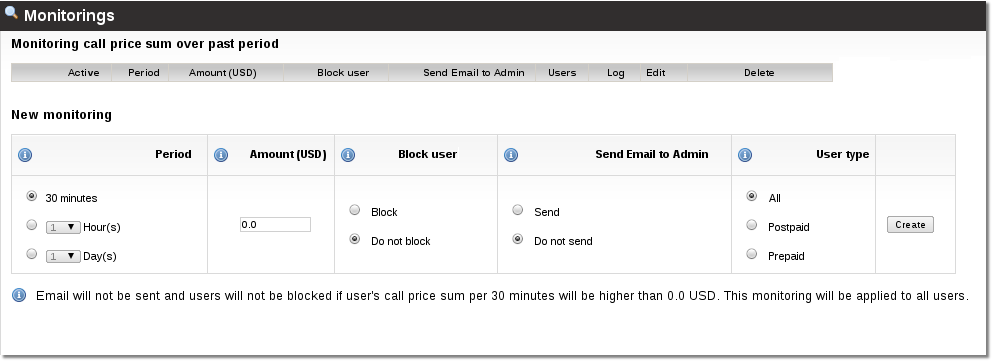
- Period - this option let's you specify how often the monitoring must run and check all users balance.
- Amount - this option let's you specify the amount of money. When user's balance drops to the amount you specified an action will be taken against him depending on other parameters.
- Block user - if this option is set to Block - user will be blocked. He will not be able to make any calls.
- Send Email to Admin - here you may choose to be informed about the action by email.
- User type - this options specifies a user group an action must be taken against.
- All - Monitoring will be applied to All users
- Postpaid - Monitoring will be applied to Postpaid users
- Prepaid -Monitoring will be applied to Prepaid users
3. Press the "Create" button to create the Monitoring
Additional Notes
- You can create as many Monitorings for any group as you want. For example you can create 2 monitorings for Postpaid users:
- 1 monitoring could just inform the administrator about the high user's balance (in this case select these options: enter the amount, choose Do not block, choose Send, choose Postpaid)
- 2 monitoring could block the user with high balance if the administrator is sleeping and didn't saw the warning email (in this case enter a bigger amount than in the first monitoring, choose Block, choose Send, choose User type: Postpaid)
- Do not add too much monitorings, because this functionality is database intensive. A separate database server could be dedicated for monitorings.
Personal Monitorings
What is a Personal Monitoring?
A Personal Monitoring is applied only to a specific user.
How to create a Personal Monitoring?
1. Navigate to SETTINGS - Users
2. Select the marked icon:

3. Select the marked icon:

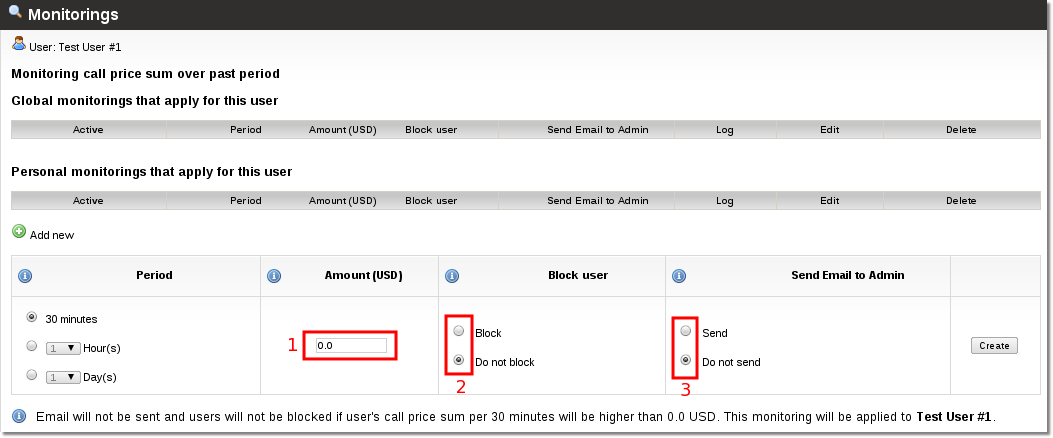
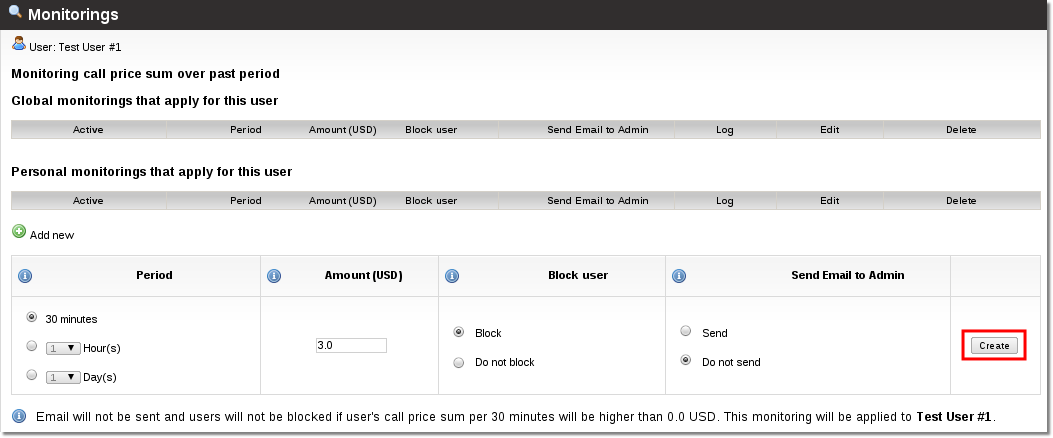
4. Depending on your scenario enter correct settings for a monitoring. Some information about marked fields:
- 1. Must never be equal 0
- 2. or 3. must be set to block or to send. You may select both, but you cannot leave them both "Do not block" and "Do not send"
5. Press the marked button to create the monitoring:
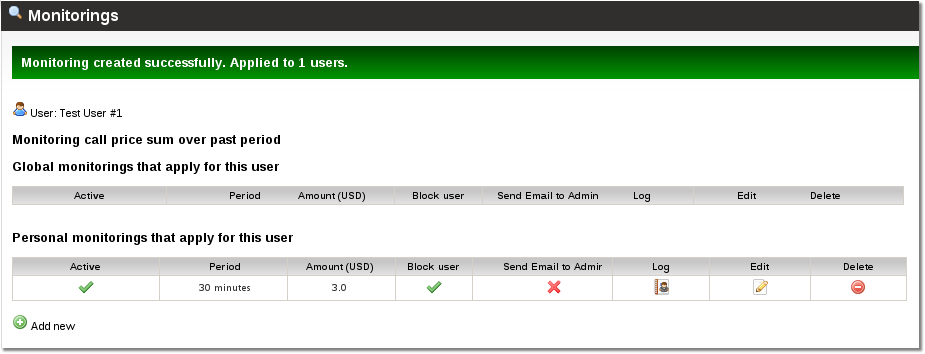
6. You will get a confirmation that monitoring was created:
Disable global monitorings for 1 or more users
This Monitorings addon feature is available starting from MOR 10
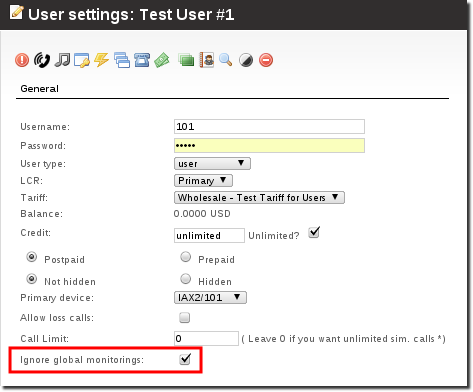
In some situations you might need to disable global monitorings for some users leaving only personal monitorings. You can do that by navigating to user settings and enabling the marked setting:
