Payments configuration
From Kolmisoft Wiki
Jump to navigationJump to search
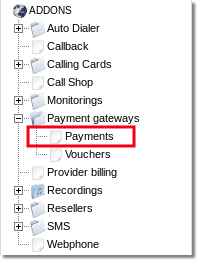
You can find Payments configuration menu by navigating to SETTINGS - Setup -> Settings -> Payments:
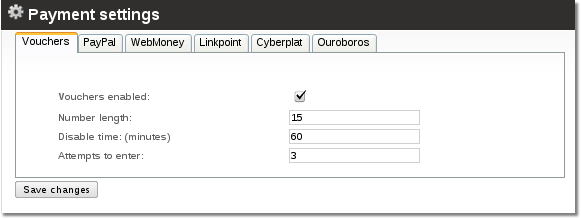
Vouchers
- Vouchers enabled – yes or no.
- Number length – how long a voucher's number should be; make it at least 10 digits long.
- Disable time (minutes) – if a user fails several times to enter the correct voucher number, the period for which he should be prevented from trying again.
- Attempts to enter – how many times a user can try to enter the voucher number.
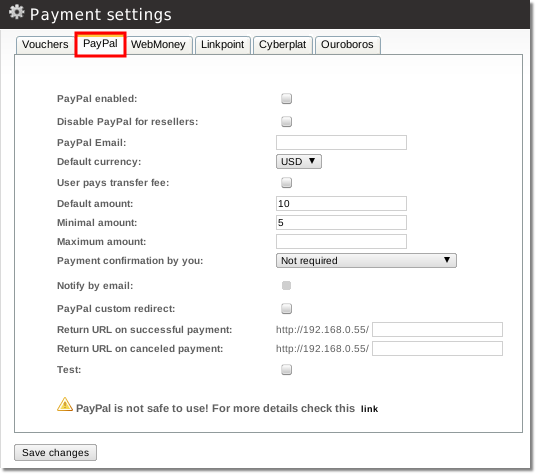
PayPal
- PayPal Enabled – yes or no.
- PayPal Email – account in PayPal where you want to get payments.
- Default currency – select a currency which matches your account's supported currency. If they do not match, you will get errors.
- User pays transfer fee – check whether the user should pay a transfer fee; otherwise you as the system owner will pay it (default).
- Default amount – amount to show for customer when he tries to enter payment. User can change this amount.
- Minimal amount – the minimum amount a user can send you.
- Test – if this is checked, all amounts will be equal to 0.01. Good for testing with a real account.
See also:
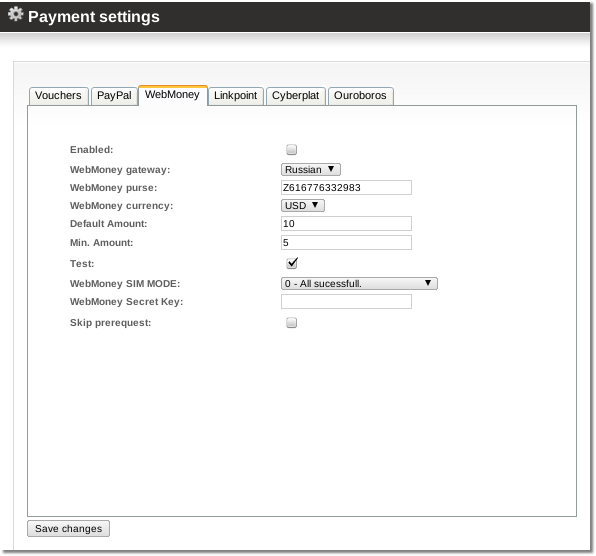
WebMoney
- WebMoney Enabled – yes or no.
- Default currency – select a currency which matches your account's supported currency. If they do not match, you will get errors.
- User pays transfer fee – check whether the user should pay a transfer fee; otherwise you as the system owner will pay it (default).
- Default amount – amount to show for customer when he tries to enter payment. User can change this amount.
- Minimal amount – the minimum amount a user can send you.
- Test – testing mode.
- WebMoney SIM MODE - testing mode in WebMoney system. Connects to the test server instead of a real one.
LinkPoint
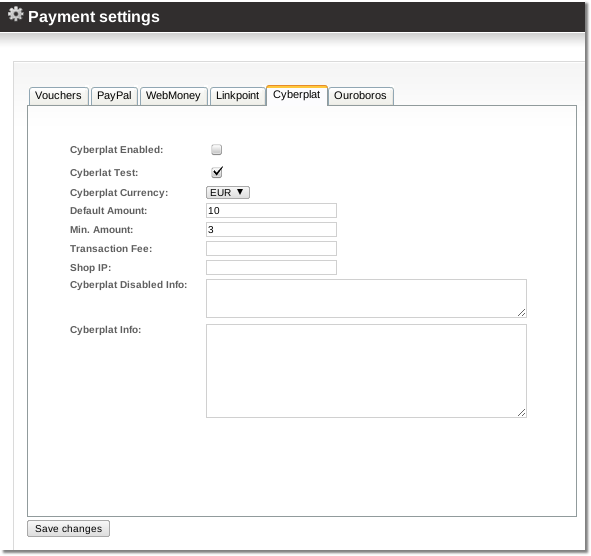
Cyberplat
- Cyberplat Enabled – yes or no.
- Cyberplat Test – testing mode.
- Cyberplat Currency – select a currency which matches your account's supported currency. If they do not match, you will get errors.
- Default amount – amount to show for customer when he tries to enter payment. User can change this amount.
- Minimal amount – the minimum amount a user can send you.
- Transaction Fee - a transaction fee that user pays for a transaction
- Shop IP - a shop IP
- Cyberplat Disabled Info - Text view for user when Cyberplat is off global or in user settings (/users/edit/).
- Cyberplat Info - Text view in Cyberplat payment form end.
Technical information
- MOR sends requests to this address: https://card.cyberplat.ru/cgi-bin/GetForm.cgi
- MOR sends requests to this address: https://payment.cyberplat.ru/cgi-bin/GetForm.cgi when Test mode is on.
- MOR receives requests to this address: http://YOUR_SERVER_ADDRESS/billing/payments/cyberplat_result
In order a Cyberplat payment gateway would work a file /home/mor/lib/cyberplat/checker.ini must be present. More information about this file and it's structure can be found in official cyberplat documentation:
Ouroboros
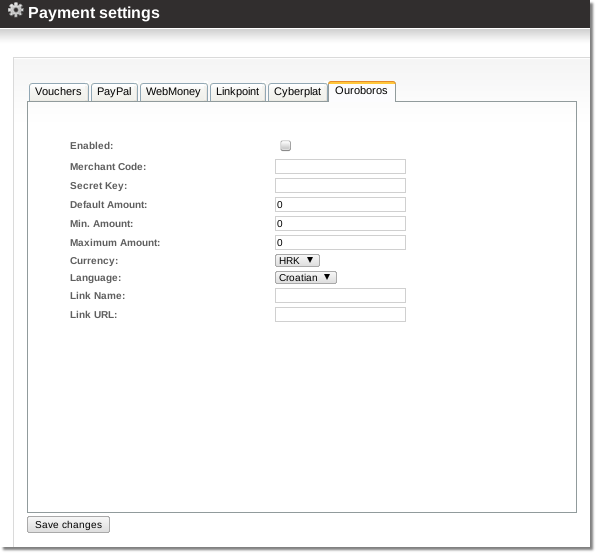
- Enabled – yes or no.
- Merchant Code – a merchant code
- Secret Key – a secret code.
- Default amount – amount to show for customer when he tries to enter payment. User can change this amount.
- Minimal amount – the minimum amount a user can send you.
- Currency – select a currency which matches your account's supported currency. If they do not match, you will get errors.
- Language – in which language Ouroboros should display the web page.
- Link Name - describe the name of the link that will be displayed next to the Ouroboros icon on the main page.
- Link URL - enter the URL of the link that will be displayed next to the Ouroboros icon in the main page.
See also
