Difference between revisions of "Allowed Addresses"
| (One intermediate revision by the same user not shown) | |||
| Line 7: | Line 7: | ||
And click ''Save changes''. | And click ''Save changes''. | ||
Now, when pressed Advanced button, you will see an additional section in SIP and IAX2 Devices edit window: | Now, when pressed on '''Advanced''' button under Authentication, you will see an additional section in SIP and IAX2 Devices edit window: | ||
<br><br> | <br><br> | ||
[[File:Deviceconfig allowedaddr.png]] | [[File:Deviceconfig allowedaddr.png]] | ||
Latest revision as of 14:49, 7 November 2022
IP, MASK – permits traffic from this IP only. You can find a detailed explanation here.
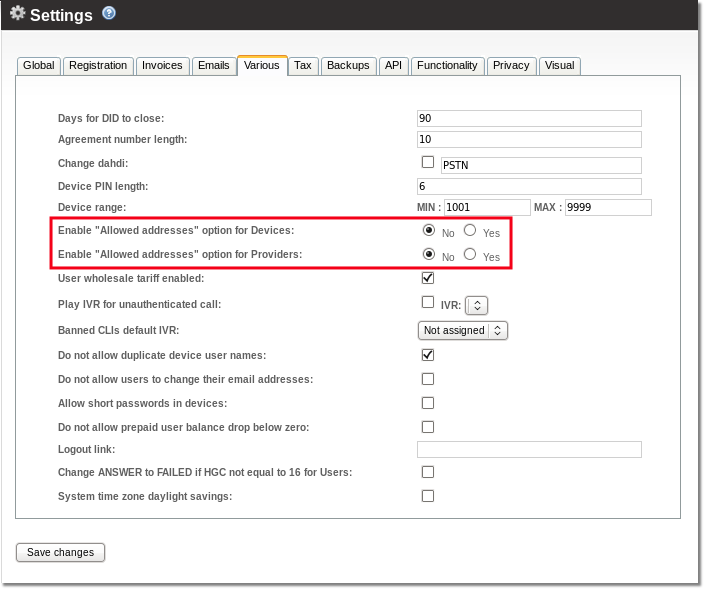
You can enable multiple allowed addresses however this option should be turned on to be visible in main device settings window. Go to SETTINGS -> Setup -> Settings -> Various tab and choose Yes for Enable "Allowed addresses" option for Devices:.

And click Save changes.
Now, when pressed on Advanced button under Authentication, you will see an additional section in SIP and IAX2 Devices edit window:

Allowed addresses describes from what IP's or defined subnets accept traffic.
NOTE that this setting take effect only for Dynamic authentication devices. For IP authentication devices, this setting is not applied.
If you do not clearly understand what these settings are used for, leave them with default values.
