Difference between revisions of "PBX Servers"
From Kolmisoft Wiki
Jump to navigationJump to search
| Line 1: | Line 1: | ||
==Description== | ==Description== | ||
This explains the basic usage of Cloud PBX integration into MOR | This explains the basic usage of [Cloud PBX] integration into MOR | ||
Currently it lets to create server with type 'pbx server' | Currently it lets to create server with type 'pbx server' | ||
Revision as of 08:42, 27 March 2020
Description
This explains the basic usage of [Cloud PBX] integration into MOR
Currently it lets to create server with type 'pbx server'
When this server created will able to:
- Add/Edit/Delete ACL list to the server
- Create users (pbx user type) with automatically Account creating on the PBX server
- Create DIDs and assign them to the Pbx Users and point to the PBX server
- Create/Edit/Delete Carriers on the PBX server
PBX Servers
Go to SETTINGS–> Billing –> PBX Servers
- You can add/delete PBX Server .
- Fill all fields and press green button.
- Before you add server you should make password-less ssh connection to the CloudPBX server from MOR
- Use this manual Configure SSH connection between servers
Server parameters
- Server IP - Ip address of the server
- Realm - Realm for the main CloudPBX Account
- SSH Username - Username for ssh connection
- SSH Secret - Password for the ssh connection
- PBX Username - Username of the main CloudPBX Account
- PBX Secret - Password of the main CloudPBX Account
- PBX Account Name - Name of the main CloudPBX Account
ACL
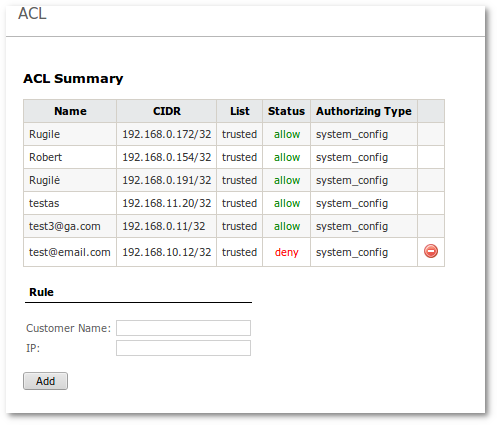
Click on ![]() to check ACL in the server record.
to check ACL in the server record.
- Access list allows to accept inbound calls on the PBX server.
- You can add/allow/deny/delete IP's from which will be accepted inbound traffic.
- Delete IP possibly only after rule was denied.
- Possible to add IP's from third party providers (not MOR only) like DIDWW and other.
- Pay attention that this traffic will be not visible in the MOR.
Users
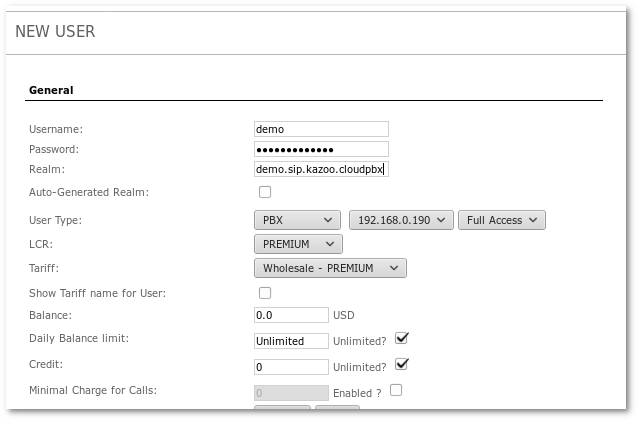
- You can create user with type: PBX.
- Create user like you usually doing this
- Select user type PBX and choose Pbx Server from drop-down menu.
- This action will be:
- Create user in the MOR.
- Create virtual device with CLI by realm/domain authentication.
- Will create Account in the CloudPBX server with same credentials.
- User in the MOR is equal to the Account on the CloudPBX with all his users and devices.
- User in the MOR can not be deleted for security reason.
- Because delete user equal to account delete on the CloudPBX.
- This action would destroy all users, devices and configuration under this account without possibility to restore.
- For this reason possible to disable only.
- If you really want to remove account , you should to do it manually from CloudPBX GUI.
DIDs
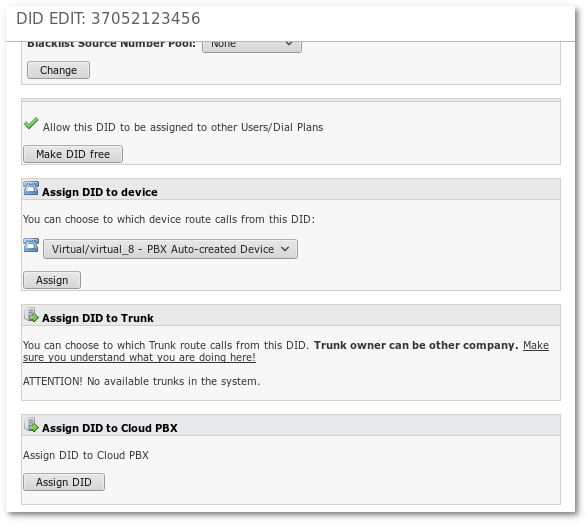
- DIDs for user with type PBX can be created like usually.
- For user with type PBX, DIDs can be assigned to the PBX server.
- Number after assigning to the PBX server will visible in the Cloud Pbx Gui.
- Also will be possible to configure Number inside of the Cloud PBX.
- If you are use direct connect to the DID provider from Cloud PBX , DID's you should add and configure manually in the CloudPBX GUI
Carriers
- You can create carriers for this account directly from MOR GUI.
- This functionality will create carriers in the CloudPBX.
- Is not exist GUI on the CloudPBX to add/edit/delete/view Carriers.
- Carrier on the PBX server allow Account users make outgoing calls.
- Carrier on the PBX server is the same as provider in the MOR.
- In the user line press on icon Carriers
- Press button Add new Carrier
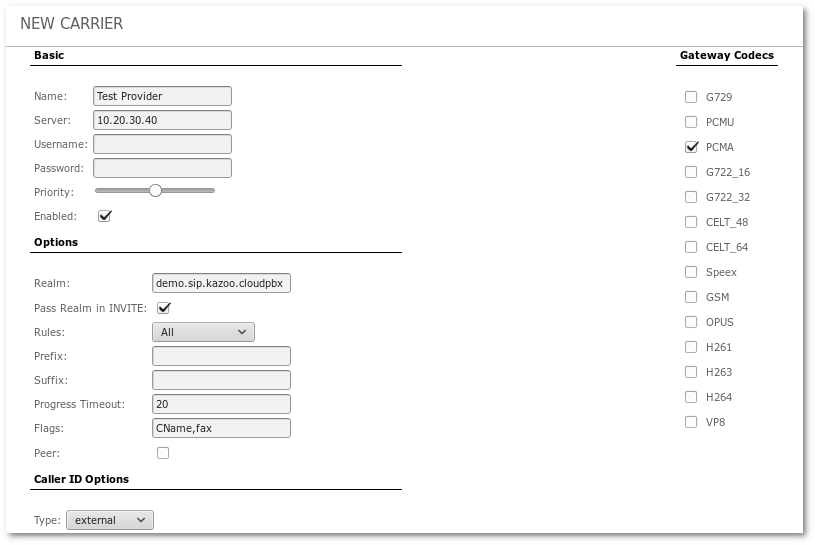
- Fill parameters and save
Carrier parameters
- Name - Any friendly name
- Server - IP Address or domain name of the server
- Username - Username if used
- Password - Password if used
- Priority - You can change priority if more of one carrier used
- Enabled - Check/Uncheck for enabling/disabling
- Realm - Realm of the Account
- Pass Realm in INVITE - Will add extra field in invite with realm
- Rules - Checking dialed number for matching to use this carrier
- Prefix - Adding prefix to the dialed number
- Suffix - Adding suffix to the dialed number
- Progress timeout - Value in seconds to disconnect by timeout on the first SIP answer
- Flags - Add flags, separate by comma. CName if you need to resolve domains , fax if you use faxing on this Carrier
- Peer - Check if this Carrier is peer
- Caller ID Options - external will be used Caller ID of the assigned number, internal will be use extension number, emergency used Caller Name and Number
- Gateway Codecs - Check codecs which you need


