ATI - Speedflow example
Speedflow Tariff Import configuration
1. Create an import template. Go to BILLING > Tariff Import > Import Rules > Templates. Click "ADD NEW TEMPLATE" at the top-right corner of the page.
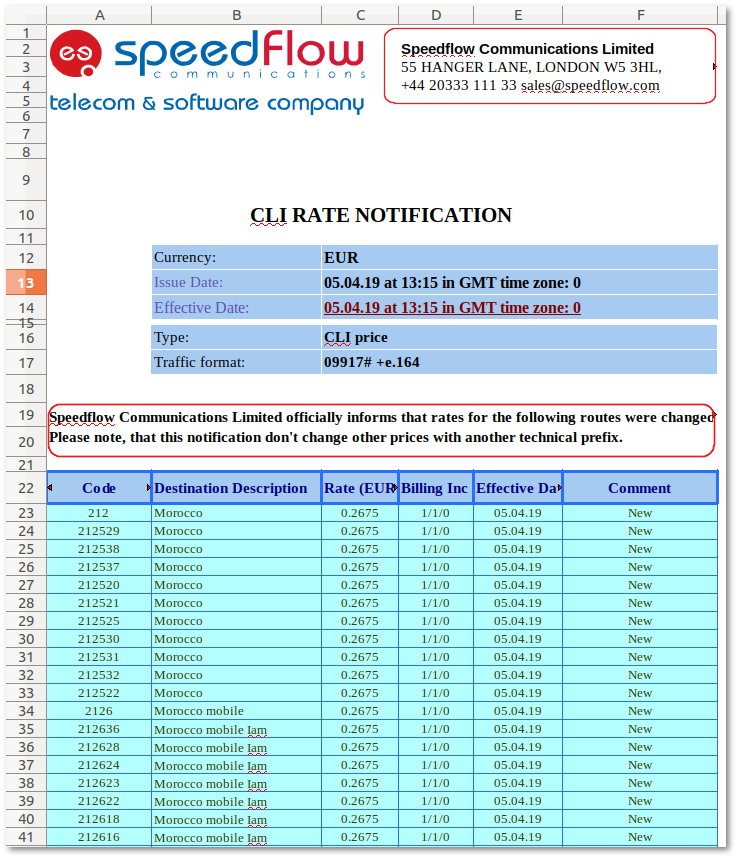
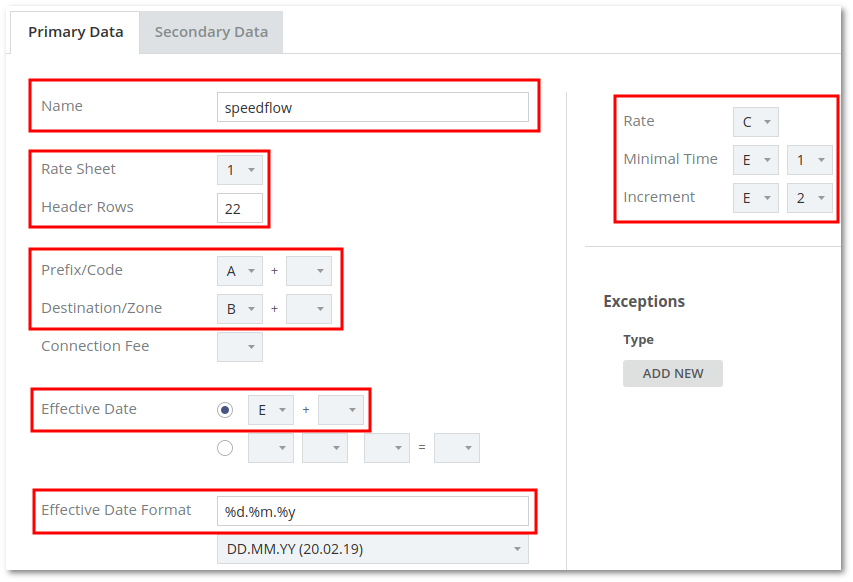
Set "Name" to "speedflow". It can be any name, but "speedflow" will represent for which Provider tariffs this template is used. Set "Rate Sheet" to "1", as this tariff file contains only one worksheet. Set "Header Rows" to "22", as this tariff has 4 rows before actual rates data begins. Set "Refix/Code" to column "A"; Set "Destination/Zone" to column "B"; Set "Effective Date" to column "E"; Set "Effective Date Format" to "%d.%m.%y"; Set "Rate" to column "C"; Set "Minimal Time" to column "E" and value "1"; Set "Increment" to column "E" and value "2";
Click "Create" to save changes.
2. Create Rate Import Rules Go to BILLING > Tariff Import > Import Rules > Rate Import Rules Click "ADD NEW RATE IMPORT RULES" at the top-right corner of the page.
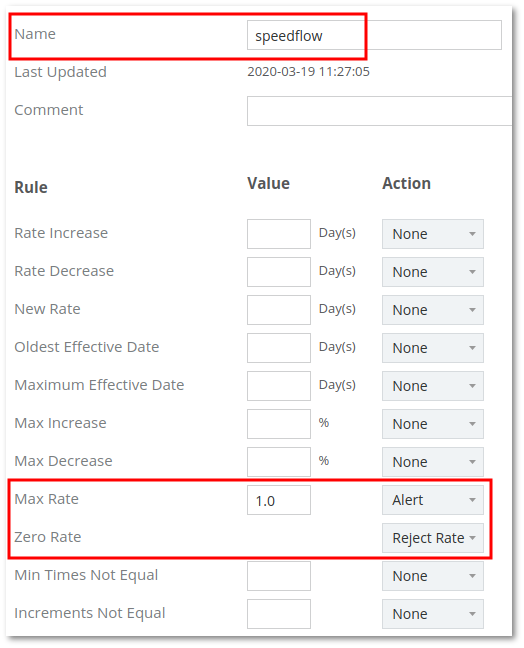
This example shows how to create a Rate Import Rule which will inform the admin about new rates above 1.0 in price and will reject rates where the price is equal to 0.
Set "Name" to "speedflow"; Set "Max Rate" to value "1.0" and action "Alert"; Set "Zero Rate" to action "Reject Rate".
Click "Create" to save changes.
3. Create Tariff Import Rules Go to BILLING > Tariff Import > Import Rules Click "ADD NEW TARIFF IMPORT RULES" at the top-right corner of the page.
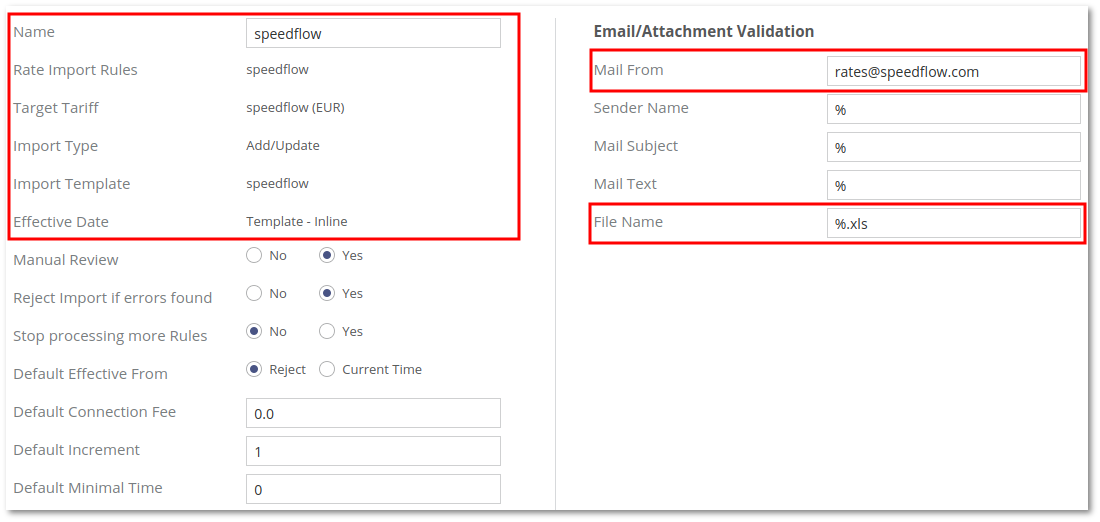
Set fields like this: "Name":"speedflow"; "Rate Import Rules":"speedflow"; "Target Tariff":"speedflow (EUR)". This is a tariff assigned to Speedflow Termination Point; "Import Type":"Add/Update"; "Import Template":"speedflow"; "Effective Date":"Template - Inline" "Mail From":"rates@speedflow.com". This is not an actual email from which Speedflow sends rates. Set the correct email address from which you get tariffs. "File Name":"%.xls"
Click "Create" to save changes
At this point, the system is ready to receive emails from Speedflow.
5. Once an email from Seedflow is received you will see a new Tariff Job waiting for confirmation in Billing > Tariff Import > Jobs.
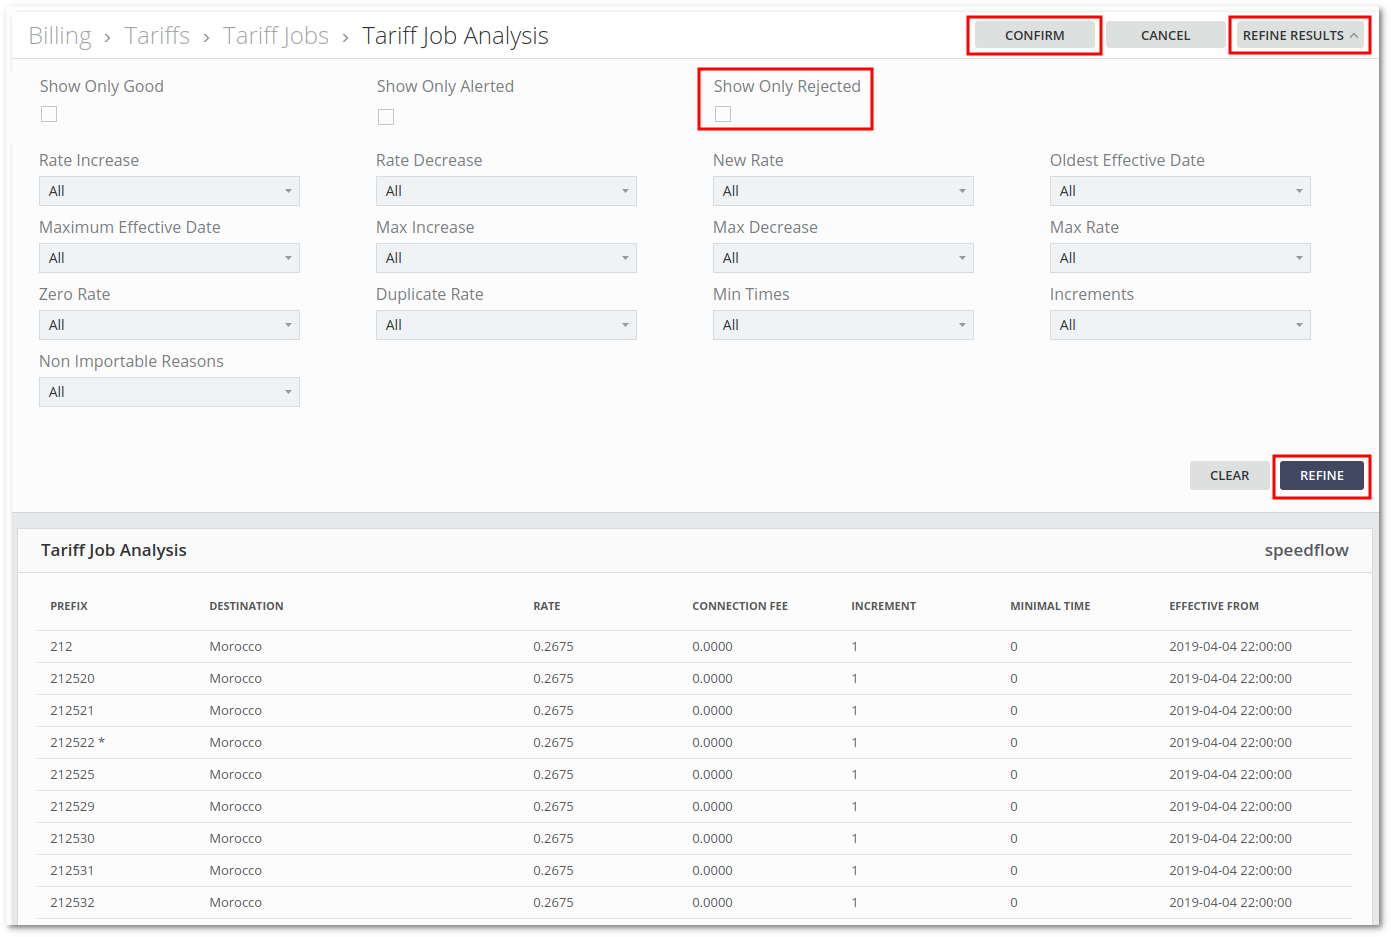
Click "ANALYSIS" to see the rates to be imported. By default, the ANALYSIS page does not show new rates. Click "REFINE RESULTS", uncheck "Show Only Rejected" and click REFINE to see all received rates.
Click "CONFIRM" at the top-right corner of the page to proceed with the import of rates.
In BILLING > Tariffs List, Tariff Import is completed and new Rates are now visible.
