Difference between revisions of "Centos installation"
| Line 95: | Line 95: | ||
# Do as it says EXACTLY (unselect ALL packets). | # Do as it says EXACTLY (unselect ALL packets). | ||
# Reinstall. | # Reinstall. | ||
=See also= | |||
* [[OVH_server_installation|CentOS installation on OVH servers]] | |||
Revision as of 06:11, 29 March 2011
In order to install MOR, you need the Centos 5.2+ system (Install newest version).
First of all, you need to download the Install image. Decide which architecture you need (i386 or x86_64) and download only the first CD out of 6(7), because only the first CD is necessary to install the base system.
How do you choose between i386 (32bit) and x86_64 (64bit)? There is a simple rule: if you have 4gb of RAM or more, choose x86_64 (64bit).
Centos can be downloaded from here: http://mirror.centos.org/centos/5/isos/
As an example, for i386 you should download the file CentOS-5.4-i386-bin-1of6.iso.
For x86_64, download the file CentOS-5.4-x86_64-bin-1of7.iso
Make sure file IS NOT LiveCD and extension is ISO, but not .torrent!
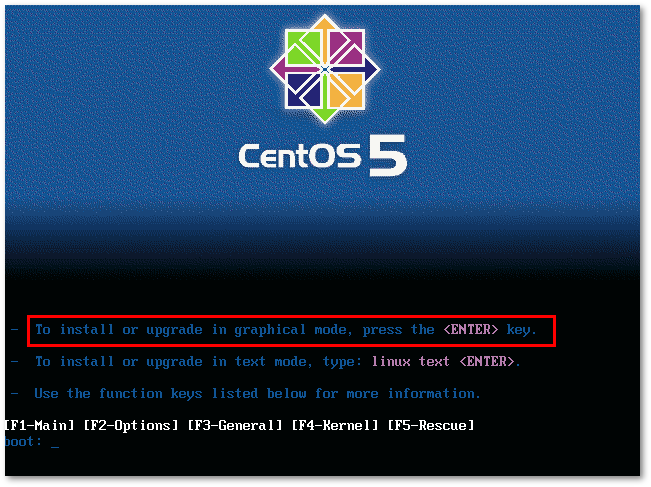
After you burn and boot from this CD, you will see:
Press ENTER here to go to GRAPHICAL MODE (in text mode it is not possible to deselect all the packets).
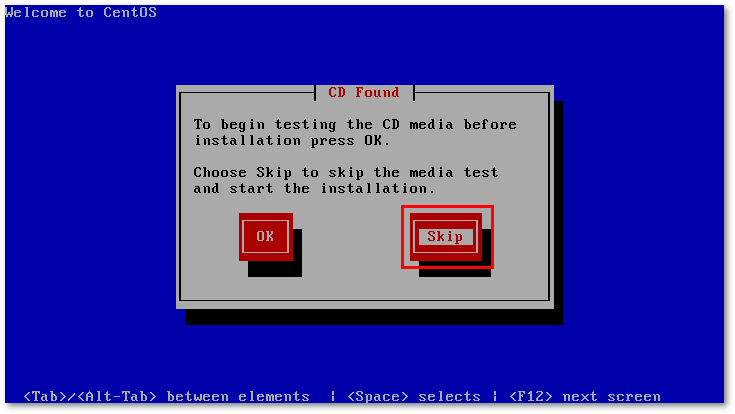
After that you will be asked to test the install CD - let's skip this part to save time:
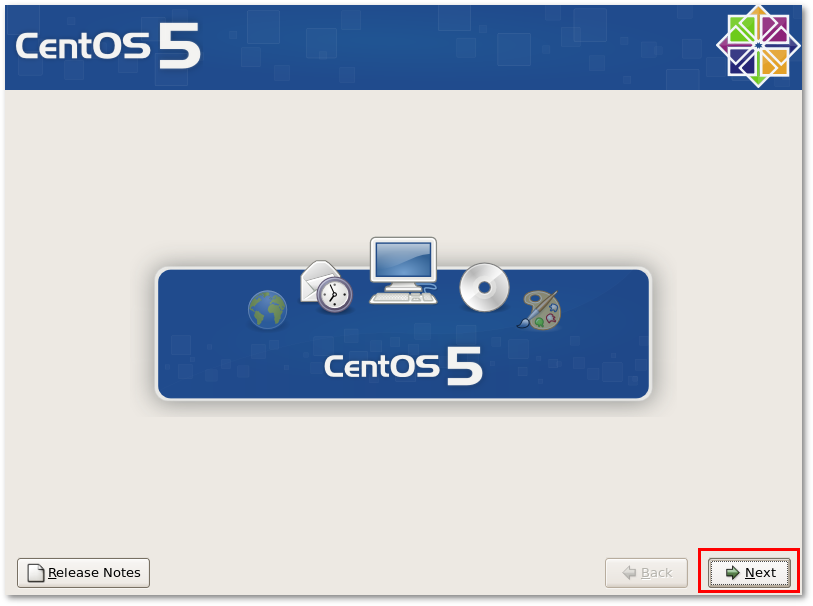
On the main Centos window, press NEXT:
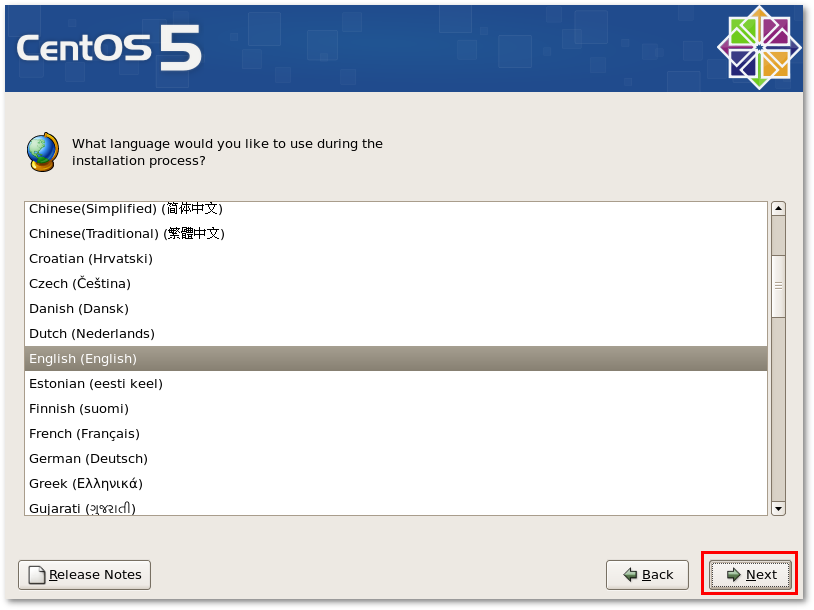
Select your installation language:
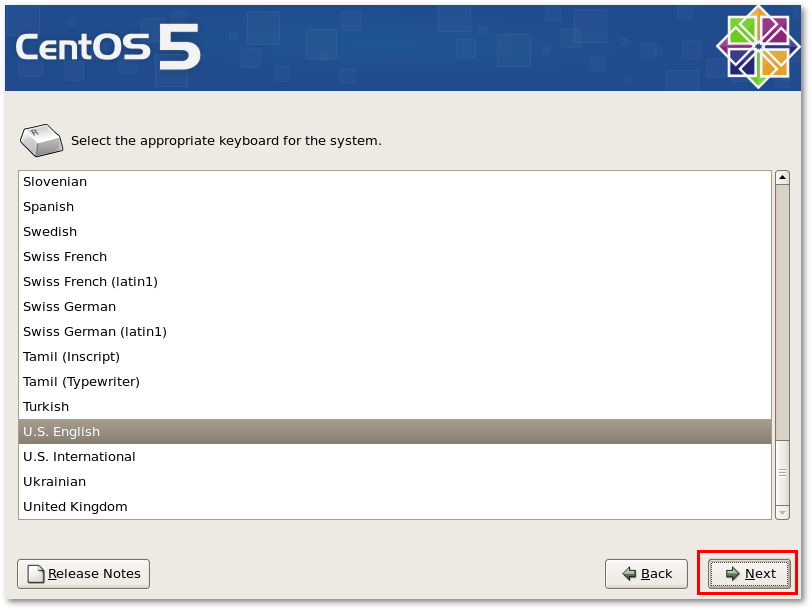
And your keyboard layout:
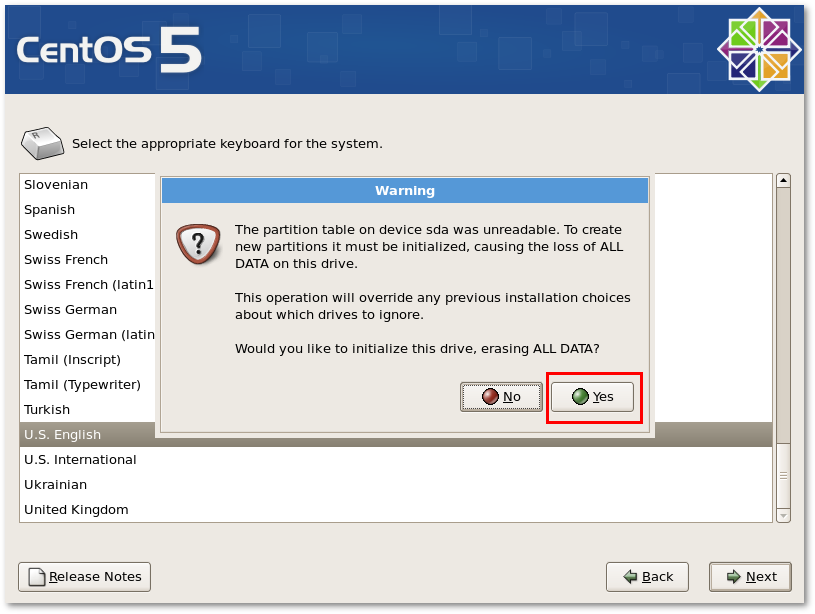
Then your system asks you to reformat your HDD. Make sure you know what you are doing and press YES:
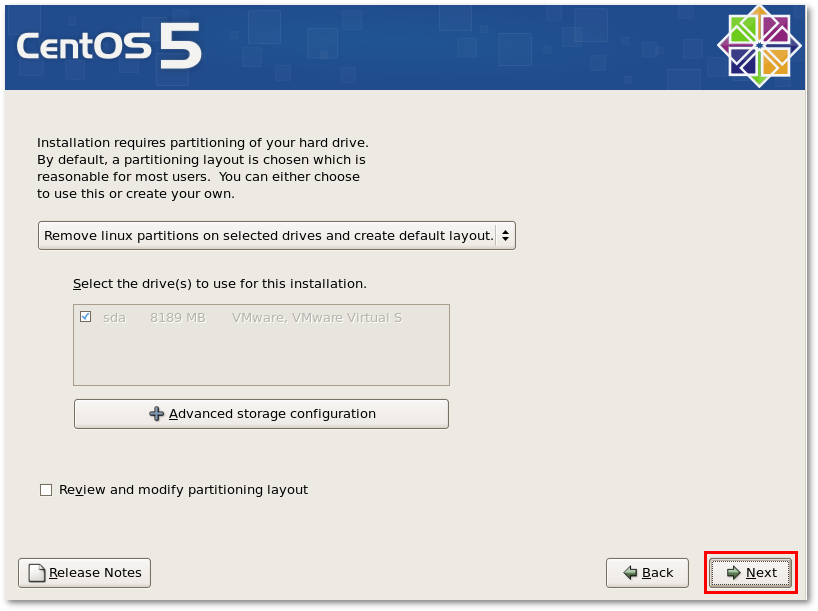
The installer next asks whether the new HDD layout is okay. You can change it if you know what you are doing - we recommend leaving it as it is. Press NEXT:
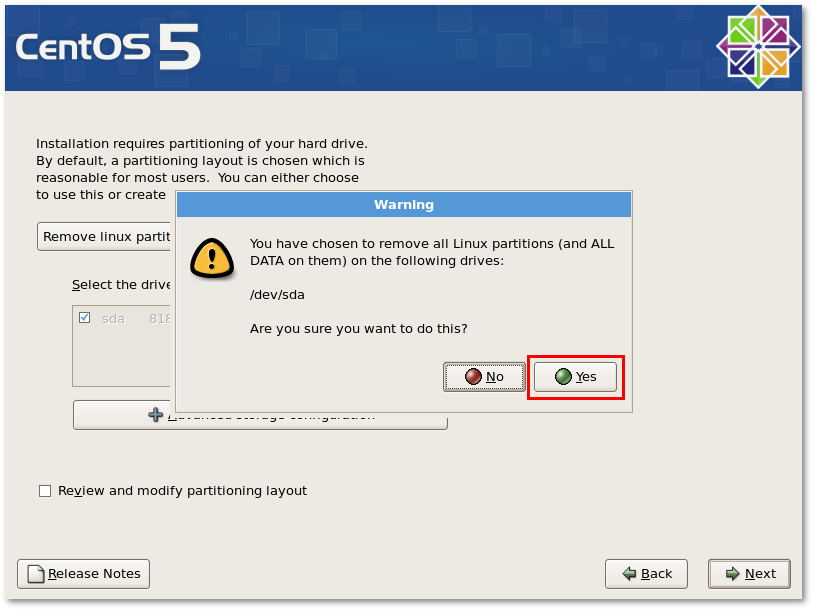
In the next window, confirm your step by pressing YES:
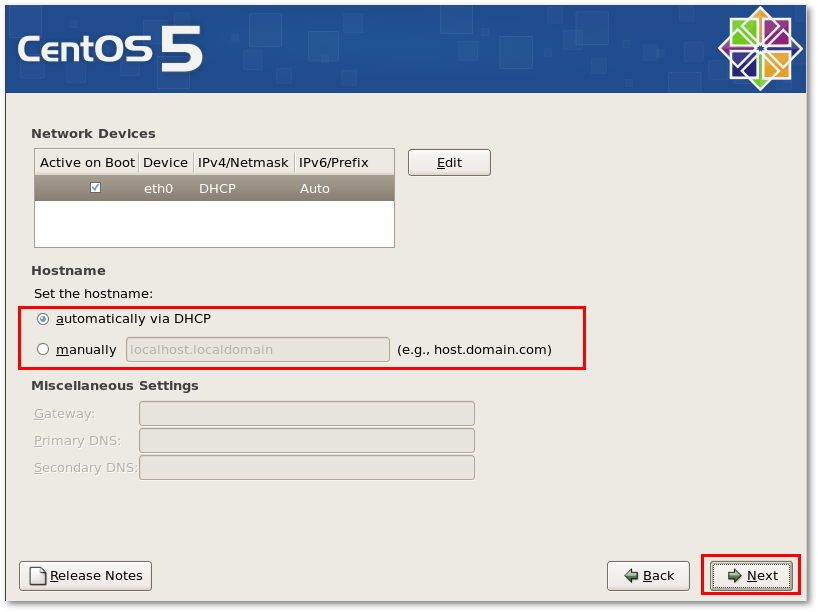
The following window lets you select the network configuration, enter manual details or leave DHCP (manual is recommended):
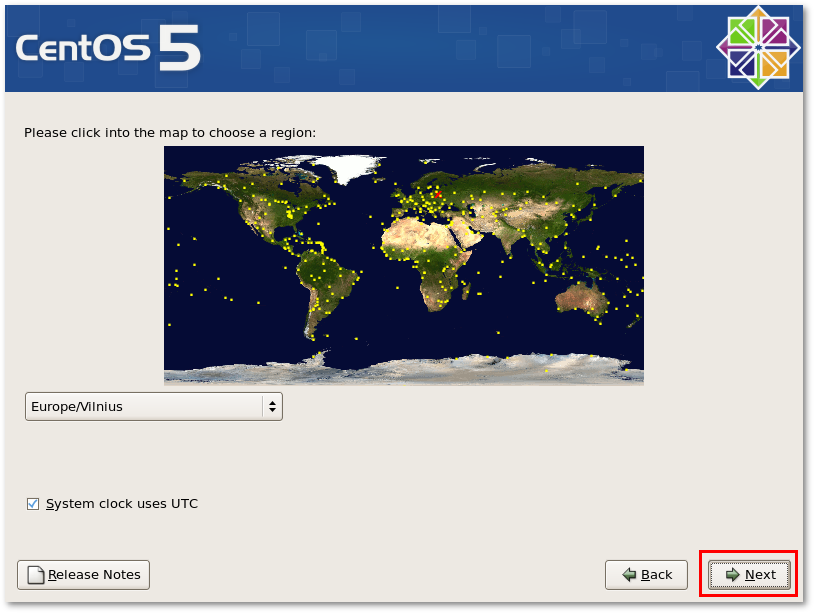
Select your time-zone:
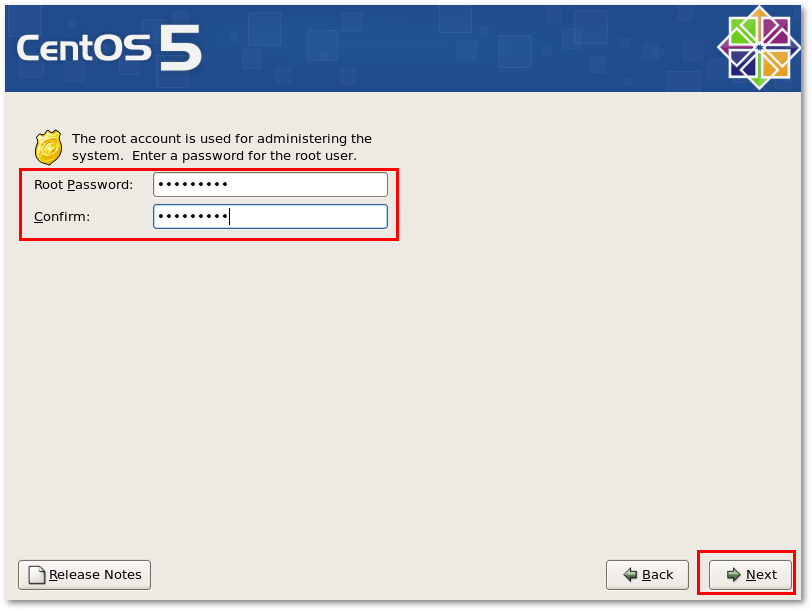
Enter the root password:
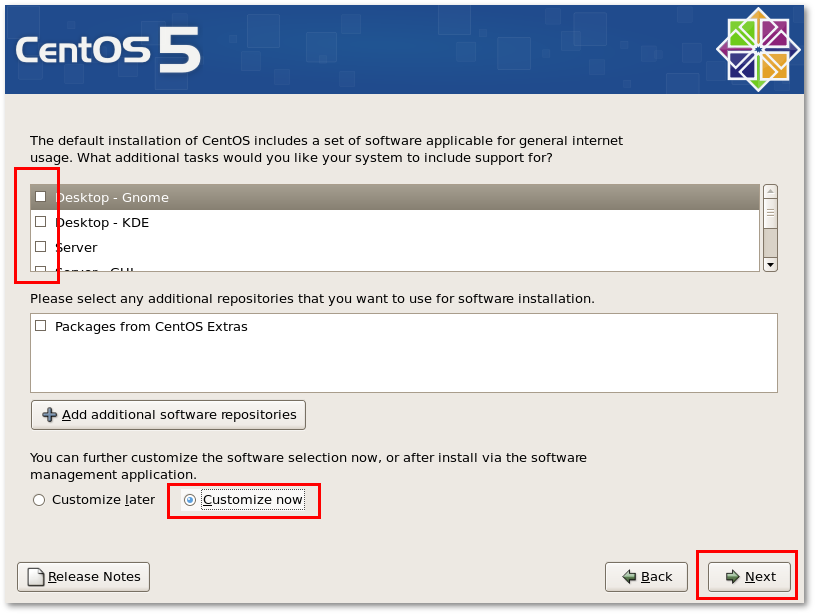
This step is VERY IMPORTANT! Make sure you have unchecked EVERYTHING from package selection, CHECK "Customize now", and press NEXT:
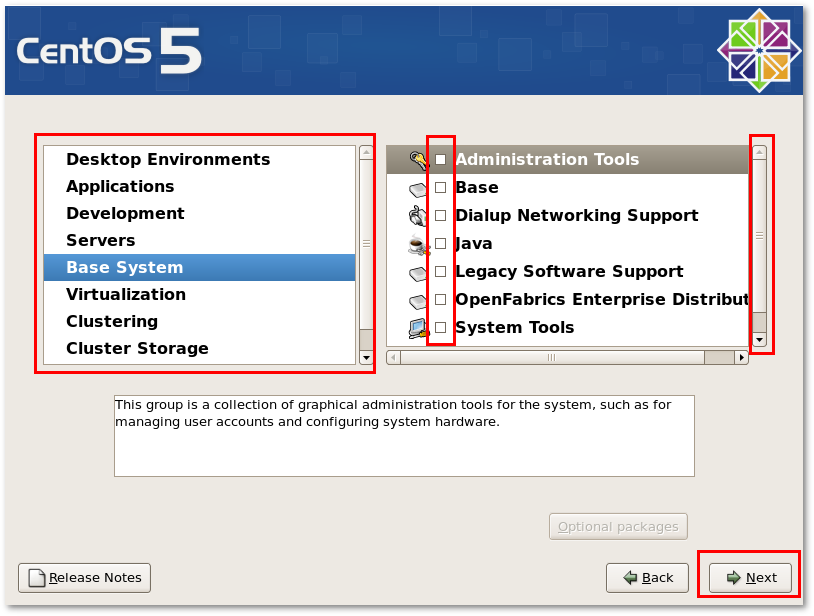
This step is also VERY IMPORTANT! Make sure you have unchecked EVERYTHING again and in ALL categories! Nothing should be left selected - otherwise the installer will ask you for other install CDs. When done, press NEXT:
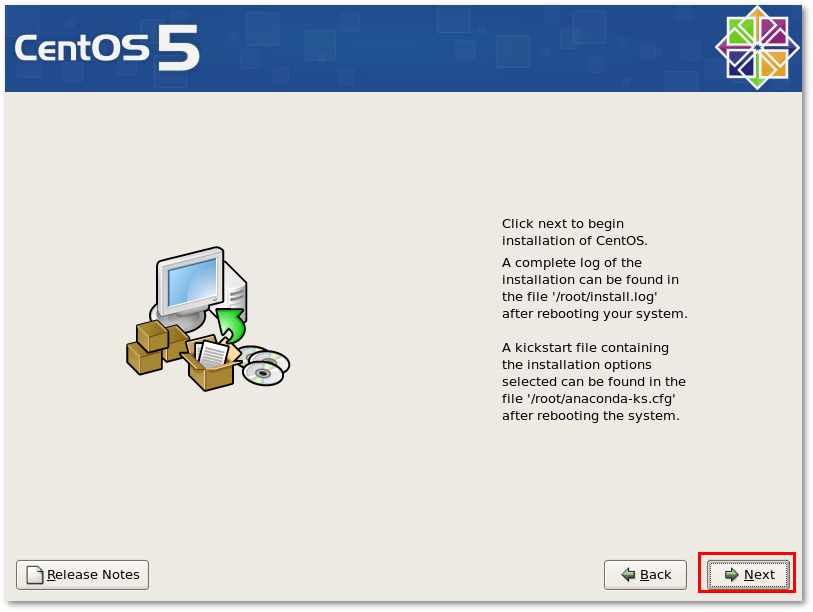
Then you will see the final window, after which installation begins (press NEXT):
Troubleshooting
If the installer is asking you for CD #2, #3, #4, or anything else, it means you failed to UNSELECT all packets, as was pointed out above.
Solution:
- Read the manual carefully once again.
- Do as it says EXACTLY (unselect ALL packets).
- Reinstall.
