Difference between revisions of "LinkPoint"
From Kolmisoft Wiki
Jump to navigationJump to search
| Line 1: | Line 1: | ||
* Set up LinkPoint | |||
Login at the LinkPoint control panel: [https://www.staging.yourpay.com] | |||
Click on "Administration" in the Main Menu Bar. | |||
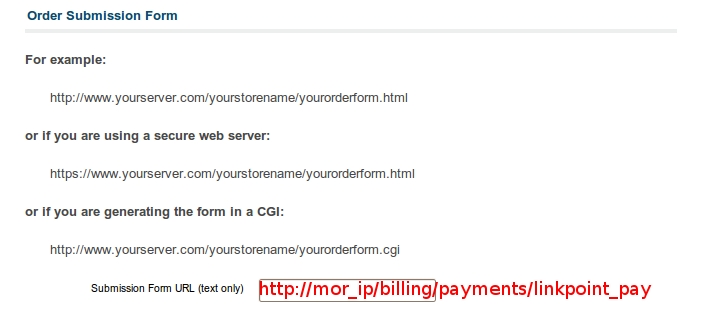
Click on the word "Connect Settings" in the Side Menu Box to enter necessary URLs to enable the product. | |||
[[Image:Lp1.jpg]] | [[Image:Lp1.jpg]] | ||
| Line 13: | Line 15: | ||
[[Image:Lp3.jpg]] | [[Image:Lp3.jpg]] | ||
* Enable LinkPoint in mor. | |||
Login at the MOR. | |||
Click on "Setup" in the Menu Bar. | |||
Click on "Settings" in the Menu Bar. | |||
Click on "Payments" in the Menu Bar. | |||
Click on the word "Linkpoint" to enter storeID and to enable the LinkPoint. | |||
Revision as of 10:26, 6 April 2010
- Set up LinkPoint
Login at the LinkPoint control panel: [1]
Click on "Administration" in the Main Menu Bar.
Click on the word "Connect Settings" in the Side Menu Box to enter necessary URLs to enable the product.
- Enable LinkPoint in mor.
Login at the MOR.
Click on "Setup" in the Menu Bar.
Click on "Settings" in the Menu Bar.
Click on "Payments" in the Menu Bar.
Click on the word "Linkpoint" to enter storeID and to enable the LinkPoint.


