Difference between revisions of "Rate import from CSV"
| Line 113: | Line 113: | ||
* You are now able to specify peak and off-peak periods (hours, minutes, seconds) when importing tariffs for work days and weekdays. | * You are now able to specify peak and off-peak periods (hours, minutes, seconds) when importing tariffs for work days and weekdays. | ||
* Important notice - time periods cannot cover each other. | * Important notice - time periods cannot cover each other. | ||
* | * If for example you upload a tariff from 8am to 12pm. The Tariff that is uploaded on top can only be from 12pm to 8am. | ||
<br><br> | <br><br> | ||
Revision as of 11:43, 21 September 2011
File format
File should be CSV (comma separated values).
Necessary fields in CSV line:
- Prefix
- Price
No other fields are necessary.
First line can be header.
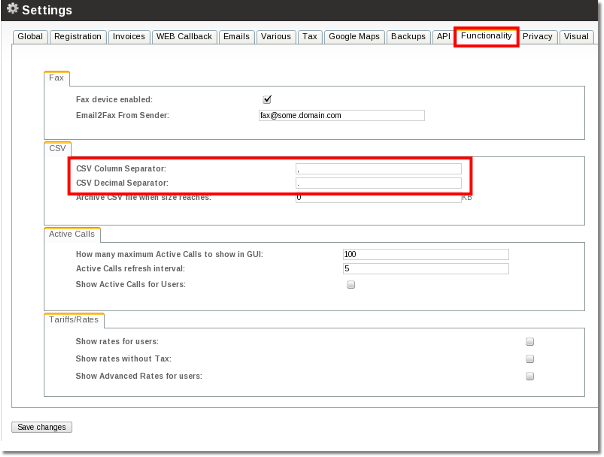
Value Separator and Decimal Separator MUST be set correctly in SETTINGS - Setup - Settings - Functionality:
- CSV Column Separator
- CSV Decimal Separator
File and CSV separator settings should match. If they do not, you will get errors when trying to import file.
Where can I get an example file with available prefixes?
Go to SETTINGS - Billing - Tariffs and click on ![]() Destinations CSV.
Destinations CSV.
Description
It is very tedious work to add several thousand rates by hand, so you can import them from a CSV file.
There are seven steps for importing rates from a CSV file:
- File upload
- Column assignment
- Column confirmation
- Analysis
- Creating destinations
- Updating rates
- Creating new rates
We will cover each of these one by one.
IMPORTANT NOTE: When importing, prefixes should be in E.164 format!!! For example, no international prefixes!
1. File upload
Select ![]() Import from CSV for the Tariff you want to import rates.
Import from CSV for the Tariff you want to import rates.
Then click on Browse and select CSV file with rates. Click Upload file:
2.1 Column assignment - wrong separators detected
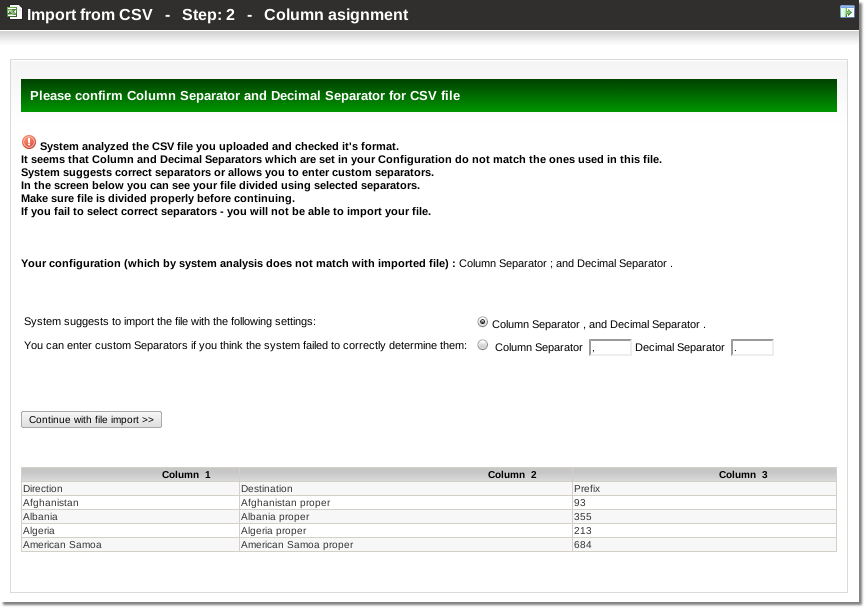
Sometimes the system is able to detect that CSV separators are wrong and suggests you to change them:
2.2 Column assignment
The file is uploaded and the first five lines of the file are available to check:
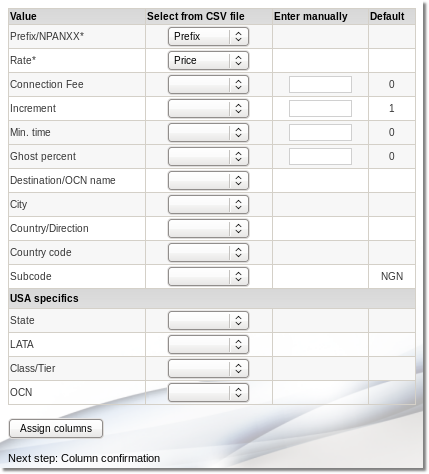
This helps us in the next step, to assign CSV file's columns to MOR's variables. We have the following window:
Here we must assign columns from the CSV file. Prefix and Rate are mandatory fields. All other fields can be empty. Connection Fee, Increment and Min. Time have their defaults. If you wish, you can enter values manually for them. Manually entered values have the highest priority. If you omit them, then MOR inserts values from the CSV file. If there is no assigned column for these fields, then default values will be added to database (DB).
There are a group of values under the name USA specifics. These are only for USA/Canada. Users from these countries need to use these fields with their CSV files.
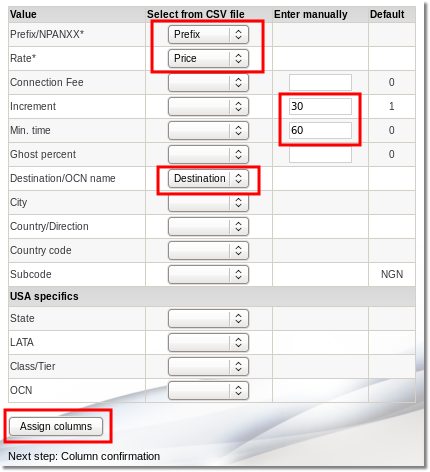
In the following example, we select fields which match our CSV file. Also entered are some manual values for Increment and Min.Time. We count time by 30s increments and minimum time for the call is 60s, with these settings (you can put any values you want/need):
This way of selecting CSV rows and assigning them to MOR values lets us import various CSV file formats.
Rate Day Type
This option is available starting from MOR 9
It is possible to select to which Day Type rates apply before importing them.
So in two steps it is possible to import separate rates for Work Days and Free Days, or (in a single step) to import rates for All Days at once.
On/Off Peak Tariff import
This option is available starting from MOR 10
If you need to import tariffs for on/off peak periods, all you need to do is upload another tariff on top of the one you have with a different
time period.
- You are now able to specify peak and off-peak periods (hours, minutes, seconds) when importing tariffs for work days and weekdays.
- Important notice - time periods cannot cover each other.
- If for example you upload a tariff from 8am to 12pm. The Tariff that is uploaded on top can only be from 12pm to 8am.
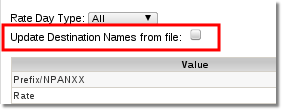
Destination name update on rate import
This option is available starting from MOR 9
When this option is selected destination name is updated from csv file during rate import
3. Column confirmation
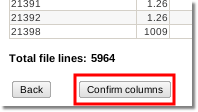
The next step is to review our selection and confirm that everything is correct. We can go Back or forward to the next step:
4. Analysis
It will take some time to accomplish this step. MOR checks many things from DB and CSV files: it compares rates, searches for duplicates, fixes small errors and so on. After the analysis is completed, we get something like this :
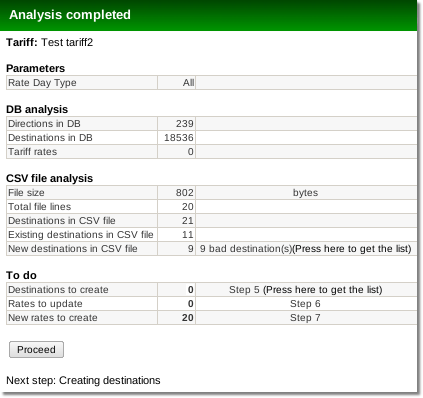
The most interesting line is 3 bad destination(s). We click on the List to check them. In the new window, we can see which destinations are bad and we can decide what to do with them. Is it possible that there are no directions for them, MOR doesn't know to which country to assign this destination, or maybe these destinations have duplicates in CSV file? You have to fix this if you want to import the whole file. Here you can stop and fix your CSV file, or you can ignore these errors and continue.
We continue the demo by clicking Proceed.
The following steps are separated to avoid excessive demands on processing power if a rate file is huge. This keeps the browser from crashing and allows it to successfully import 160.000+ destinations from one CSV file (this has been tested).
5. Creating destinations
MOR creates new destinations here. These destinations are necessary for the rates, which will be added in step 7. This window is just informative, no decisions here:
MOR creates only Destinations for prefixes which are not yet in MOR's DB and determines whether it is possible to find out the Direction (Country) for these new prefixes (Destinations).
This may be done in two ways:
1. The system checks the available prefixes for the best match and selects found Direction as a basis for the new prefix (Destination).
For example: if you try to import the rate for prefix 370630 and this prefix is unknown to MOR, MOR checks the longest matching prefix - 3706 in this case - and finds out that it is Lithuania MOB. So it creates a new Destination with Prefix 370630 in which the Direction will be Lithuania and the subcode MOB (mobile network).
2. If Country code is available in the imported file, MOR assigns this Direction to the newly created Destination.
For example: if again you try to import 370630 and it is unknown to MOR, but you have LTU in same CSV line for Country Code field, MOR will create such a Destination with Direction = Lithuania.
6. Updating rates
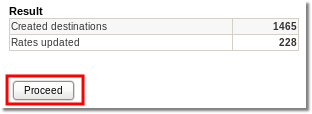
Here MOR updates rates with the values from CSV files. These rates already exist in DB. Just click Proceed:
7. Creating new rates
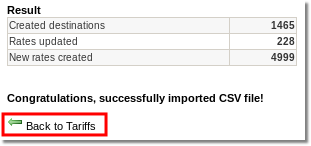
Finally, MOR creates all rates and we are all done!
NOTES
Rate import is VERY CPU-intensive.
If there are a lot of rates, please be patient and let MOR finish its job. It may take some time to count everything and come back to life.
At some point it may seem that browser is not responding. That is not the case – it is just working very hard, importing your very own rates from the CSV file.
If you get a timeout error, try to import the file in smaller pieces.
Destination to create from CSV
When importing rates from the CSV file, you can check which Destinations will be created automatically.
You can view them in a separate window when you click List in step 4 in the field "Destinations to create".
Such destinations do not exist in MOR's database but MOR will create them when importing the rate file.
More info: Integrity Check
Example Videos
<flashow>http://wiki.kolmisoft.com/videos/rates_import_from_csv.swf%7Cwidth=600%7Cheight=455</flashow>
Similar video with different tariff:
<flashow>http://wiki.kolmisoft.com/videos/tariff_import_from_csv.swf%7Cwidth=800%7Cheight=618</flashow>
