Difference between revisions of "Basic and OLD Call Shop functionality"
m |
|||
| Line 1: | Line 1: | ||
= >> [[Call_Shop_Addon | Call Shop was rewritten from scratch, press here to get more information]] << = | |||
= Definition = | = Definition = | ||
Revision as of 10:06, 23 August 2010
>> Call Shop was rewritten from scratch, press here to get more information <<
Definition
MOR is not used in Call Shops very often but has some BASIC Call Shop functionality, which is described here.
The main idea is to have several Phone Booths (we will call them "Users‟) which are allowed to dial out. Subsequently they are billed for the calls they have made.
Setup
First of all we need to create a new Group for Call Shop.
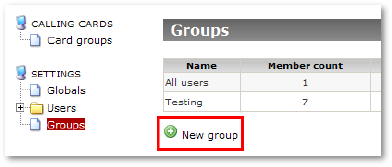
Select SETTINGS – Groups – New group.
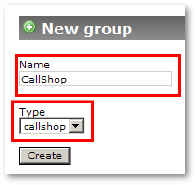
Enter a name for the Call Shop (“CallShop” in the example) and select Type as “callshop”. Click Create.
Now we have a group which will be used for Call Shop. We need to add some members to this group.
A member is a User in MOR terms. Let's add them.
Click on Members for the CallShop group:
Each group can have different types of members. A member can be “Manager” and “User”. The Manager will manage the group. A Group can have several managers.
Let's add Manager for our Call Shop. Usually this will be “System Admin”.
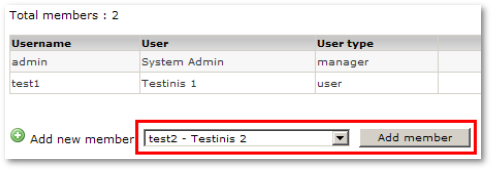
Make sure in the selection list Add new member that “admin – System Admin” is selected and click the Add member button:
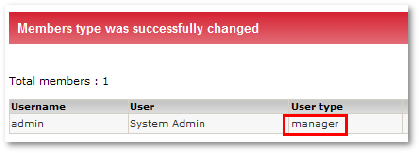
When a new member is added, its type is "User‟. Let's change it to "Manager‟.
Click on Change type for our only user:
Now we have a manager for our group:
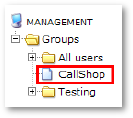
Also, instantly we have new controls for the CallShop group under MANAGEMENT, because we are logged in as "System Admin‟.
Now we need some users for full Call Shop functionality. These users will do the actual calling.
We add them in same way as our manager, but we leave their type as "user‟:
And second:
Now we have three members - one manager and two users:
The setup is complete. If users have the correct setup (devices, tariffs, LCRs, etc) and they can dial out, then we can start using our Call Shop.
Operation
Now we go to MANAGEMENT – Groups – CallShop and we see our main Call Shop management window:
- Here you can select the period you want to check. It's saved in your browser's memory and if you go to other pages, you will have this period selected automatically.
- Calls/Duration are for the selected period.
- Login shows the last login time of the user. If it's empty, the user is not logged in and can't call. If you click on login time, you will get a detailed list from that login time till the current moment.
- Login duration – for how long the user has been logged in.
- Here are controls which lets you login/logout the user, and at the same time allow him to call or disallow him from calling.
- By clicking on this link, you will get a detailed list of calls in the selected period.
- Here you will get list of logins in the selected period, grouped by days.
The main procedure is as follows:
- A new person comes to your callshop and wants to call.
- You select "free user" in the Call Shop management window and click the “Login” button (5), allowing calls from this Call Booth.
- The person goes to this Call Booth, which represents a user on the management interface, and starts calling.
- When he finishes, he comes back to you (the manager).
- You click Login time (3) for this user and you get a list with all the user's calls.
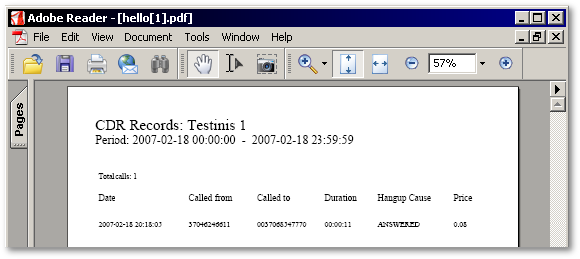
- You can get a PDF report for the user's calls, print it and give it to the user.
- The user pays for the calls.
- You click “Logout” (5) for his Phone Booth, ending this session.
When you click on Login time (3):
you will get a call list from this login time till the current moment:
Here you can click on Export to PDF to get the same result in PDF format:
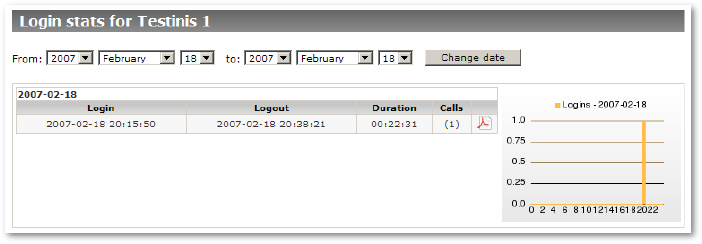
When you click on “Logins” (7), you will get the Logins window:
Here you will find a graphical representation and all login sessions, with the ability to get a call list for all of them.
