Difference between revisions of "Centos7 installation"
| Line 25: | Line 25: | ||
<br><br> | <br><br> | ||
1) Press on DATE & TIME and set your timezone. | 1) Press on DATE & TIME and set your timezone. | ||
2) Press on NETWORK & HOSTNAME and press ON. | 2) Press on NETWORK & HOSTNAME and press ON. | ||
3) Press on INSTALLATION DESTINATION and it will lead to next window: | 3) Press on INSTALLATION DESTINATION and it will lead to next window: | ||
<br><br> | <br><br> | ||
Revision as of 13:51, 16 December 2019
In order to install latest MOR versions with Asterisk 15 support, you need the Centos 7 system (Install newest CentOS 7 version).
First of all, you need to download the Install image of x86_64 minimal iso.
Centos can be downloaded from here: http://isoredirect.centos.org/centos/7/isos/x86_64/ (we recommend downloading latest releases).
As an example, you should download the file CentOS-7-x86_64-Minimal-1908.iso.
Make sure file IS NOT LiveCD and extension is ISO, but not .torrent!
After you burn and boot from this CD, you will see:
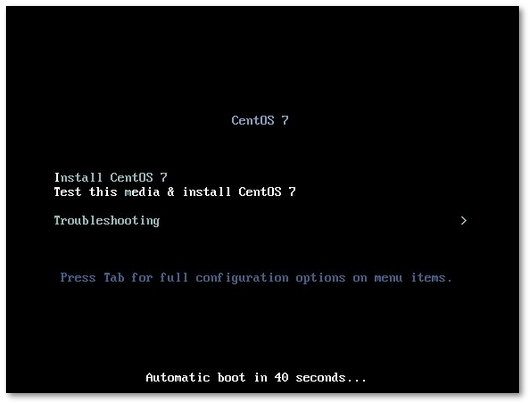
Choose Install CentOS 7 and press enter.
Now select your language here and click Continue:
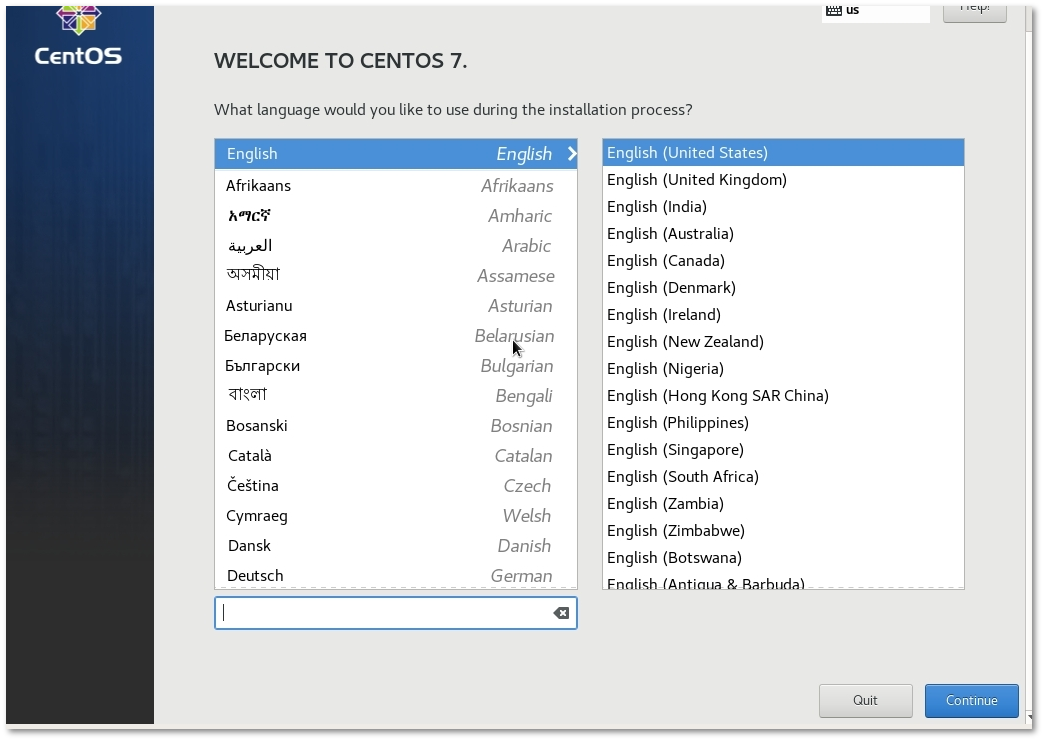
After language is selected you will see following window:
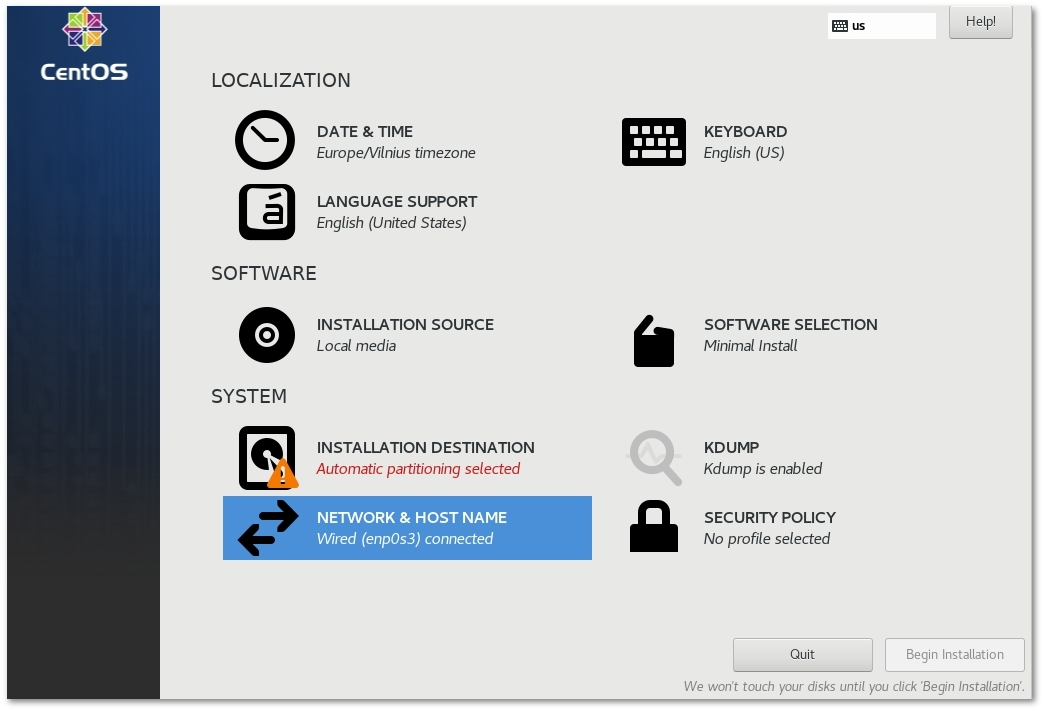
1) Press on DATE & TIME and set your timezone.
2) Press on NETWORK & HOSTNAME and press ON.
3) Press on INSTALLATION DESTINATION and it will lead to next window:
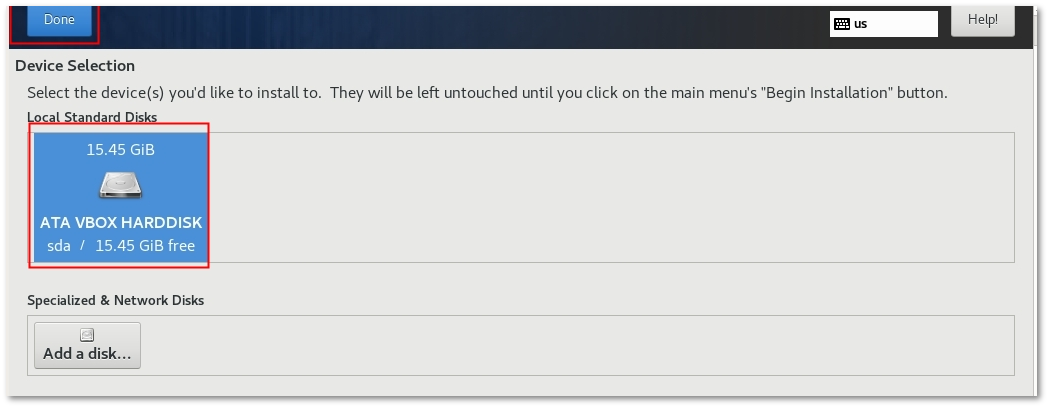
Select disc to install and press Done.
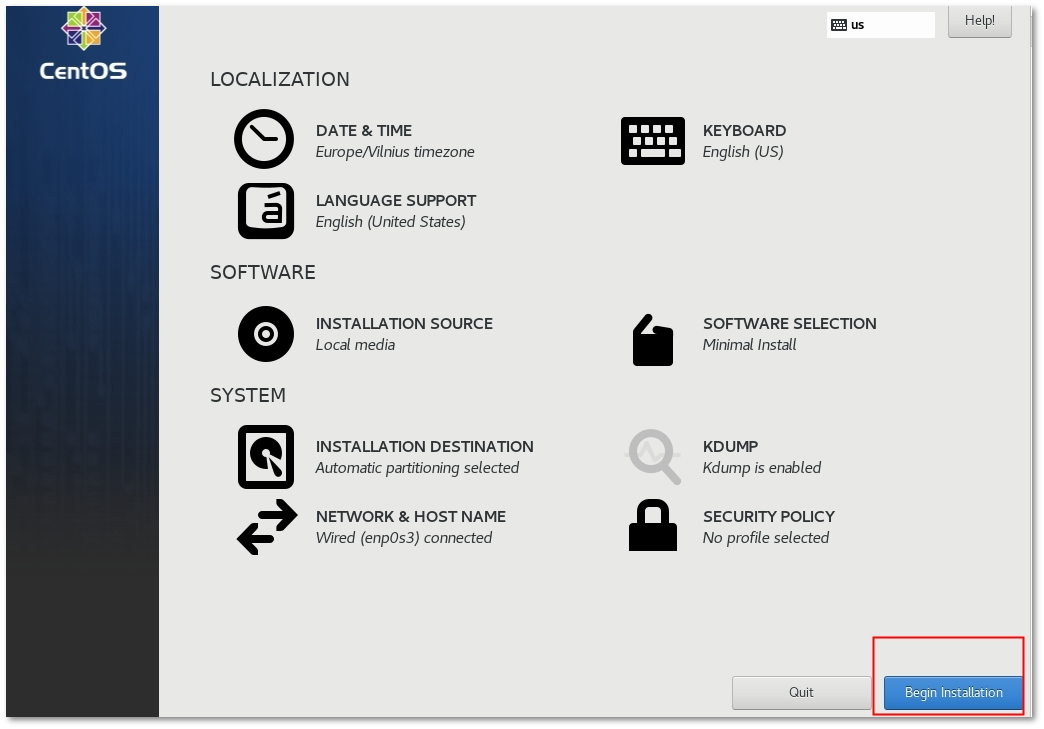
Everything is ready for Installation. Press Begin Installation:
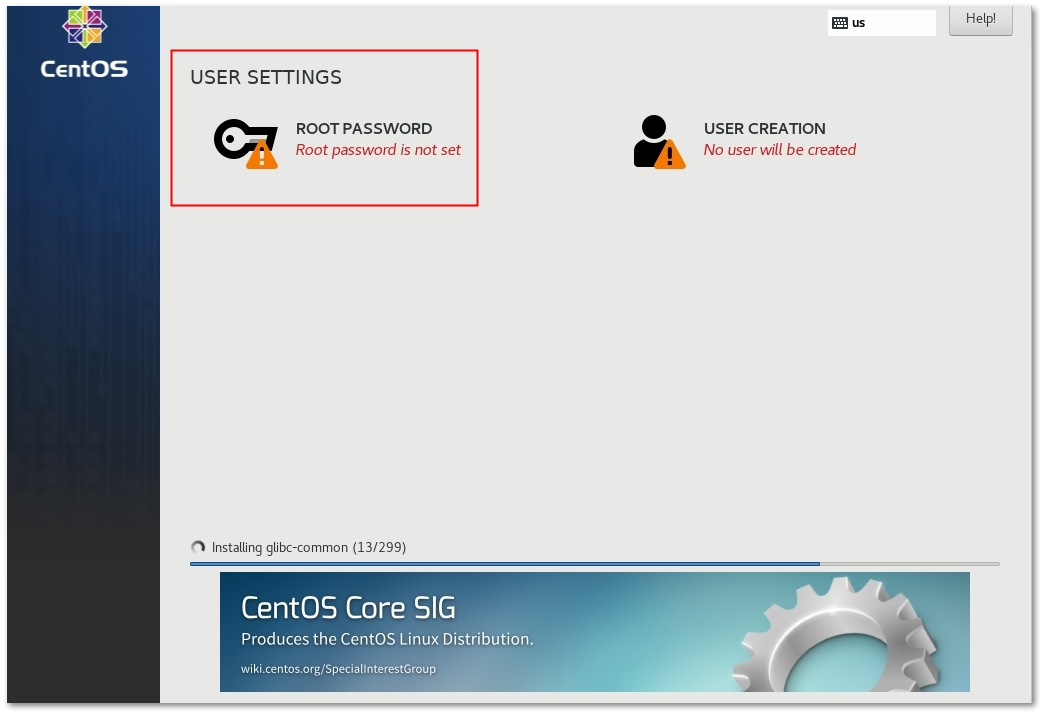
While installation is running you can create Root password:
After installation is completed, reboot the system:

After reboot your computer you will get a login screen. Just type root as user name and your password.
