Difference between revisions of "2Checkout.com technical details"
From Kolmisoft Wiki
Jump to navigationJump to search
(Created page with '=Description= right 2Checkout is one of Payment Gateways types. Official page http://www.2checkout.com <br><br> =Configuration= Go to '''ADDONS –…') |
|||
| Line 5: | Line 5: | ||
=Configuration= | =Configuration= | ||
Go to '''ADDONS –> Payment gateways''' and click on 2Checkout logo. Configuration settings will appear: | Go to '''ADDONS –> Payment gateways''' and click on 2Checkout logo. | ||
<br><br> | |||
[[File:payment_gateways_path.png]] | |||
<br><br> | |||
Configuration settings will appear: | |||
<br><br> | <br><br> | ||
[[Image:2checkout.png]] | [[Image:2checkout.png]] | ||
Latest revision as of 09:16, 31 May 2013
Description
2Checkout is one of Payment Gateways types. Official page http://www.2checkout.com
Configuration
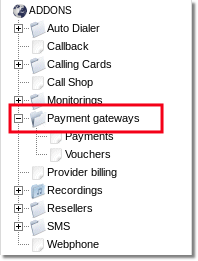
Go to ADDONS –> Payment gateways and click on 2Checkout logo.
Configuration settings will appear:
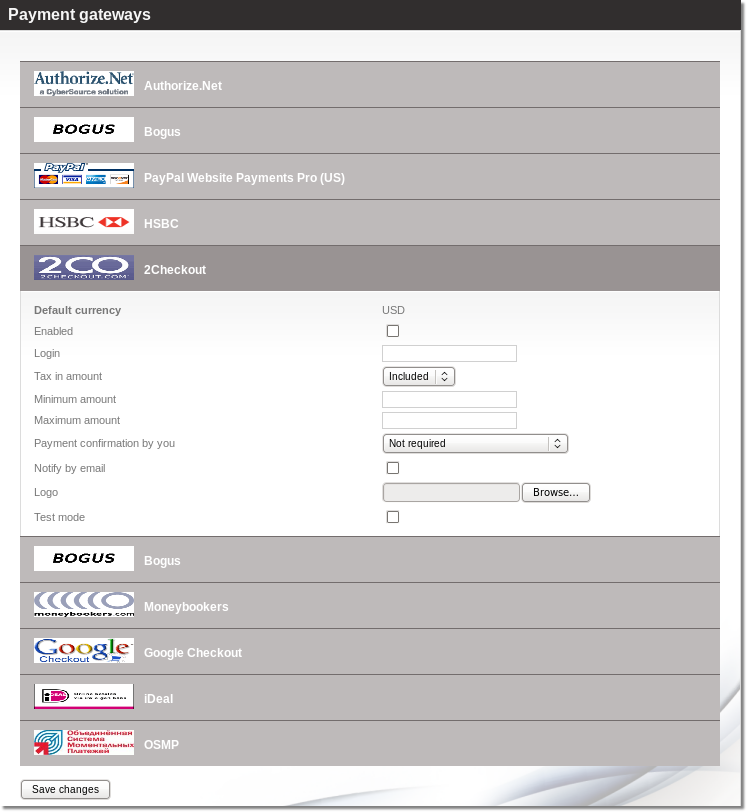
- Default currency – default system currency will be used for payments.
- Enabled – check to activate 2Checkout Payment Gateway.
- Login – username of 2Checkout.com account.
- Tax in amount – "Include" tax into amount that user has to pay or "Exclude" if you want to exclude the tax from the amount that is added to user's balance.
- Minimum amount – minimum amount which should be paid.
- Maximum amount – maximum amount which client should be able to pay.
- Payment confirmation by you
- Not required – No confirmation is required. Every payment is added to clients balance immediately.
- Required for suspicious payments – currently iDeal doesn't provide enough info to calculate suspiciousness.
- Required for all payments – When payments are completed they must be confirmed manually.
- Notify by email – check if you want to be notified by email after each payment.
- Logo – you can choose your own logo, which will be on the Start Page.
- Test mode – Turns on the test mode. Use this option only if you know what you are doing. In test mode MOR will send payment requests to bank's test environment, so the payments will not transfer actual money. On the other hand MOR still counts these payments as real and updates user's balance.
Additional Configuration
2checkout needs some additional configuration on your side. In order to make it work, you should login to your vendor account in 2checkout's site and do the following:
- Go to "Account" -> "Site Management"
- Set "Demo Setting" option to "Parameter".
- Set "URL*" setting to your MOR GUI address, that is: "http://YOUR_IP/billing/"
- Verify that "After completing an order, buyers should be:" setting is set to "Given links back to my website".
- Set "Approved URL" to: "http://YOUR_IP/billing/payment_gateways/integrations/two_checkout/notify".
- Set "Pending URL" to "http://YOUR_IP/billing/payment_gateways/integrations/two_checkout/pending"
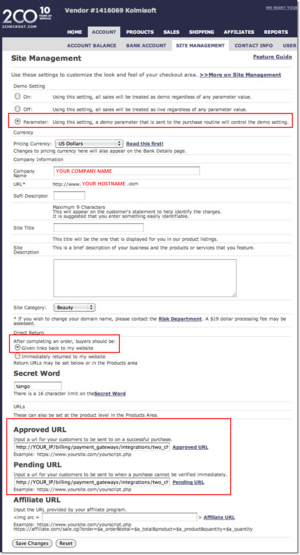
Press several times to enlarge this picture.
Usage
If 2Checkout Payment Gateways is enabled, Users are able to see 2Checkout logo on their Start Page.
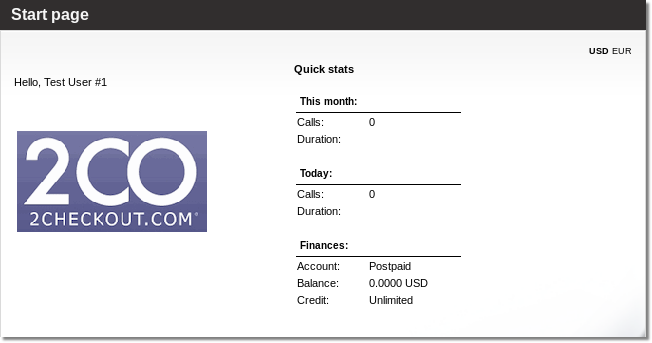
User have to click on logo to add a payment
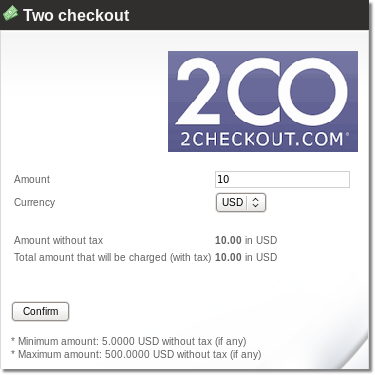
After confirmations from GUI, User will be redirected to 2Checkout.com

