Difference between revisions of "Debian Etch installation"
| (5 intermediate revisions by 2 users not shown) | |||
| Line 1: | Line 1: | ||
Here we | Here we show step-by-step installation of the Debian Etch system for MOR. | ||
The guide contains only the necessary packages. | |||
An installation CD image can be downloaded from: http://www.debian.org/CD/netinst/ | |||
As | As an example, for the i386 platform we will use: http://cdimage.debian.org/debian-cd/4.0_r3/i386/iso-cd/debian-40r3-i386-businesscard.iso | ||
---- | |||
If your hardware is very new, it is possible that Etch will not understand some components - SCSI HDD, network card or similar. | |||
In this case, download Debian Lenny(testing) from: http://www.debian.org/devel/debian-installer/, example: http://cdimage.debian.org/cdimage/lenny_di_beta1/i386/iso-cd/debian-testing-i386-businesscard.iso | |||
---- | |||
It is very small - about 32 Mb. Download it, burn it to CD and start your installation from it. | |||
The following screens will appear during installation. | |||
Please follow our comments between images. | Please follow our comments between images. | ||
| Line 17: | Line 25: | ||
<br> | <br> | ||
Press Enter in this screen | Press Enter in this screen. | ||
[[Image:ide1.jpg]] | [[Image:ide1.jpg]] | ||
Choose English language | Choose English language. | ||
[[Image:ide2.jpg]] | [[Image:ide2.jpg]] | ||
Choose country your server is in | Choose the country your server is in. | ||
[[Image:ide3.jpg]] | [[Image:ide3.jpg]] | ||
Select American English | Select American English. | ||
[[Image:ide4.jpg]] | [[Image:ide4.jpg]] | ||
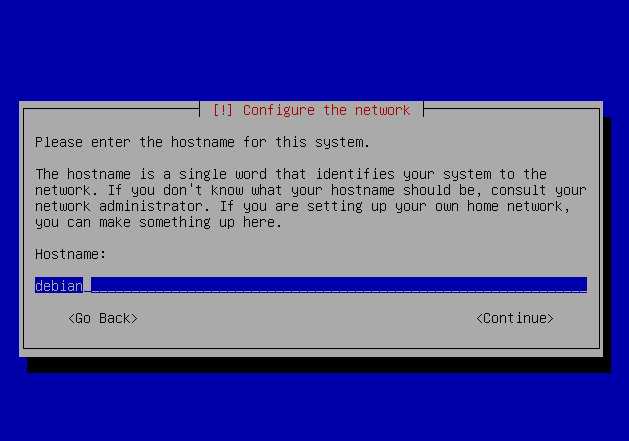
Put any hostname you want | Put any hostname you want. | ||
[[Image:ide5.jpg]] | [[Image:ide5.jpg]] | ||
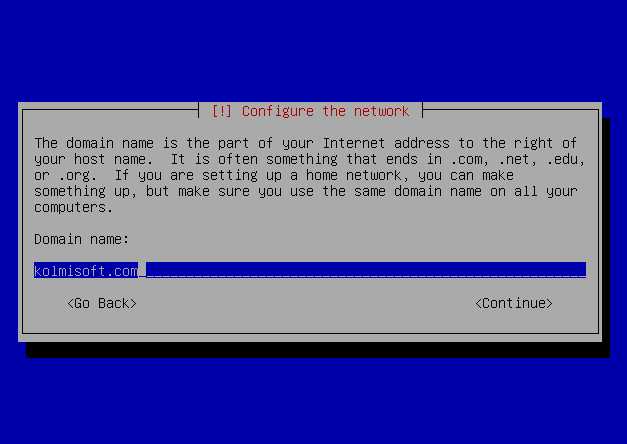
Enter your domain name | Enter your domain name. | ||
[[Image:ide6.jpg]] | [[Image:ide6.jpg]] | ||
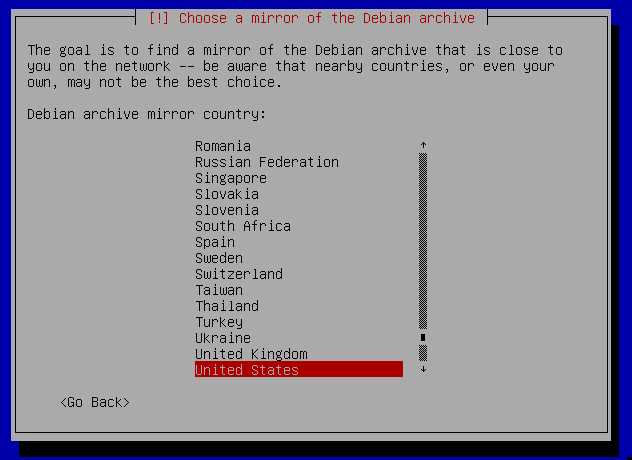
Choose country your server is in or nearest country with possible best internet access to your server (we will download packages from there) | Choose the country your server is in or the nearest country with possible best internet access to your server (we will download packages from there). | ||
[[Image:ide7.jpg]] | [[Image:ide7.jpg]] | ||
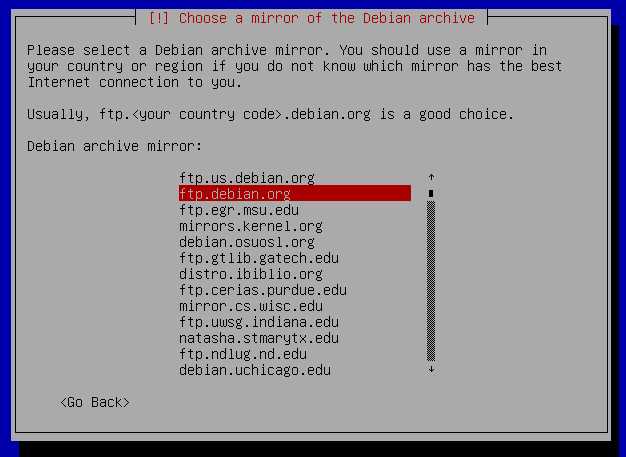
Select 1 mirror from available ones | Select 1 mirror from available ones. | ||
[[Image:ide8.jpg]] | [[Image:ide8.jpg]] | ||
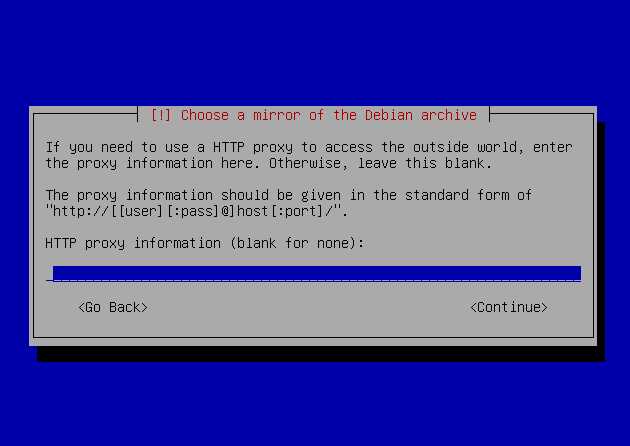
Press Enter if you do not have HTTP proxy, | Press Enter if you do not have an HTTP proxy; otherwise, enter the necessary info. | ||
[[Image:ide9.jpg]] | [[Image:ide9.jpg]] | ||
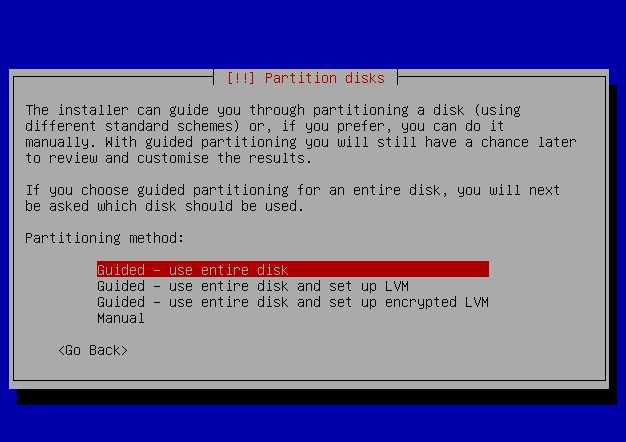
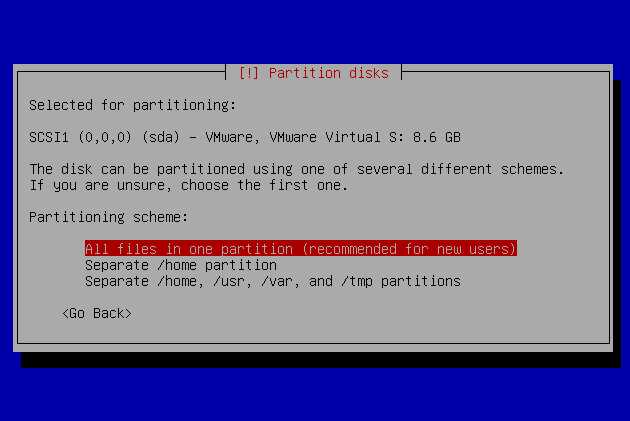
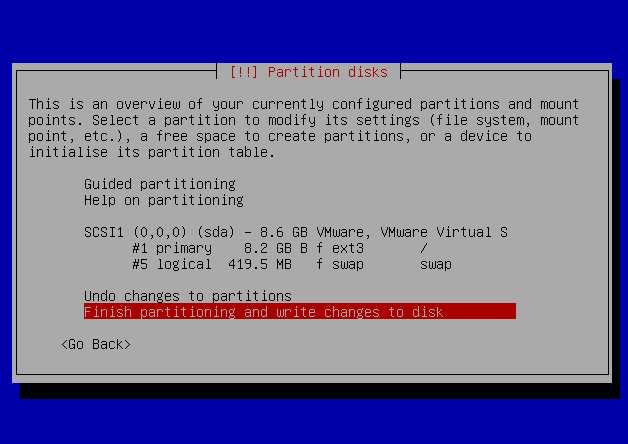
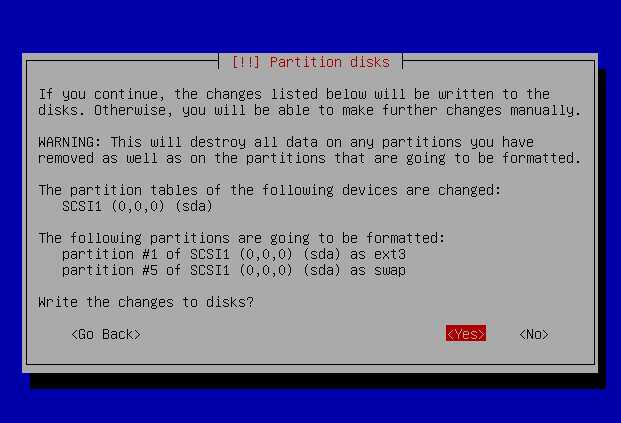
At this point, you should decide how you want to partition your HDD. In our examples, this is done by the simplest method. If you know what you are doing, make your adjustments. | |||
[[Image:ide10.jpg]] | [[Image:ide10.jpg]] | ||
| Line 84: | Line 92: | ||
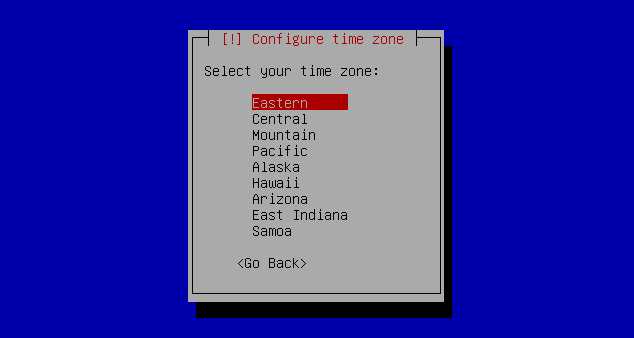
Select your timezone | Select your timezone. | ||
[[Image:ide15.jpg]] | [[Image:ide15.jpg]] | ||
| Line 110: | Line 118: | ||
[[Image:ide21.jpg]] | [[Image:ide21.jpg]] | ||
[[Image:ide22.jpg]] | [[Image:ide22.jpg]] | ||
IMPORTANT! Deselect everything before continuing! | |||
[[Image:ide23.jpg]] | [[Image:ide23.jpg]] | ||
[[Image:ide24.jpg]] | [[Image:ide24.jpg]] | ||
[[Image:ide25.jpg]] | [[Image:ide25.jpg]] | ||
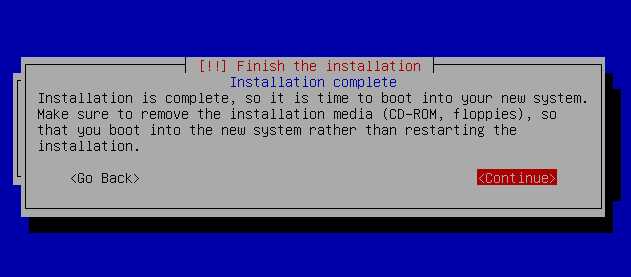
After reboot, you will be able to login to your newly installed system. | |||
Enter 'root' and your password to login. | |||
Then type the command: | |||
apt-get -y install ssh | |||
You can also edit /etc/network/interfaces to change IP of the server. | |||
After all these steps, your system is ready for MOR PRO installation. | |||
Latest revision as of 12:18, 29 April 2010
Here we show step-by-step installation of the Debian Etch system for MOR.
The guide contains only the necessary packages.
An installation CD image can be downloaded from: http://www.debian.org/CD/netinst/
As an example, for the i386 platform we will use: http://cdimage.debian.org/debian-cd/4.0_r3/i386/iso-cd/debian-40r3-i386-businesscard.iso
If your hardware is very new, it is possible that Etch will not understand some components - SCSI HDD, network card or similar.
In this case, download Debian Lenny(testing) from: http://www.debian.org/devel/debian-installer/, example: http://cdimage.debian.org/cdimage/lenny_di_beta1/i386/iso-cd/debian-testing-i386-businesscard.iso
It is very small - about 32 Mb. Download it, burn it to CD and start your installation from it.
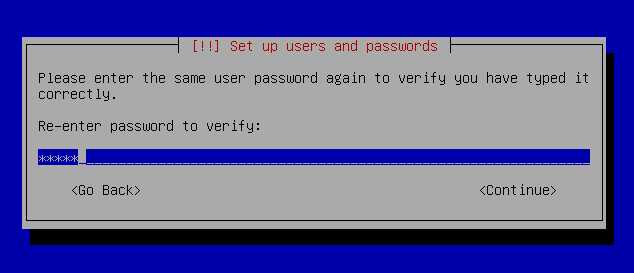
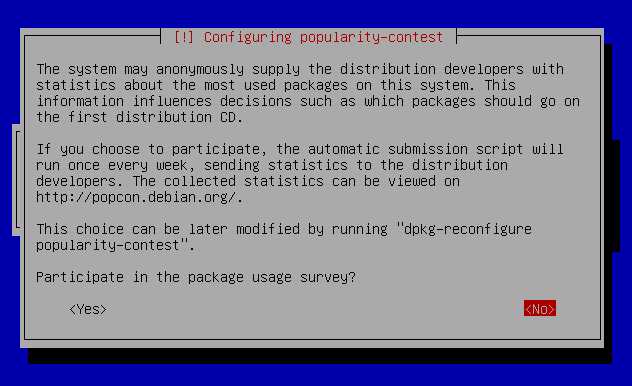
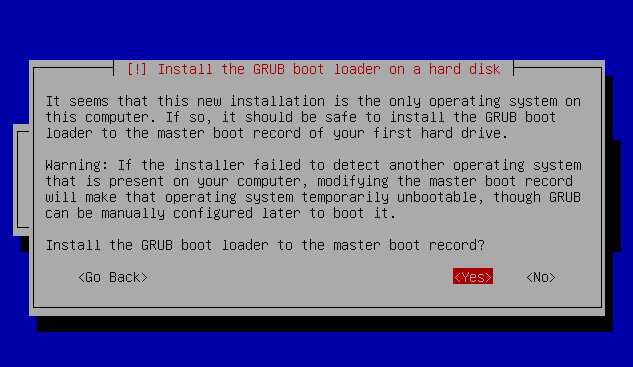
The following screens will appear during installation.
Please follow our comments between images.
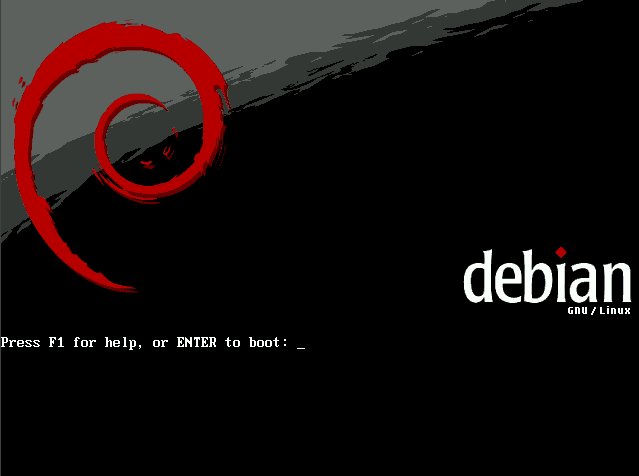
Press Enter in this screen.
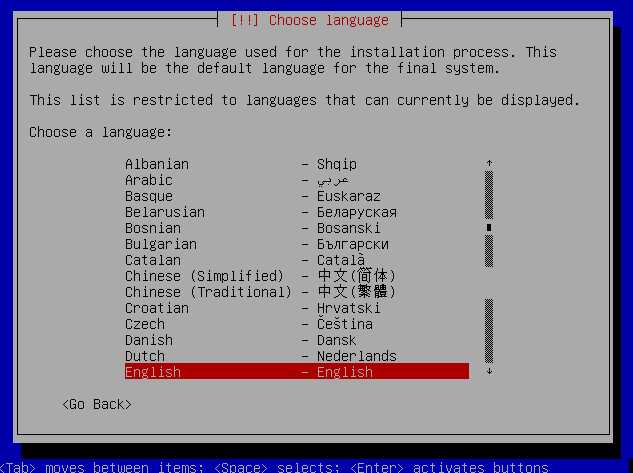
Choose English language.
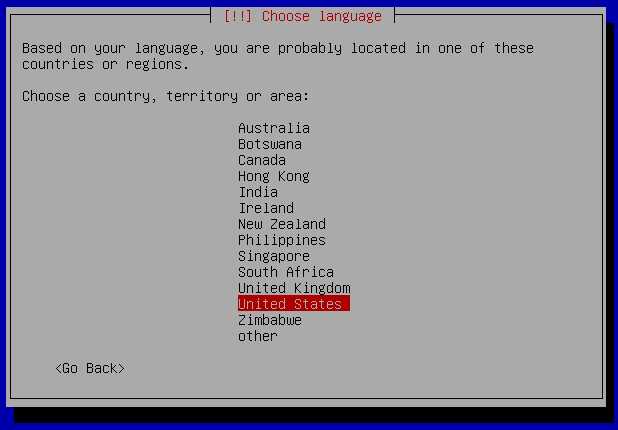
Choose the country your server is in.
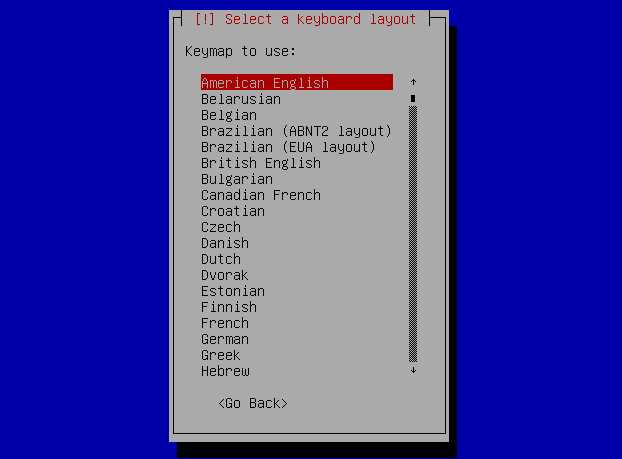
Select American English.
Put any hostname you want.
Enter your domain name.
Choose the country your server is in or the nearest country with possible best internet access to your server (we will download packages from there).
Select 1 mirror from available ones.
Press Enter if you do not have an HTTP proxy; otherwise, enter the necessary info.
At this point, you should decide how you want to partition your HDD. In our examples, this is done by the simplest method. If you know what you are doing, make your adjustments.
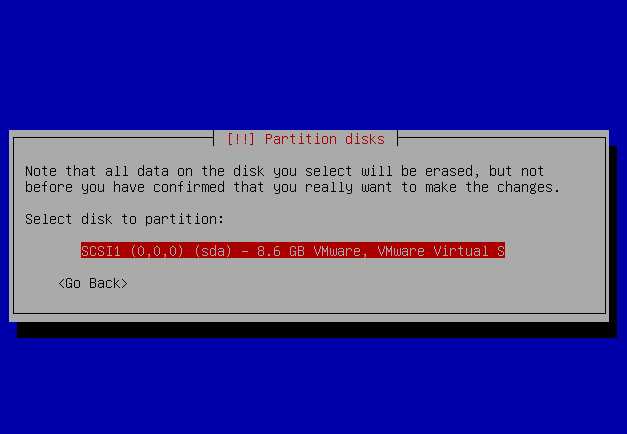
For example we use VMWare. You should select your HDD on which you want to install Debian.
Select your timezone.
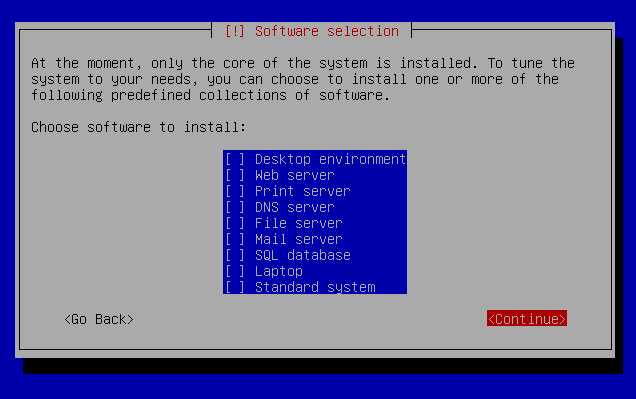
IMPORTANT! Deselect everything before continuing!
After reboot, you will be able to login to your newly installed system.
Enter 'root' and your password to login.
Then type the command:
apt-get -y install ssh
You can also edit /etc/network/interfaces to change IP of the server.
After all these steps, your system is ready for MOR PRO installation.
