Difference between revisions of "Cloudflare configuration for GUI DDoS Protection"
| (4 intermediate revisions by one other user not shown) | |||
| Line 2: | Line 2: | ||
=Description= | =Description= | ||
'''Cloudflare''' is a third-party company (not related to | '''Cloudflare''' is a third-party company (not related to Kolmisoft) that offers basic free Web DDoS Protection. This guide will show how to configure MOR GUI with Cloudflare protection. | ||
Make sure to read the notes below to decide if Cloudflare Web DDoS Protection is suitable in your case. | Make sure to read the notes below to decide if Cloudflare Web DDoS Protection is suitable in your case. | ||
== Important Notes == | == Important Notes == | ||
* This guide shows only how to configure basic Web DDoS Protection (HTTP and HTTPS) using the domain name. '''It will have no effect if DDoS attack uses other protocols'''. | * This guide shows only how to configure basic Web DDoS Protection (HTTP and HTTPS) using the domain name. '''It will have no effect if DDoS attack uses other protocols'''. | ||
* After configuration, switch GUI domain name will point to Cloudflare IPs. This means that the domain name can be used only for GUI access, it is not possible to use the same domain for GUI and SIP traffic. Any other non GUI traffic (for example SSH), will not work using the configured domain name. | * '''Web DDoS Protection (HTTP and HTTPS) works only if '''GUI is accessed using the domain. If an attacker knows the IP, Cloudflare will NOT protect the GUI.''' | ||
* All GUI traffic using domain name will ''' | * After configuration, switch GUI domain name will point to Cloudflare IPs. This means that the domain name can be used only for GUI access, '''it is not possible to use the same domain for GUI and SIP traffic'''. Any other non-GUI traffic (for example SSH), will not work using the configured domain name. | ||
* All GUI traffic using domain name will '''reach the server from Cloudflare IPs'''. | |||
** Logs for GUI access in MOR will show Cloudflare IPs, not the real IPs. | ** Logs for GUI access in MOR will show Cloudflare IPs, not the real IPs. | ||
** [https://www.cloudflare.com/ips-v4 Cloudflare IPs] must be '''whitelisted''' (not blocked) to access switch GUI in order for GUI to work. | ** [https://www.cloudflare.com/ips-v4 Cloudflare IPs] must be '''whitelisted''' (not blocked) to access switch GUI in order for GUI to work. | ||
| Line 38: | Line 39: | ||
In this example, the name servers in the red rectangle are old ones (you will need to remove them from your domain registrar account. ), and the nameservers in the green rectangle are new Cloudflare nameservers that you will need to add your domain registrar account (The values will be different than in this example). | In this example, the name servers in the red rectangle are old ones (you will need to remove them from your domain registrar account. ), and the nameservers in the green rectangle are new Cloudflare nameservers that you will need to add your domain registrar account (The values will be different than in this example). | ||
[[File:cloudflare4.png]]<br> | [[File:cloudflare4.png]]<br> | ||
To complete this step, please review the configuration | To complete this step, please review the configuration [https://developers.cloudflare.com/dns/zone-setups/full-setup/setup/ here] | ||
In '''Update your registrar''' section, you will find links to documentation for many common domain registrars, so follow the link that matches your domain registrars. | In '''Update your registrar''' section, you will find links to documentation for many common domain registrars, so follow the link that matches your domain registrars. | ||
| Line 50: | Line 52: | ||
7. After name servers have been updated in your domain registrar to Cloudflare ones, Cloudflare will detect this automatically after some time. Once this is done configuration is completed. | 7. After name servers have been updated in your domain registrar to Cloudflare ones, Cloudflare will detect this automatically after some time. Once this is done configuration is completed. | ||
Check the 'Verify changes' section | Check the '''Verify changes''' section at the end of [https://developers.cloudflare.com/dns/zone-setups/full-setup/setup/ this page] to get more details on how to verify that Cloudflare is active. | ||
=== After the Setup === | === After the Setup === | ||
Once the Basic setup is completed, and GUI traffic to | Once the Basic setup is completed, and GUI traffic to the Switch domain is routed through Cloudflare, you might want to configure custom rules. | ||
The main configuration is done in the Security -> WAF section. | The main configuration is done in the '''Security -> WAF''' section. | ||
Here, for example, you can create rate limiting rules, o IP access rules (for example Block specific countries, or force catchpa on Specific countries, etc). | Here, for example, you can create rate limiting rules, o IP access rules (for example Block specific countries, or force catchpa on Specific countries, etc). | ||
For more information, please check the documentation for [https://developers.cloudflare.com/waf/ WAF] | For more information, please check the documentation for [https://developers.cloudflare.com/waf/ WAF] | ||
| Line 67: | Line 69: | ||
== Blocking GUI access on the Data Center level == | == Blocking GUI access on the Data Center level == | ||
If the switch is hosted as a dedicated server or as VM in the cloud, it is best to block GUI access using Provider firewall, for example | If the switch is hosted as a dedicated server or as VM in the cloud, it is best to block GUI access using a Provider firewall, for example | ||
* [https://docs.hetzner.com/robot/dedicated-server/firewall/ Hetzner Firewall] if | * [https://docs.hetzner.com/robot/dedicated-server/firewall/ Hetzner Firewall] if the Switch is hosted as a dedicated server in Hetzner, | ||
* [https://help.ovhcloud.com/csm/en-dedicated-servers-firewall-network?id=kb_article_view&sysparm_article=KB0043448 OVH firewall] If the Switch is hosted as a dedicated server in OVH, | * [https://help.ovhcloud.com/csm/en-dedicated-servers-firewall-network?id=kb_article_view&sysparm_article=KB0043448 OVH firewall] If the Switch is hosted as a dedicated server in OVH, | ||
* [https://docs.aws.amazon.com/vpc/latest/userguide/security-groups.html AWS Security Groups] and/or [https://docs.aws.amazon.com/vpc/latest/userguide/vpc-network-acls.html NACL] if the switch is hosted as an instance in AWS. | * [https://docs.aws.amazon.com/vpc/latest/userguide/security-groups.html AWS Security Groups] and/or [https://docs.aws.amazon.com/vpc/latest/userguide/vpc-network-acls.html NACL] if the switch is hosted as an instance in AWS. | ||
This way traffic will be blocked without reaching the physical server/instance. | |||
== Blocking GUI access on the Server with iptables == | |||
It is also a good idea to block all GUI traffic except Cloduflarfe IPs on the server/instance itself, as additional protection. This will also ensure that [https://www.cloudflare.com/ips-v4 Cloudflare IPs] are not blocked by [[Blocked Countries]]. | |||
You can use such iptables rules: | |||
iptables -N CLOUDFLARE | |||
iptables -A CLOUDFLARE -s SERVER_EXTERNAL_IP,SERVER_INTERNAL_IPs,127.0.0.1,173.245.48.0/20,103.21.244.0/22,103.22.200.0/22,103.31.4.0/22,141.101.64.0/18,108.162.192.0/18,190.93.240.0/20,188.114.96.0/20,197.234.240.0/22,198.41.128.0/17,162.158.0.0/15,104.16.0.0/13,104.24.0.0/14,172.64.0.0/13,131.0.72.0/22 -j ACCEPT | |||
iptables -A CLOUDFLARE -p tcp -m multiport --dports 80,443 -j DROP | |||
iptables -I INPUT -p tcp -m multiport --dports 80,443 -j CLOUDFLARE | |||
cp -a /etc/sysconfig/iptables "/etc/sysconfig/iptables.$(date +%F_%R)" | |||
service iptables save | |||
Replace SERVER_EXTERBAL_IP with external server IP and SERVER_INTERNAL_IPs with internal server IPs if such exist, for example, 10.2.5.1. If there are any Virtual IPs configured for GUI, add them here too. | |||
... | |||
Latest revision as of 08:25, 6 December 2023
Kolmisoft is not related to Cloudflare. Kolmisoft does not provide support for Cloudflare products and is not responsible for any damage caused using Cloudflare products. Please use this guide at your own risk.
Description
Cloudflare is a third-party company (not related to Kolmisoft) that offers basic free Web DDoS Protection. This guide will show how to configure MOR GUI with Cloudflare protection. Make sure to read the notes below to decide if Cloudflare Web DDoS Protection is suitable in your case.
Important Notes
- This guide shows only how to configure basic Web DDoS Protection (HTTP and HTTPS) using the domain name. It will have no effect if DDoS attack uses other protocols.
- Web DDoS Protection (HTTP and HTTPS) works only if GUI is accessed using the domain. If an attacker knows the IP, Cloudflare will NOT protect the GUI.
- After configuration, switch GUI domain name will point to Cloudflare IPs. This means that the domain name can be used only for GUI access, it is not possible to use the same domain for GUI and SIP traffic. Any other non-GUI traffic (for example SSH), will not work using the configured domain name.
- All GUI traffic using domain name will reach the server from Cloudflare IPs.
- Logs for GUI access in MOR will show Cloudflare IPs, not the real IPs.
- Cloudflare IPs must be whitelisted (not blocked) to access switch GUI in order for GUI to work.
- Blocked Countries will not block real IPs for GUI access as packets will reach the switch from Cloudflare IPs.
Configuration
Before Proceeding
Before Proceeding you must already have:
- Domain name which points to switch IP.
- Access to the admin account for your domain registrar.
Basic Setup
1. Go to https://www.cloudflare.com/ and sign up.
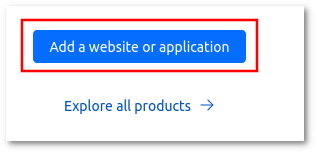
2. After Sign Up press on 'Add website or application' button
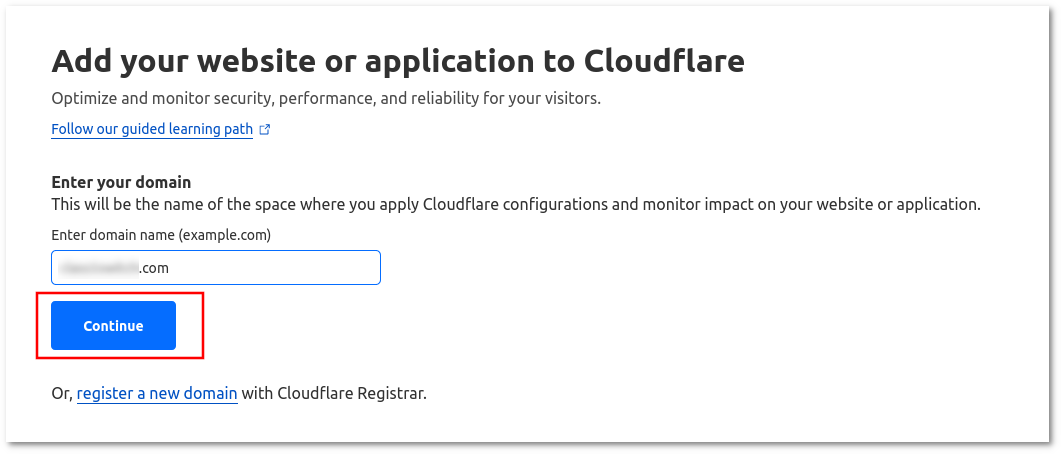
3. Enter the domain name which you control and which points to Switch GUI. Enter it in the format example.com (not www.example.com and not http(s)://www.example.com) and click Continue
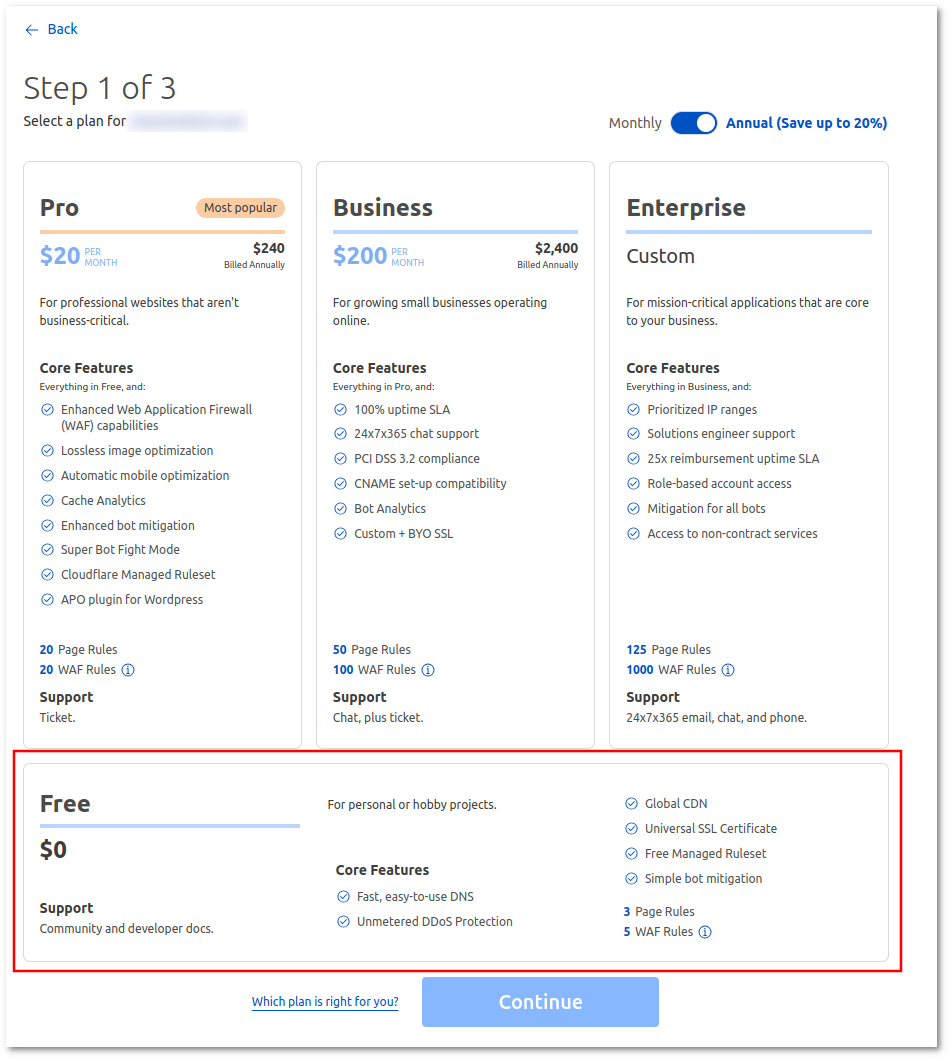
4. Cloudflare will show available plans. You can select a free one for basic protection, or paid options for more advanced configuration/protection.
5. After plan selection, in a few moments, Cloudflare will scan the domain for all the records associated with this domain and will show these records. Once Scan is complete, click Continue (you will always be able to modify DNS records in DNS->Records section).
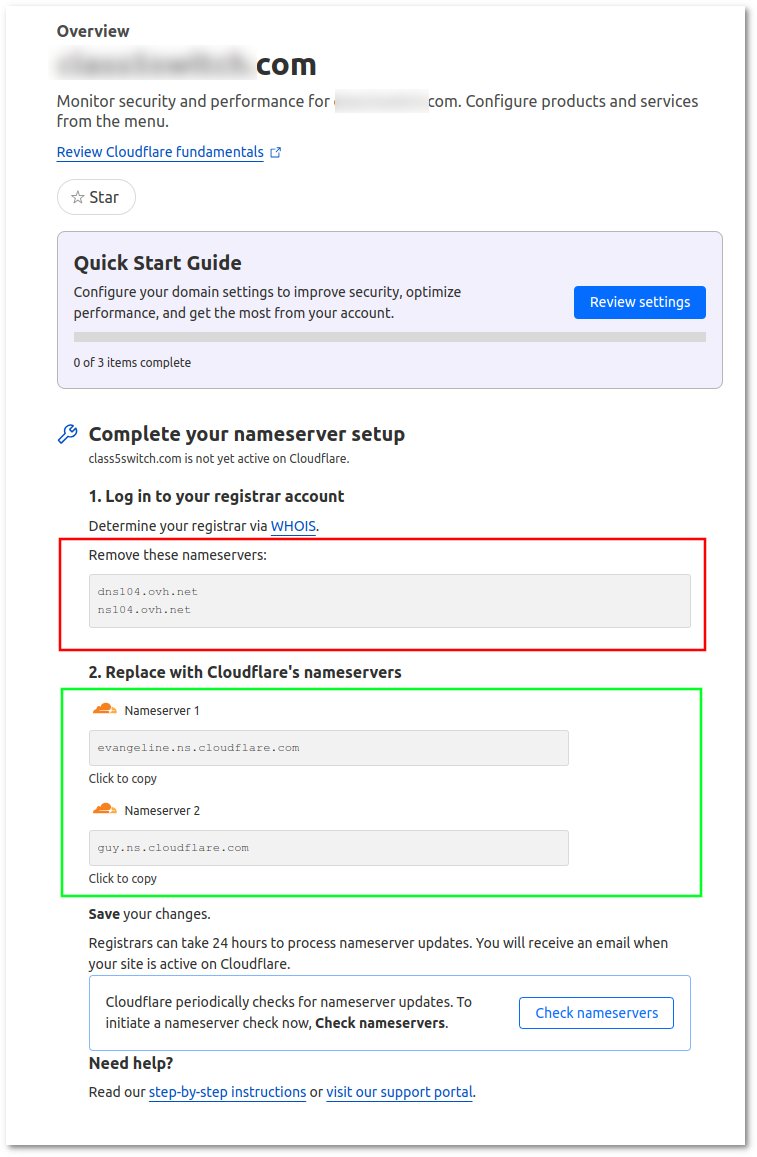
6. At this point, Cloudflare will show DNS nameservers that you will need to add from your domain registrar account.
In this example, the name servers in the red rectangle are old ones (you will need to remove them from your domain registrar account. ), and the nameservers in the green rectangle are new Cloudflare nameservers that you will need to add your domain registrar account (The values will be different than in this example).
To complete this step, please review the configuration here
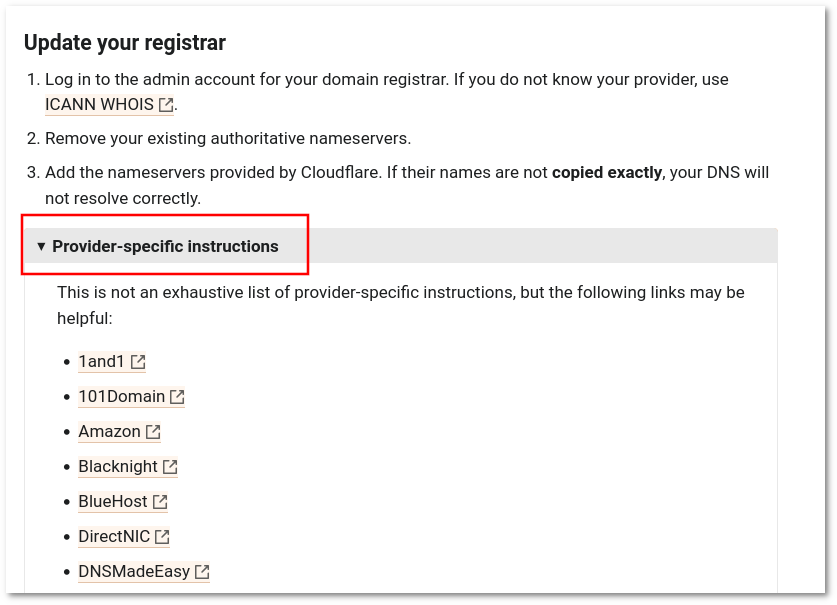
In Update your registrar section, you will find links to documentation for many common domain registrars, so follow the link that matches your domain registrars.
If your domain registrar is not documented here, please check the documentation on your domain registrar site or contact their support.
7. After name servers have been updated in your domain registrar to Cloudflare ones, Cloudflare will detect this automatically after some time. Once this is done configuration is completed.
Check the Verify changes section at the end of this page to get more details on how to verify that Cloudflare is active.
After the Setup
Once the Basic setup is completed, and GUI traffic to the Switch domain is routed through Cloudflare, you might want to configure custom rules.
The main configuration is done in the Security -> WAF section. Here, for example, you can create rate limiting rules, o IP access rules (for example Block specific countries, or force catchpa on Specific countries, etc). For more information, please check the documentation for WAF
Blocking GUI access for non-Cloudflare IPs
When a domain name is imported into Cloudflare, it will point to Cloudflare IPs, so real server IP will not be visible by querying the domain, however, it is easy to leak real server IP. If an attacker knows a real server IP, it can launch an attack using the IP directly (not the domain name) and bypass Cloudflare protection.
So the best practice is to block GUI (80 and 443 ports) access for all IPs, except the Cloudflare IPs and servers' internal/external IPs. It is best to block GUI access both on the Data Center level and in iptables directly on the server
Blocking GUI access on the Data Center level
If the switch is hosted as a dedicated server or as VM in the cloud, it is best to block GUI access using a Provider firewall, for example
- Hetzner Firewall if the Switch is hosted as a dedicated server in Hetzner,
- OVH firewall If the Switch is hosted as a dedicated server in OVH,
- AWS Security Groups and/or NACL if the switch is hosted as an instance in AWS.
This way traffic will be blocked without reaching the physical server/instance.
Blocking GUI access on the Server with iptables
It is also a good idea to block all GUI traffic except Cloduflarfe IPs on the server/instance itself, as additional protection. This will also ensure that Cloudflare IPs are not blocked by Blocked Countries. You can use such iptables rules:
iptables -N CLOUDFLARE
iptables -A CLOUDFLARE -s SERVER_EXTERNAL_IP,SERVER_INTERNAL_IPs,127.0.0.1,173.245.48.0/20,103.21.244.0/22,103.22.200.0/22,103.31.4.0/22,141.101.64.0/18,108.162.192.0/18,190.93.240.0/20,188.114.96.0/20,197.234.240.0/22,198.41.128.0/17,162.158.0.0/15,104.16.0.0/13,104.24.0.0/14,172.64.0.0/13,131.0.72.0/22 -j ACCEPT
iptables -A CLOUDFLARE -p tcp -m multiport --dports 80,443 -j DROP
iptables -I INPUT -p tcp -m multiport --dports 80,443 -j CLOUDFLARE
cp -a /etc/sysconfig/iptables "/etc/sysconfig/iptables.$(date +%F_%R)"
service iptables save
Replace SERVER_EXTERBAL_IP with external server IP and SERVER_INTERNAL_IPs with internal server IPs if such exist, for example, 10.2.5.1. If there are any Virtual IPs configured for GUI, add them here too.
Https
Once the domain name is added to Cloudflare, it will automatically add a valid TLS/SSL certificate.
If you want to use custom certificates, you will need to upload them into Cloudflare .
It is also possible to allow only https traffic (redirect http automatically to https) from Cloudflare. If you want this, follow the configuration here
