Difference between revisions of "Zoiper configuration"
| (One intermediate revision by the same user not shown) | |||
| Line 21: | Line 21: | ||
Select SIP account and Press ''' | Select SIP account and Press '''NEXT''' to create a new SIP account: | ||
[[Image:zoiper_config3.png]] | [[Image:zoiper_config3.png]] | ||
| Line 33: | Line 33: | ||
New window will appear, where you can set account name, by default it will be username@IP. You can leave as it is or set some other name. Click | New window will appear, where you can set account name, by default it will be username@IP. You can leave as it is or set some other name. Click '''NEXT''' to finish configuration. | ||
[[Image:zoiper_config5.png]] | [[Image:zoiper_config5.png]] | ||
Now you should see window with all information in one place. Zoiper will try to register and if successful will show as Registered in top corner. If status remain in Registering state, doublecheck entered details and click Register. Once state will show Registered, press OK. | Now you should see window with all information in one place. Zoiper will try to register and if successful will show as Registered in top corner. If status remain in Registering state, doublecheck entered details and click Register. Once state will show Registered, press '''OK'''. | ||
[[Image:zoiper_config6.png]] | [[Image:zoiper_config6.png]] | ||
Enter the number you wish to dial and click the CALL icon to dial: | Enter the number you wish to dial and click the '''CALL''' icon to dial: | ||
[[Image:zoiper_config7.png]] | [[Image:zoiper_config7.png]] | ||
Latest revision as of 10:47, 4 April 2018
In this guide, we will configure Zoiper softphone with server IP 192.168.0.108, username 1037, password a8q4nBG96VdD.
For your installation, use the correct server IP, username and password.
The ones in this example are only for the DEMO!
After downloading Zoiper, install and start it.
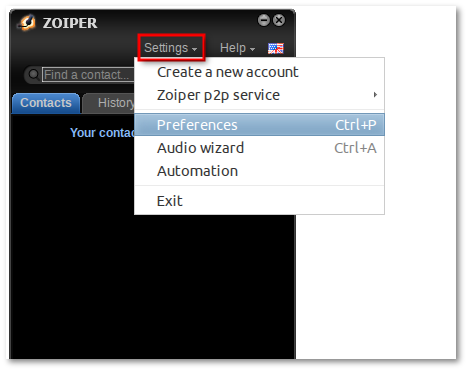
In Zoiper window click on Settings and then Preferences
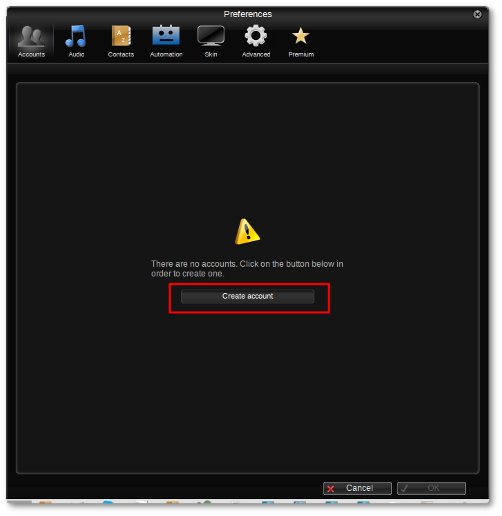
New window will appear, click on Create account:
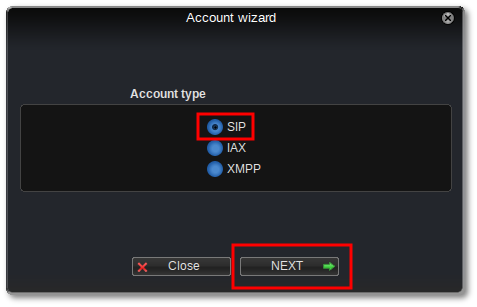
Select SIP account and Press NEXT to create a new SIP account:
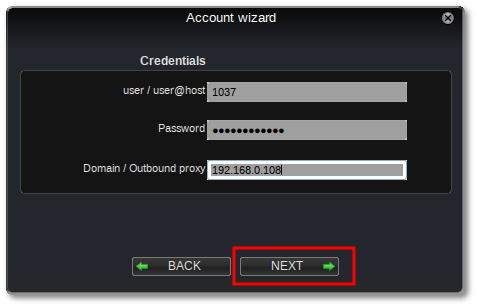
Enter a user, password, and your MOR IP address or domain name. In our example we are using 192.168.0.108, username 1037, password a8q4nBG96VdD. Make sure your are entering your MOR IP and correct username/password.
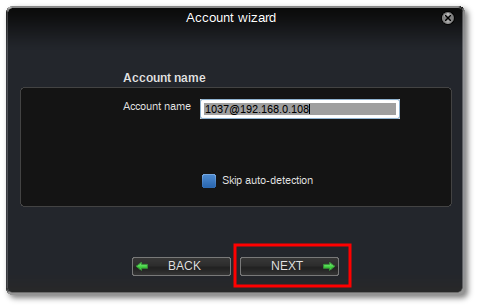
New window will appear, where you can set account name, by default it will be username@IP. You can leave as it is or set some other name. Click NEXT to finish configuration.
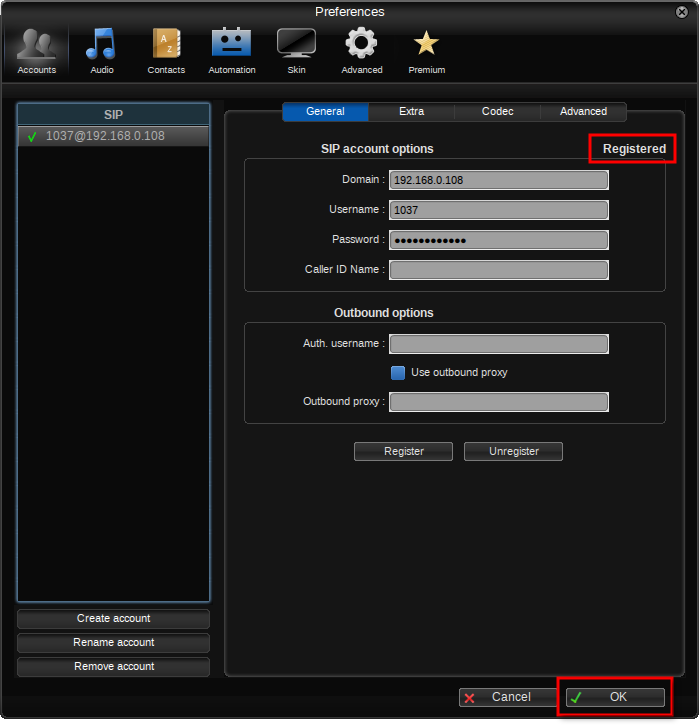
Now you should see window with all information in one place. Zoiper will try to register and if successful will show as Registered in top corner. If status remain in Registering state, doublecheck entered details and click Register. Once state will show Registered, press OK.
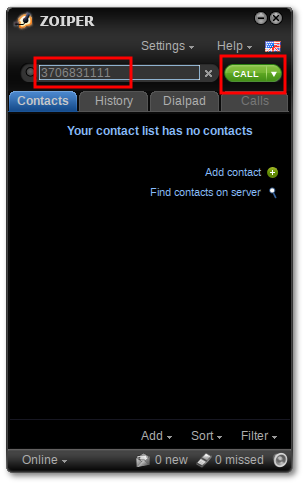
Enter the number you wish to dial and click the CALL icon to dial:
