Difference between revisions of "ATI - Voicetrading example"
(Created page with "== Step-by-step example for VoiceTrading Tariff == 1. Review VoiceTrading XLSX tariff structure <br><br> File:M2TIImage95.png <br><br> <br><br> File:M2TIImage83.png <br><br> We can see that the XLSX document consists of two Worksheets: Worksheet 1 (Rates) and Worksheet 2 (Numberplan). 2. Go to BILLING > Tariff Import > Import Rules > Templates to create a new Template <br><br> File:M2TIImage85.png <br><br> 3. Configure Template for VoiceTrading XLSX str...") |
|||
| Line 204: | Line 204: | ||
We can see that 1178 rates have been imported to Tariff '''Supplier VoiceTrading'''. | We can see that 1178 rates have been imported to Tariff '''Supplier VoiceTrading'''. | ||
<br><br> | |||
== See also == | |||
* [[Automatic Tariff Import]] | |||
Revision as of 09:15, 11 November 2022
Step-by-step example for VoiceTrading Tariff
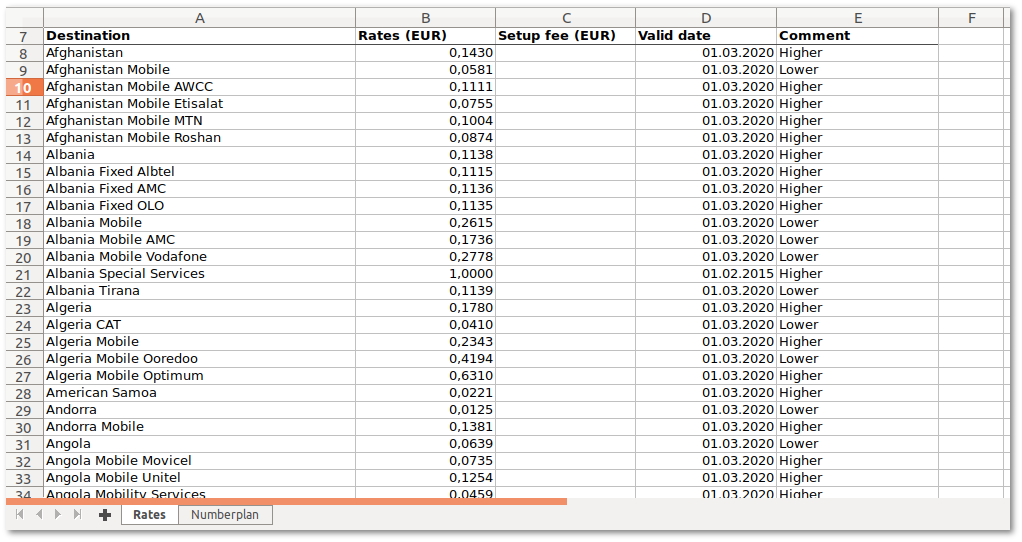
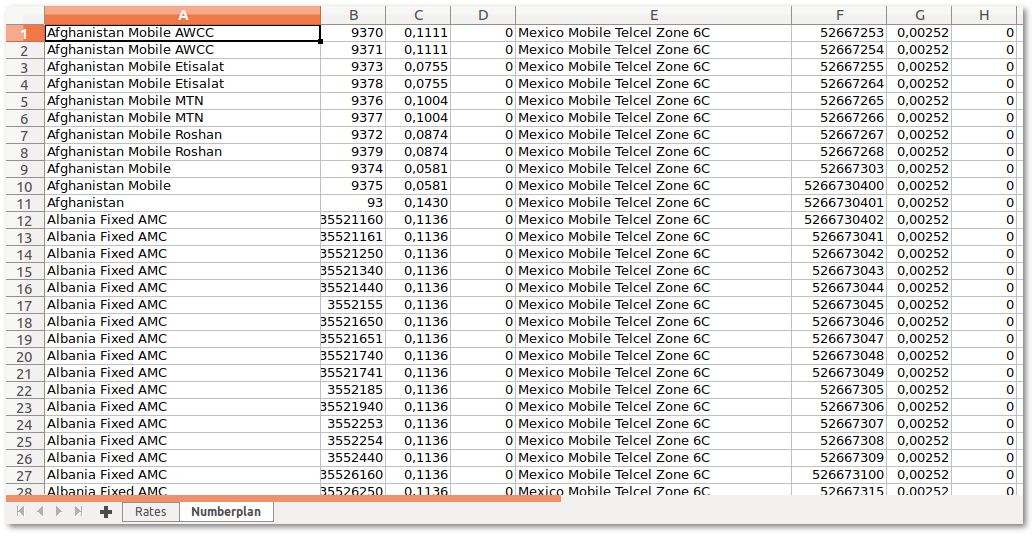
1. Review VoiceTrading XLSX tariff structure
We can see that the XLSX document consists of two Worksheets: Worksheet 1 (Rates) and Worksheet 2 (Numberplan). 2. Go to BILLING > Tariff Import > Import Rules > Templates to create a new Template
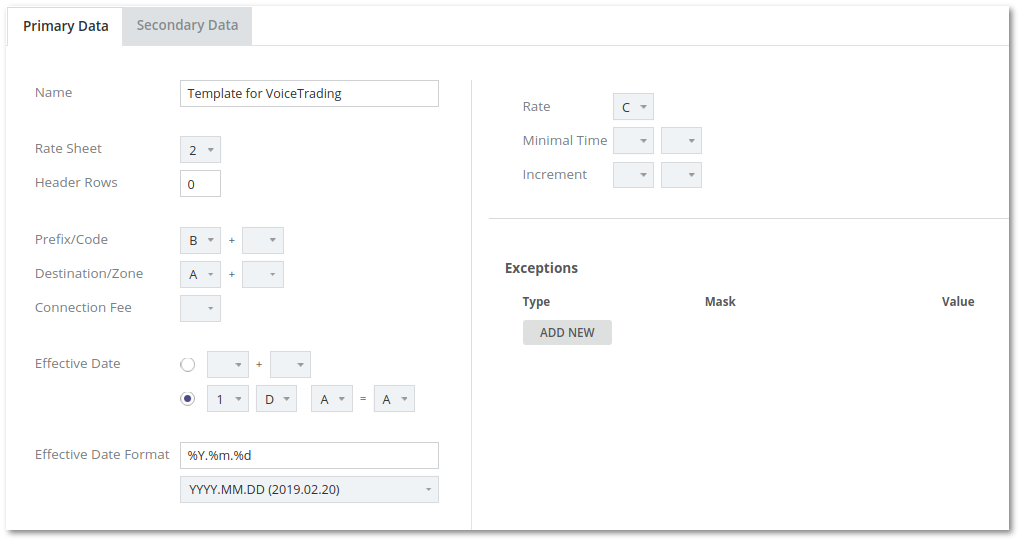
3. Configure Template for VoiceTrading XLSX structure
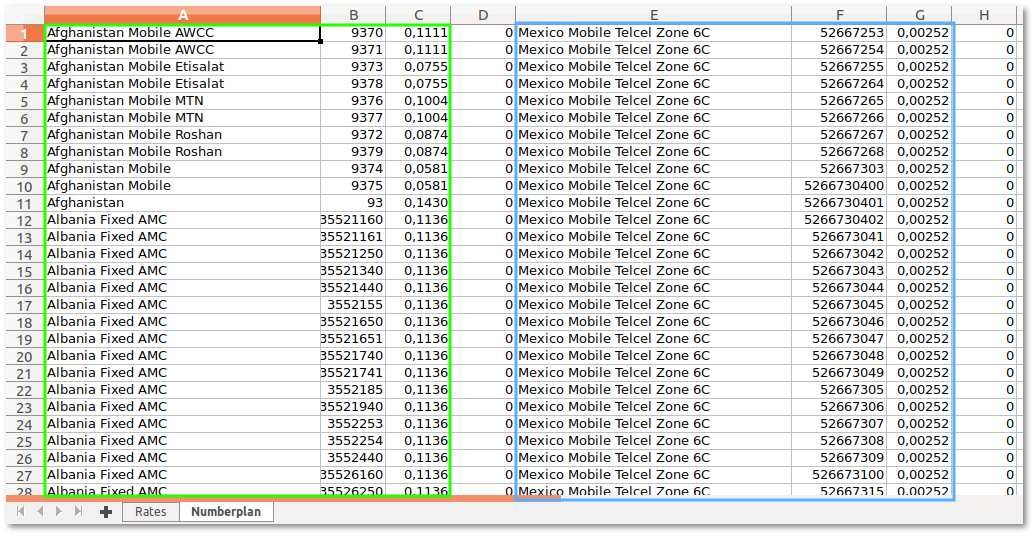
As you can see, there are two tabs on this page: Primary Data and Secondary Data. Do not confuse them with Worksheets, they are not related. Some Providers do not want to exceed a certain limit of rows in the XLSX file, so data is placed in two regions on the same row(s). Let’s review the screenshot below:
The green square corresponds to Primary Data, while Blue square corresponds to Secondary Data. They both contain the same information: Destination name, Prefix, and Rate.
Let's go step by step and configure a Template for Primary Data:
Rate Sheet - 2. VoiceTrading XLSX file has two sheets, so set to 2 Header Rows - 0. VoiceTrading XLSX file has no header rows (data starts at 1st row)
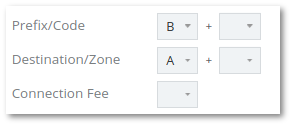
Prefix/Code - B. The Prefix is in Cell B for Primary Data. Destination/Zone - A. Destination is in Cell A for Primary Data. Connection Fee - Empty. There is no Connection Fee cell in VoiceTrading XLSX.
To better understand Effective Date mapping, let’s review both Worksheets again:
Effective Date is on Worksheet 1 (Rates) and on Column D. So we select 1 and D on the first and second dropdowns accordingly.
Now we need to map Worksheet 1 (Rates) where the Effective Date is defined with Worksheet 2 (Numberplan), where Rates and Prefixes are defined. We can do this by Destination Column, which is A in Worksheet 1 (Rates), and also A in Worksheet 2 (Numberplan). So we select A on the 3rd and 4th Dropdown accordingly.
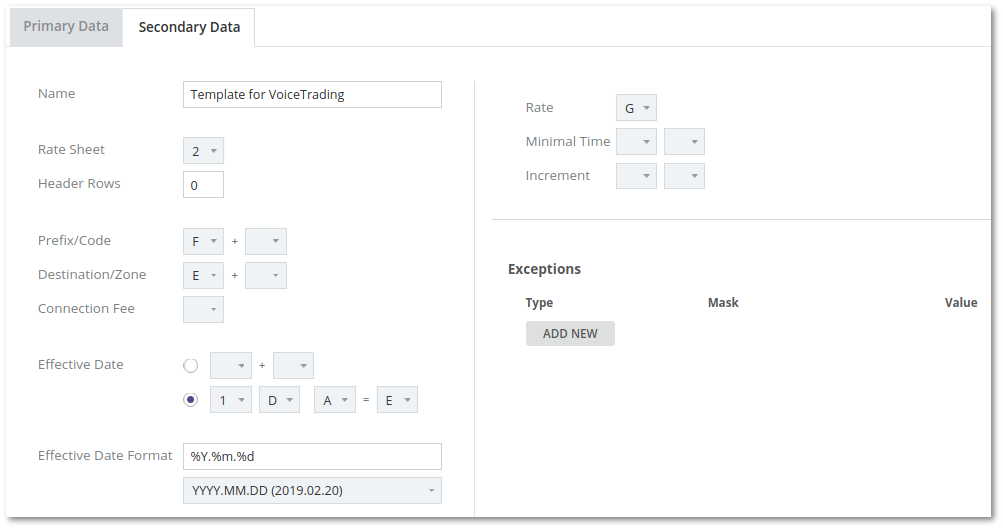
The Effective Date Format for VoiceTrading is in YYY.MM.DD, so we select accordingly.
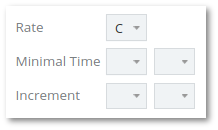
Rate - C. Prefix is in Cell C for Primary Data. There are no Minimal Time and Increment cells in VoiceTrading XLSX.
Let’s configure Secondary Data now:
Rate Sheet, Header Rows and Effective date will be the same as on Primary data.
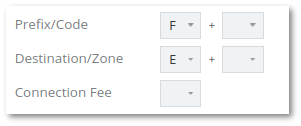
Prefix/Code - F. Prefix is in Cell F for Secondary Data. Destination/Zone - E. Destination is in Cell E for Secondary Data. Connection Fee - Empty. There is no Connection Fee Cell in VoiceTrading XLSX.
To better understand Effective Date mapping, let’s review both Worksheets again:
Effective Date is on Worksheet 1 (Rates) and on Column D. So we select 1 and D on the first and second dropdowns accordingly.
Now we need to map Worksheet 1 (Rates) where the Effective Date is defined with Worksheet 2 (Numberplan), where Rates and Prefixes are defined. We can do this by Destination Column, which is A in Worksheet 1 (Rates) and E in Worksheet 2 (Numberplan). So we select A on the 3rd dropdown and E on the 4th dropdown accordingly.
Once the configuration is complete, press the CREATE button to create a new Template.
4. Go to BILLING > Tariff Import > Import Rules > Rate Import Rules to create Rate Import Rules
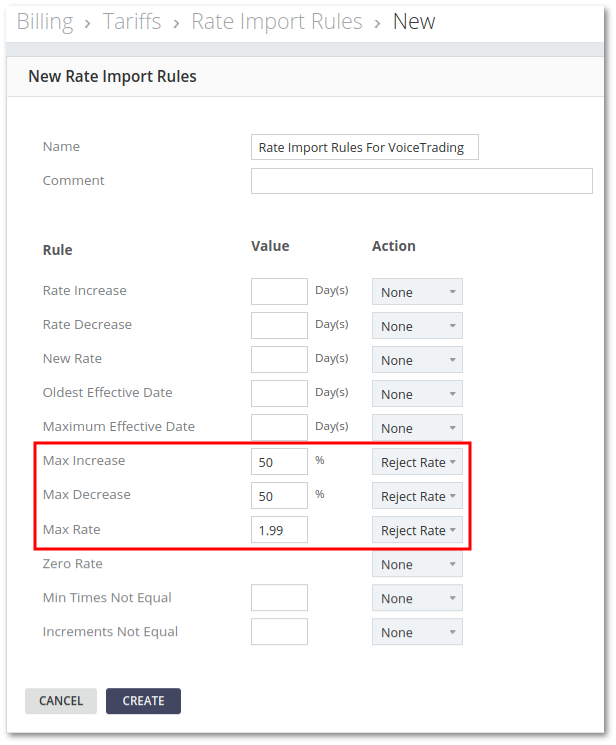
5. Configure Rate Import Rules according to your specifications
In this example we changed these values: Max Increase: 50%. If the rate increase is higher than 50%, such a rate will be automatically rejected. Max Decrease: 50%. If the rate increase is higher than 50%, such a rate will be automatically rejected. Max Rate: 1.99. If the rate is higher than 1.99, such a rate will be automatically rejected.
6. Go to BILLING > Tariff Import > Import Rules to create Tariff Import Rules
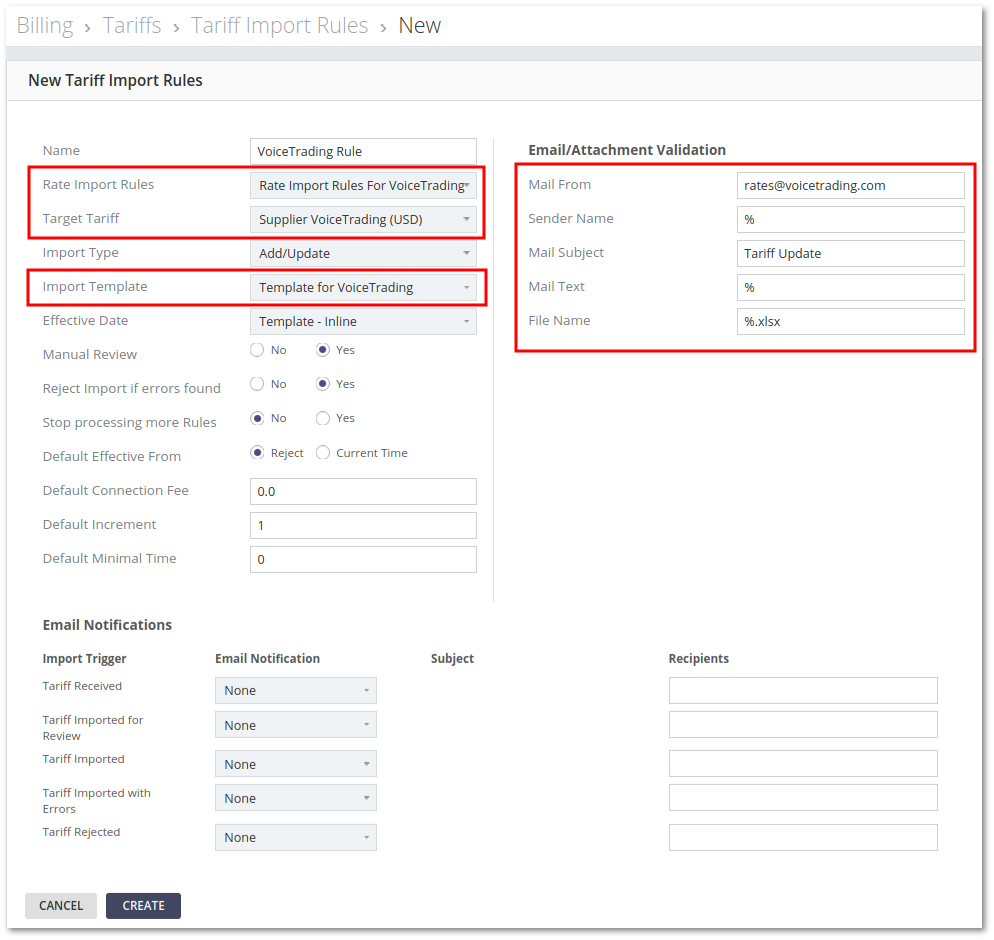
7. Configure Tariff Import Rules according to your specifications
The minimum that you should change from default: Rate Import Rules: set to Import Rules created in step 5. Target Tariff: set to the Tariff you want to import rates into. Import Template: set to Template created and configured in step 3. Email/Attachment Validation: set to valid date for your Provider. The data in the screenshot is only an example and does not represent real values for VoiceTrading Provider.
8. Once email(s) will be received, you will see them in BILLING > Tariff Import > Inbox If Tariff Import Rules have been correctly entered in the previous step, Import Job will be created automatically.
9. Click on the Import Job link. This will redirect you to the Tariff Jobs page.
Here we can see that Tariff Job is waiting for confirmation and that there are 1178 rates to be updated and 0 rejected rates.
10. Click on the ANALYSIS link to view a detailed analysis
By default, the Tariff Job Analysis page shows only rejected Rates. There are no rejected rates, in this case, so we can press the CONFIRM button.
11. Go to BILLING > Tariff Import > Jobs to check the Tariff Jobs status again. We can see that status is Imported.
12. The process is completed. Let’s go to Billing > Tariffs to confirm this
We can see that 1178 rates have been imported to Tariff Supplier VoiceTrading.
