Difference between revisions of "CDR Import"
(→Import) |
(→Import) |
||
| Line 14: | Line 14: | ||
= Import = | = Import = | ||
Sometimes MOR can be used as separate billing software, other than for real-time billing. When using MOR as separate billing software, it is possible to import CDRs from other switches (they need not be Asterisk) and bill these CDRs. | Sometimes MOR can be used as separate billing software (that is, other than for real-time billing). When using MOR as separate billing software, it is possible to import CDRs from other switches (they need not be Asterisk) and bill these CDRs. | ||
CDR Import can be found in '''SETTINGS – Billing – Functions – CDR Import'''. | CDR Import can be found in '''SETTINGS – Billing – Functions – CDR Import'''. | ||
Revision as of 11:33, 21 May 2010
Configuration
Make sure you select the correct options for values:
- CSV Column Separator
- CSV Decimal Separator
In Configuration.
If the settings do not match your CSV file, you will not be able to import CDRs.
Import
Sometimes MOR can be used as separate billing software (that is, other than for real-time billing). When using MOR as separate billing software, it is possible to import CDRs from other switches (they need not be Asterisk) and bill these CDRs.
CDR Import can be found in SETTINGS – Billing – Functions – CDR Import.
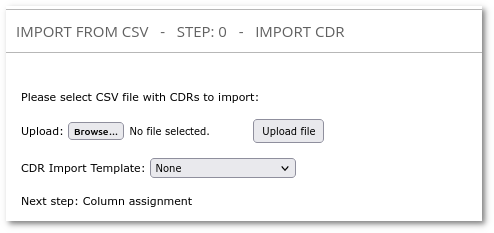
The first step is to select a CSV file to import:
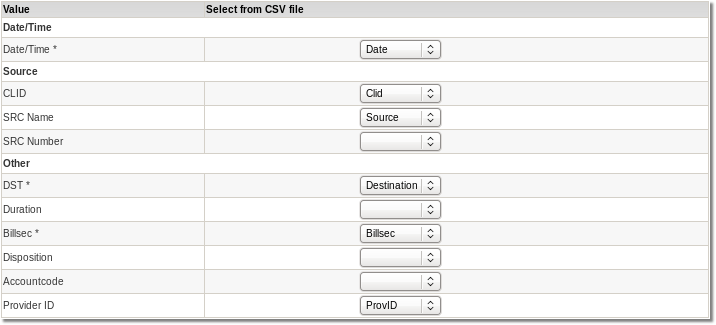
Click on Upload file and you will get the next window, where you will have to assign columns to CDR values:
In step 2, you can see the necessary fields to select. They are marked by * (a star). You can select to enter Date/Time in one line OR Date AND Time in separate lines. Without selecting at least one field marked by *, you will not be able to continue import process.
Select the appropriate settings and press Assign Columns:
Here you will be presented with a parsed file. If something is not right, clicks the Back button. If it's okay, click Confirm columns:
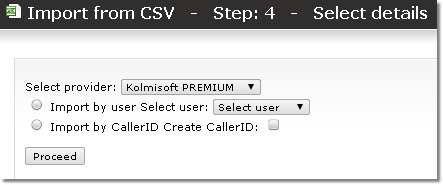
Here we select the User to which we want to assign all these calls.
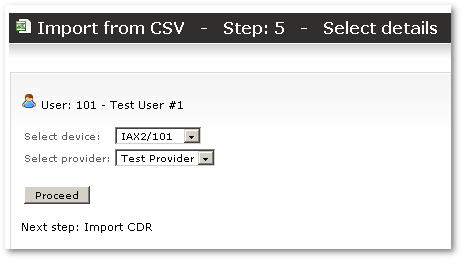
Here we select Device to which all these imported calls will be assigned, and Provider.
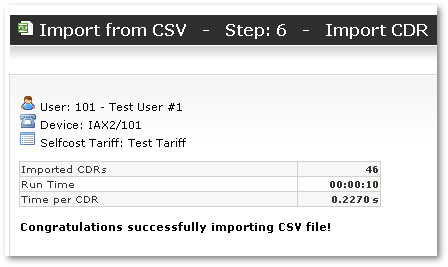
Finally, the file is imported.
Export
You can export CDR in PDF or CSV formats. It can be done in Call Stats page (STATISTICS – Calls) and other places where you see:
Just press on one of these links and you will get CDR in selected period.
Calls to DIDs
Calls to DIDs are billed as to normal numbers.
Calls to DIDs which belong to the caller are not billed at all. (Price = 0)
