Difference between revisions of "LinkPoint"
| (2 intermediate revisions by the same user not shown) | |||
| Line 1: | Line 1: | ||
= | =Description= | ||
1. Login into LinkPoint control panel: [ | Whether opening a new business or expanding an established one, [http://www.linkpointsource.com/ LinkPint] provide flexible and reliable products and services that enable merchants across the nation to accept nearly all types of electronic payments including: | ||
* Most major credit cards: MasterCard®, Visa®, American Express®, Diners Club®, Discover® Network, JCB® | |||
* PIN-secured and signature debit | |||
* Electronic benefits transfer (EBT) | |||
* Gift cards, purchasing cards (levels II and III) | |||
* TeleCheck® Warranty and TeleCheck Electronic Check Acceptance® (ECA®) services | |||
* Web-based, e-commerce transactions through the LinkPoint® Secure Payment Gateway (LSPG) — a reliable and complete online payment solution | |||
=Configuration= | |||
Go to '''ADDONS -> Payment gateways -> Payments''': | |||
<br><br> | |||
[[File:Payments_path.png]] | |||
<br><br> | |||
Select LinkPoint tab, enter '''LinkPoint StoreID''' and check '''Enabled''' to enable the LinkPoint payment gateway: | |||
<br><br> | |||
[[File:Linkpoint settings.png]] | |||
<br><br> | |||
=Additional Configuration= | |||
1. Login into LinkPoint control panel: [http://www.linkpointsource.com/applyonline.html LinkPoint] | |||
2. Click on "Administration" in the Main Menu Bar. | 2. Click on "Administration" in the Main Menu Bar. | ||
| Line 13: | Line 35: | ||
[[Image:Lp3.png]] | [[Image:Lp3.png]] | ||
<br><br> | <br><br> | ||
= | =Usage= | ||
Log in as User and, if LinkPoint is enabled, in front page you will see LinkPoint logo: | |||
<br><br> | |||
[[Image:linkpoint_payment.png]] | |||
<br><br> | |||
click on it to make a payment. In first step you can choose Payment amount: | |||
<br><br> | |||
[[Image:linkpoint_payment2.png]] | |||
<br><br> | <br><br> | ||
Second step is for Payment confirmation. After confirmation you have to continue payment in LinkPoint page. | |||
<br><br> | <br><br> | ||
=See also= | |||
* [[Payment Gateway Addon]] | |||
Latest revision as of 15:33, 14 June 2013
Description
Whether opening a new business or expanding an established one, LinkPint provide flexible and reliable products and services that enable merchants across the nation to accept nearly all types of electronic payments including:
- Most major credit cards: MasterCard®, Visa®, American Express®, Diners Club®, Discover® Network, JCB®
- PIN-secured and signature debit
- Electronic benefits transfer (EBT)
- Gift cards, purchasing cards (levels II and III)
- TeleCheck® Warranty and TeleCheck Electronic Check Acceptance® (ECA®) services
- Web-based, e-commerce transactions through the LinkPoint® Secure Payment Gateway (LSPG) — a reliable and complete online payment solution
Configuration
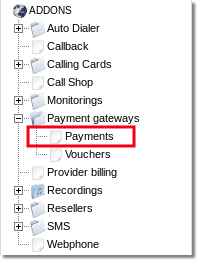
Go to ADDONS -> Payment gateways -> Payments:
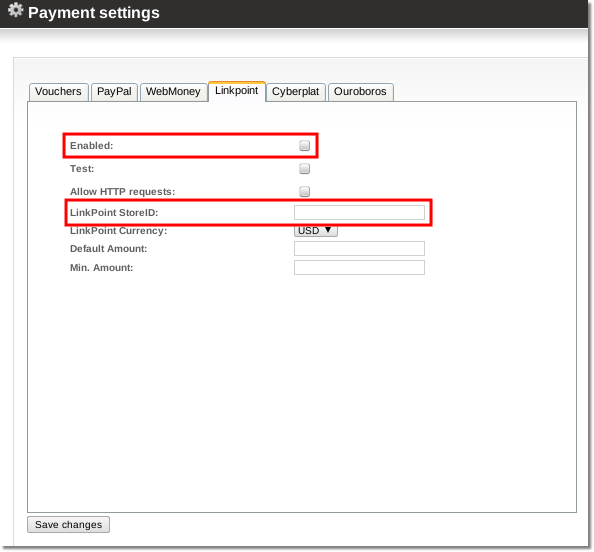
Select LinkPoint tab, enter LinkPoint StoreID and check Enabled to enable the LinkPoint payment gateway:
Additional Configuration
1. Login into LinkPoint control panel: LinkPoint
2. Click on "Administration" in the Main Menu Bar.
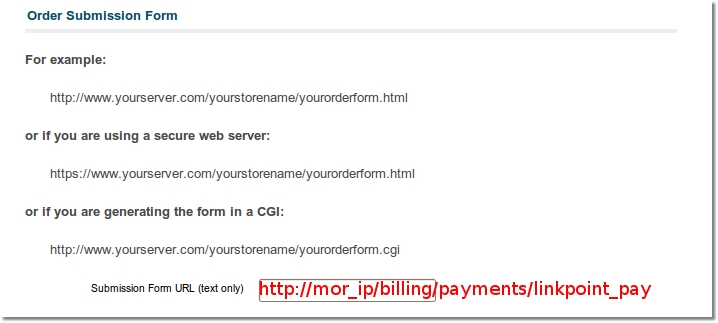
3. Click on the word "Connect Settings" in the Side Menu Box to enter necessary URLs to enable the payment gateway:


Usage
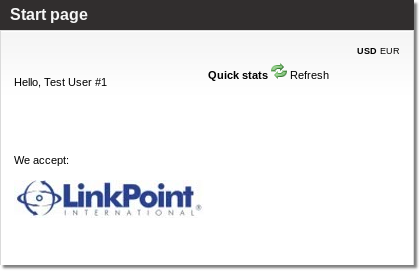
Log in as User and, if LinkPoint is enabled, in front page you will see LinkPoint logo:
click on it to make a payment. In first step you can choose Payment amount:
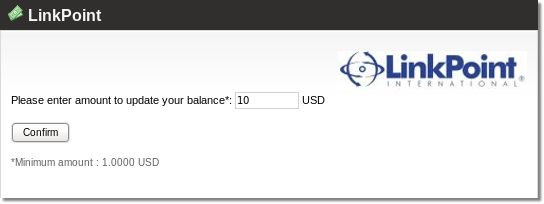
Second step is for Payment confirmation. After confirmation you have to continue payment in LinkPoint page.
