Difference between revisions of "How to recover corrupted MySQL data"
| Line 41: | Line 41: | ||
[[File:mysql_failed_dump.png]] | [[File:mysql_failed_dump.png]] | ||
We are very lucky here because sessions table does not hold any important information. | |||
We will ignore this table in data export using special mysqldump key: | |||
--ignore-table=name Do not dump the specified table. To specify more than one | |||
table to ignore, use the directive multiple times, once | |||
for each table. Each table must be specified with both | |||
database and table names, e.g. | |||
--ignore-table=database.table | |||
We execute: | |||
mysqldump -u mor -pmor mor --ignore-table=mor.sessions > mor.sql | |||
This will export all data to ''mor.sql'' file. | |||
If it fails at some other table, let's say [users], then exclude [users] table also: | |||
mysqldump -u mor -pmor mor --ignore-table=mor.sessions --ignore-table=mor.users > mor.sql | |||
= Data import = | |||
Import my.sql file in newly formated file using command: | |||
mysql -u mor -pmor mor < mor.sql | |||
or: | |||
# Shutdown database and delete the data directory. Run mysql_install_db to create MySQL default tables | |||
# Remove the innodb_force_recovery line from your /etc/my.cnf file and restart the database. (It should start normally now) | |||
# Restore everything from your backup (mysql -u mor -pmor mor < mor.sql) | |||
# NOTE: if DB is new - create excluded tables manually, because they will not be created when importing saved mor.sql file. In our example create sessions table manually using phpMyAdmin or mysql console command. | |||
Revision as of 18:46, 13 May 2011
Description
Sometimes MySQL data gets corrupted.
It often happens when HDD space runs out.
After that when MySQL process is started, it keeps crashing.
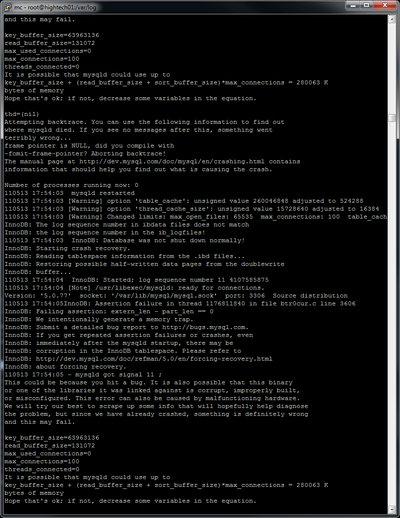
Example how it looks in the /var/log/mysql.log:
Recovery mode
Solution to this is into file /etc/my.cnf enter such line:
innodb_force_recovery = 4
and restart MySQL process:
/etc/init.d/mysql restart
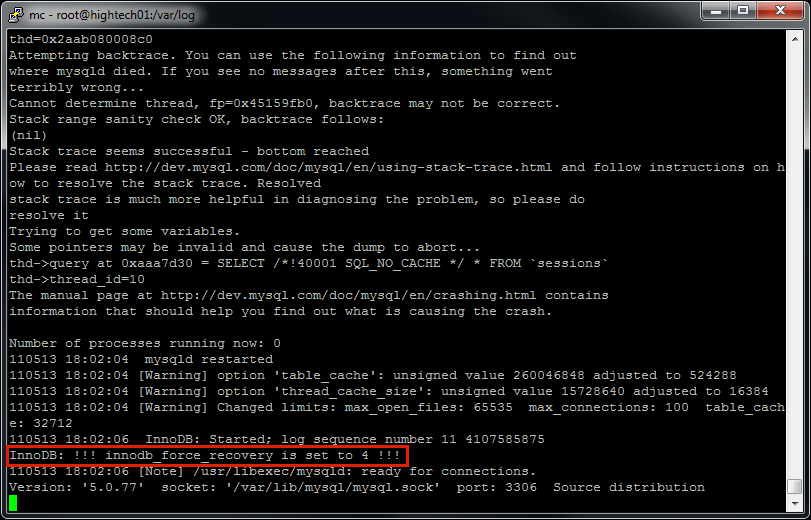
After that log should show that recovery mode is turned on:
Your database will now start, but with innodb_force_recovery, all INSERTs and UPDATEs will be ignored. E.g. DB is in read-only mode.
Data retrieval
Try to retrieve data using mysqldump command:
mysqldump -u mor -pmor mor > mor.sql
It is big chance that at some point it will stop showing which table is corrupted.
In our example it is [sessions] table:
We are very lucky here because sessions table does not hold any important information.
We will ignore this table in data export using special mysqldump key:
 --ignore-table=name Do not dump the specified table. To specify more than one
                     table to ignore, use the directive multiple times, once
                     for each table.  Each table must be specified with both
                     database and table names, e.g.
                     --ignore-table=database.table
We execute:
mysqldump -u mor -pmor mor --ignore-table=mor.sessions > mor.sql
This will export all data to mor.sql file.
If it fails at some other table, let's say [users], then exclude [users] table also:
mysqldump -u mor -pmor mor --ignore-table=mor.sessions --ignore-table=mor.users > mor.sql
Data import
Import my.sql file in newly formated file using command:
mysql -u mor -pmor mor < mor.sql
or:
- Shutdown database and delete the data directory. Run mysql_install_db to create MySQL default tables
- Remove the innodb_force_recovery line from your /etc/my.cnf file and restart the database. (It should start normally now)
- Restore everything from your backup (mysql -u mor -pmor mor < mor.sql)
# NOTE: if DB is new - create excluded tables manually, because they will not be created when importing saved mor.sql file. In our example create sessions table manually using phpMyAdmin or mysql console command.


